A beautiful home is in the details, but that doesn’t mean it has to be expensive or difficult to create. Beadboard is a beautiful and practical way to update your home on a budget.
Custom architectural details add character and charm to any space.
Beadboard brings to mind quaint cottages and Cape Cod architecture. In fact, I was inspired to add it to our kitchen during a trip to the Hob Knob, a Martha’s Vineyard Hotel.
Unlike fleeting home trends, beadboard comes from simpler times and is here to stay. It is classic and timeless.
Its simple aesthetic works so well with farmhouse, transitional, and classic design styles. It can also be used in modern home design, believe it or not!
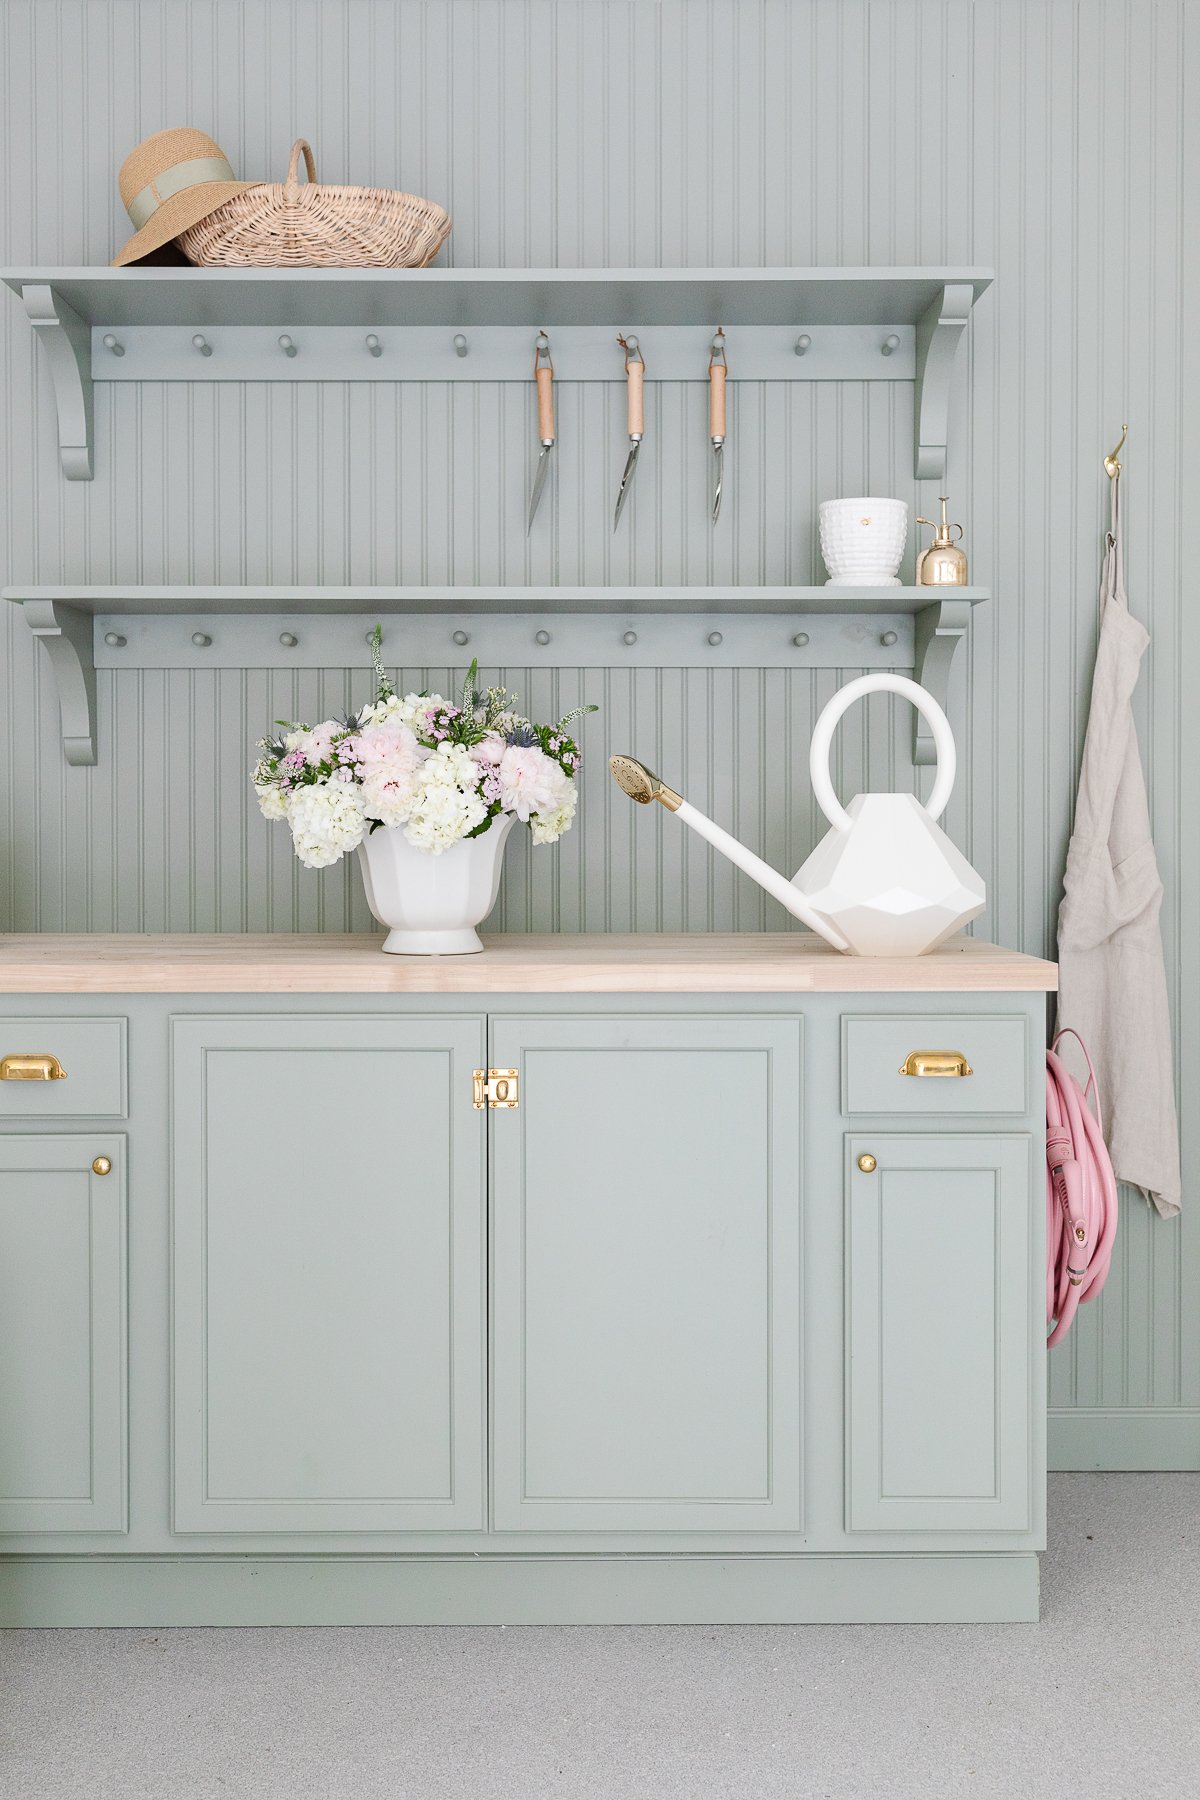
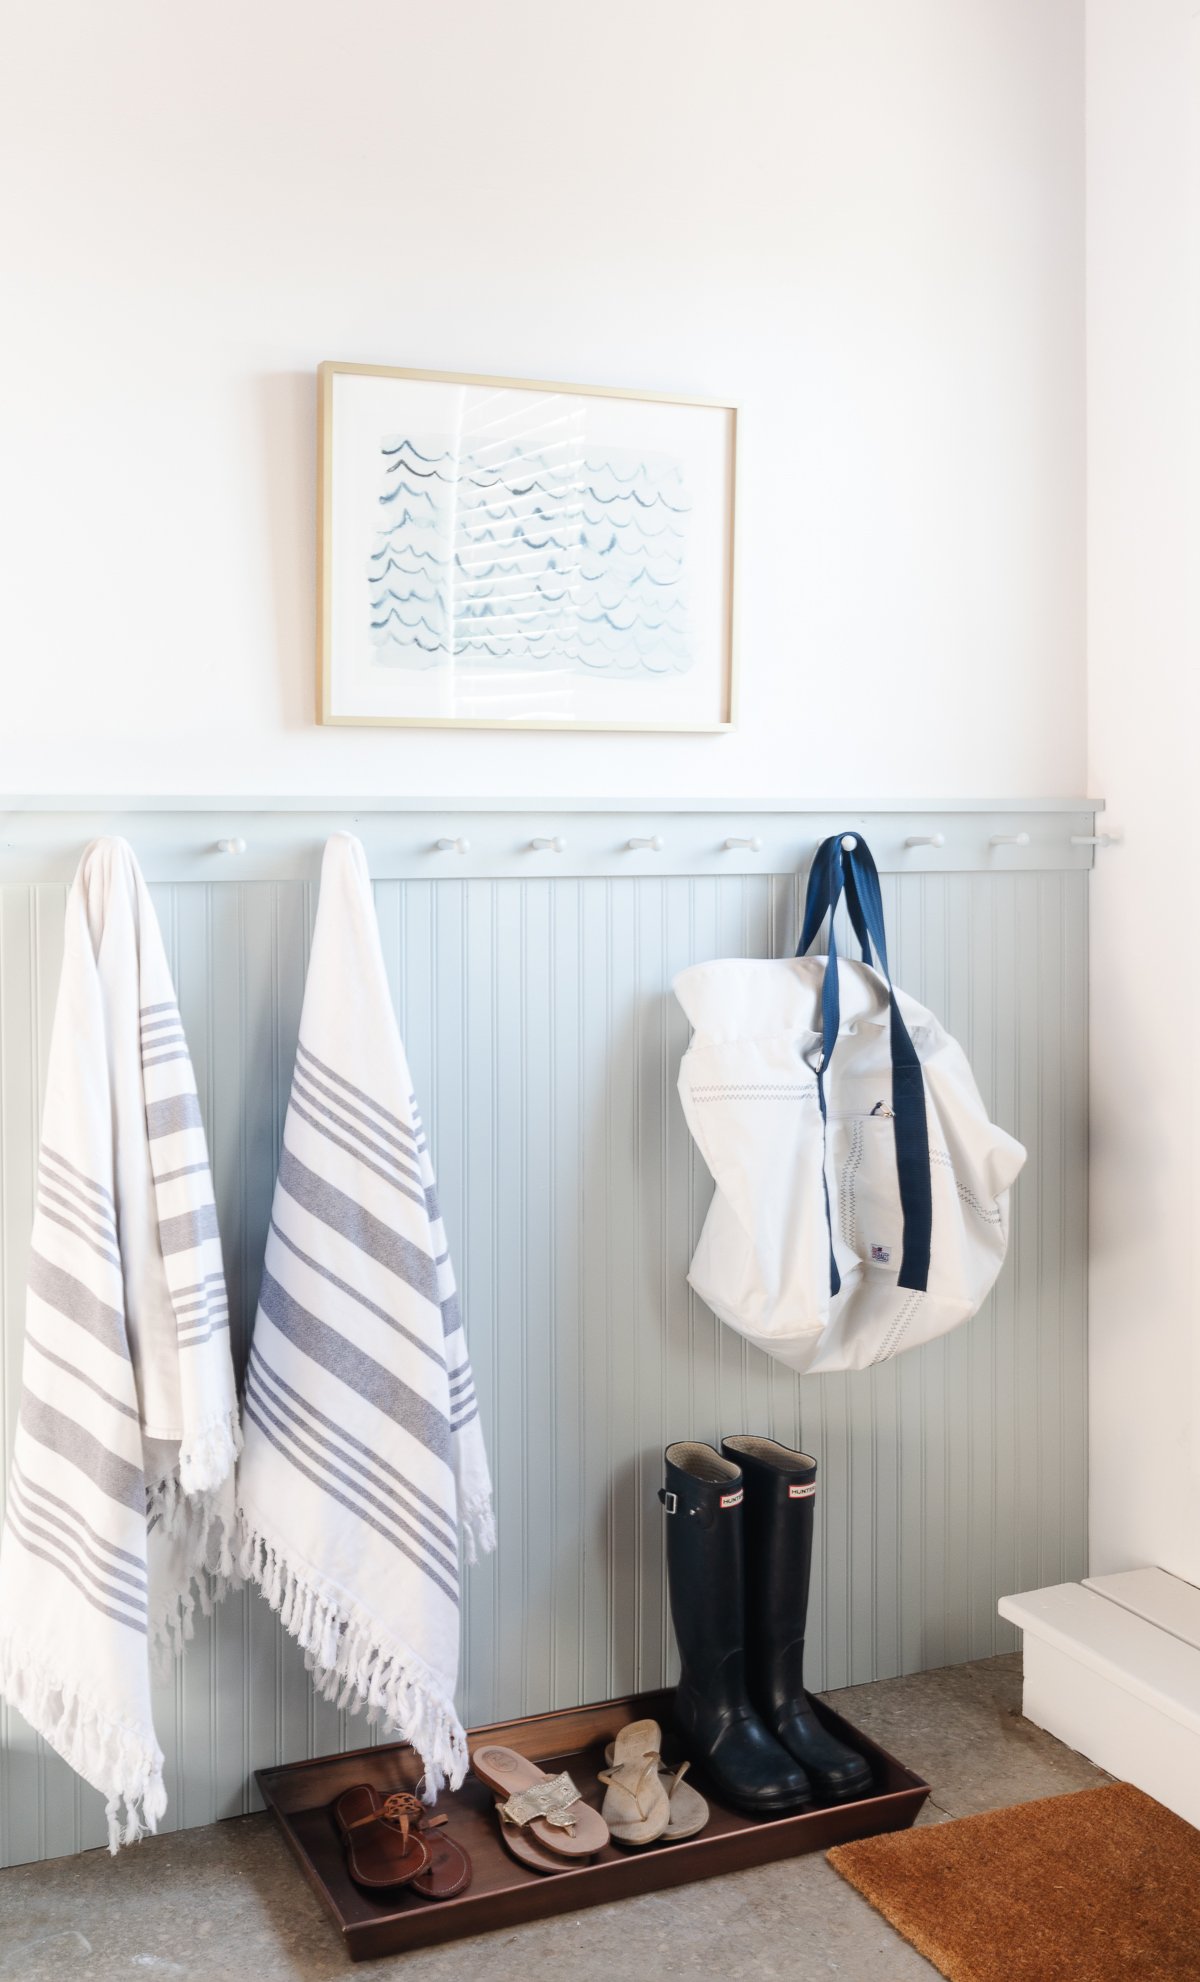
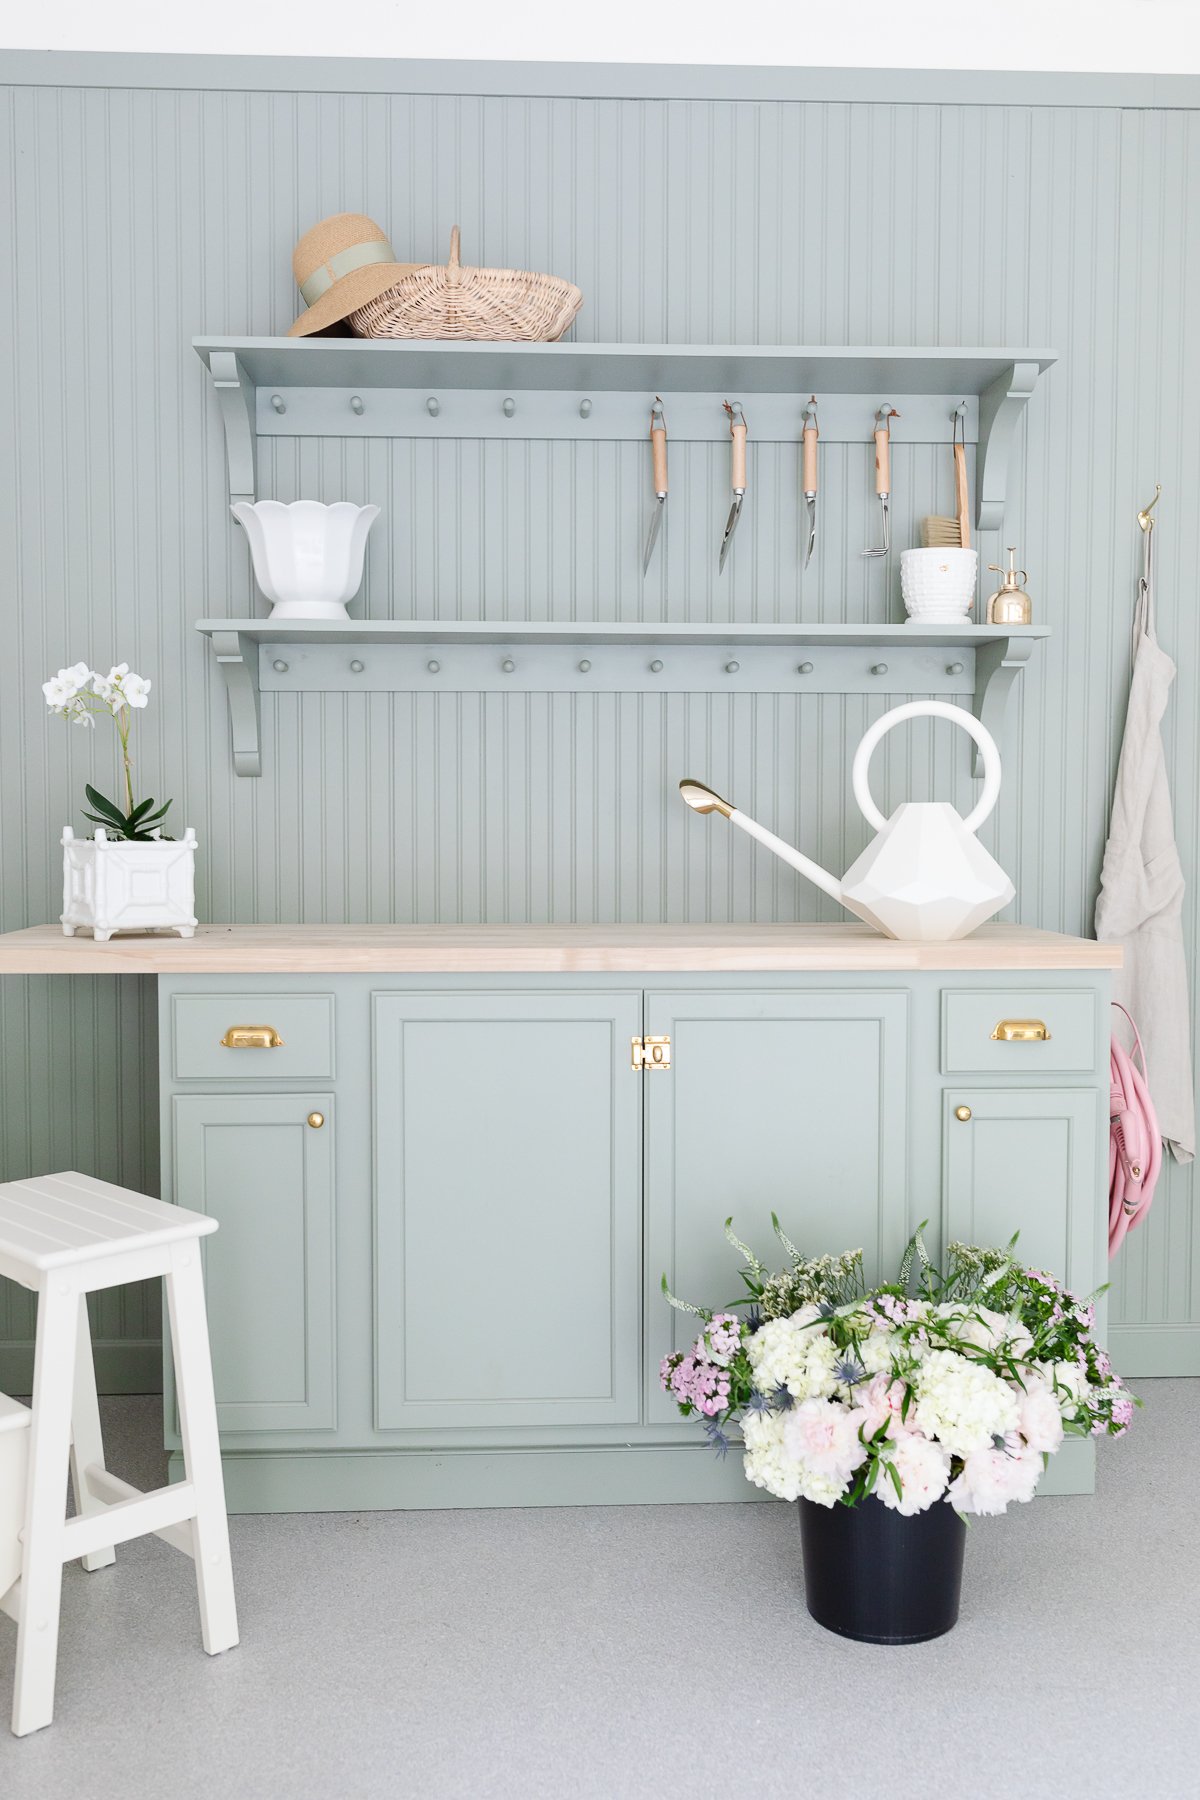
Beadboard can be used all over the house – in bedrooms, hallways, bathrooms, laundry rooms, kitchens, even on ceilings. Plus there are so many different ways to install beadboard, the ways to personalize it to your style are nearly endless.
What Is Beadboard?
Beadboard dates back as long as 400 years ago in England, where it was used to keep heat inside and dampness out. When English settlers came to America, they brought beadboard with them to remind them of home.
Classic beadboard, also called beaded paneling, is a row of narrow vertical wood planks, separated by small indentations called “beads.” Original beadboard was made up of individual boards, each routered and beveled to fit into the next in a tongue and groove manner.
Today, beadboard can be purchased in 4’ x 8’ sheets, offering the same look but with much easier installation. When installed side by side, sheets can be caulked at the seams, creating a seamless-looking expanse. It can also still be purchased in individual, interlocking pieces.
Beadboard comes in various types of real wood that can be painted, stained, or sealed with its natural color. It also comes in primed MDF (medium-density fiberboard), ready for paint.
You can also purchase pre-finished MDF panels in many designs, including rustic styles like weathered pine and distressed oak. This makes installation extremely user friendly, since there is no need to paint, stain, or seal. Simply glue and nail into place, caulk, and you’re done!

Beadboard vs. Wainscoting
Beadboard and wainscoting are related, so it’s easy to get the two confused. However, they are not the same thing, and here’s why.
A wainscot, or wainscoting, is a wood-paneled wall treatment on the lower part of a wall. It consists of baseboard, vertical wood panels (at least one on each side), and a cap piece of trim running horizontally across the top.
So while beadboard can be used to create a wainscoting, it isn’t exactly the same thing. For example, a wainscot can also be created with board and batten, shiplap, or other wood paneling.
The same is true for a chair rail. A chair rail is a horizontal board hung at the same height as the backs of chairs. It protects walls from being scuffed by chairs. Beadboard is not the same thing as a chair rail, although it can be hung underneath a chair rail to create a charming wainscoting – make sense?
This is why beadboard wainscoting is so popular in dining rooms. Not only does it create a cozy atmosphere, the chair rail also protects walls from damage done by dining chairs.
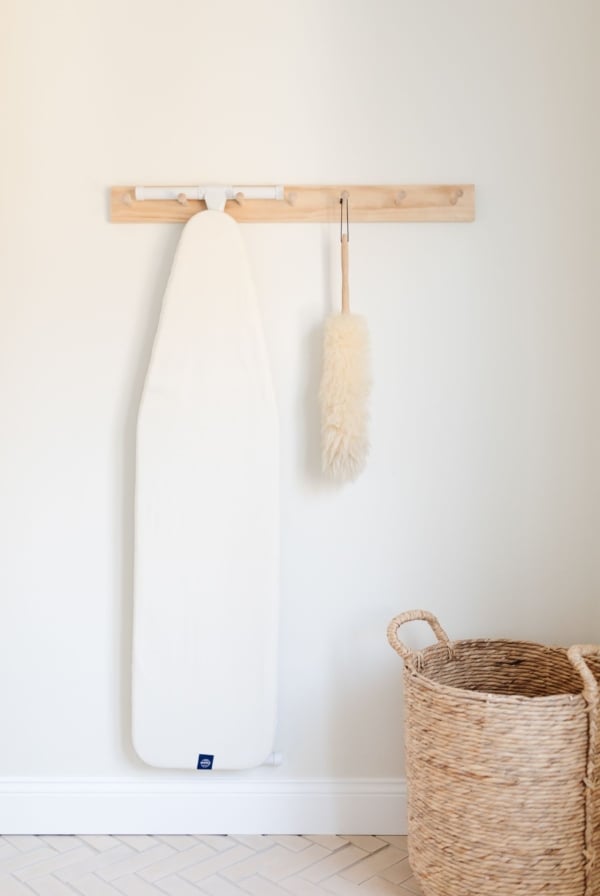
Where to Use
The shorter answer may be where not to use beadboard. There are just so many beautiful and practical places to install it in your home for a truly custom look!
It’s possible to overdo a good thing, so choose just a couple of spaces for beadboard. Then mix it up in other spaces with other wall treatments – board and batten, shiplap, paneling, wall paper – and don’t forget to leave some walls bare.
See the bead board we used in this custom DIY Potting Bench project!
Wainscoting
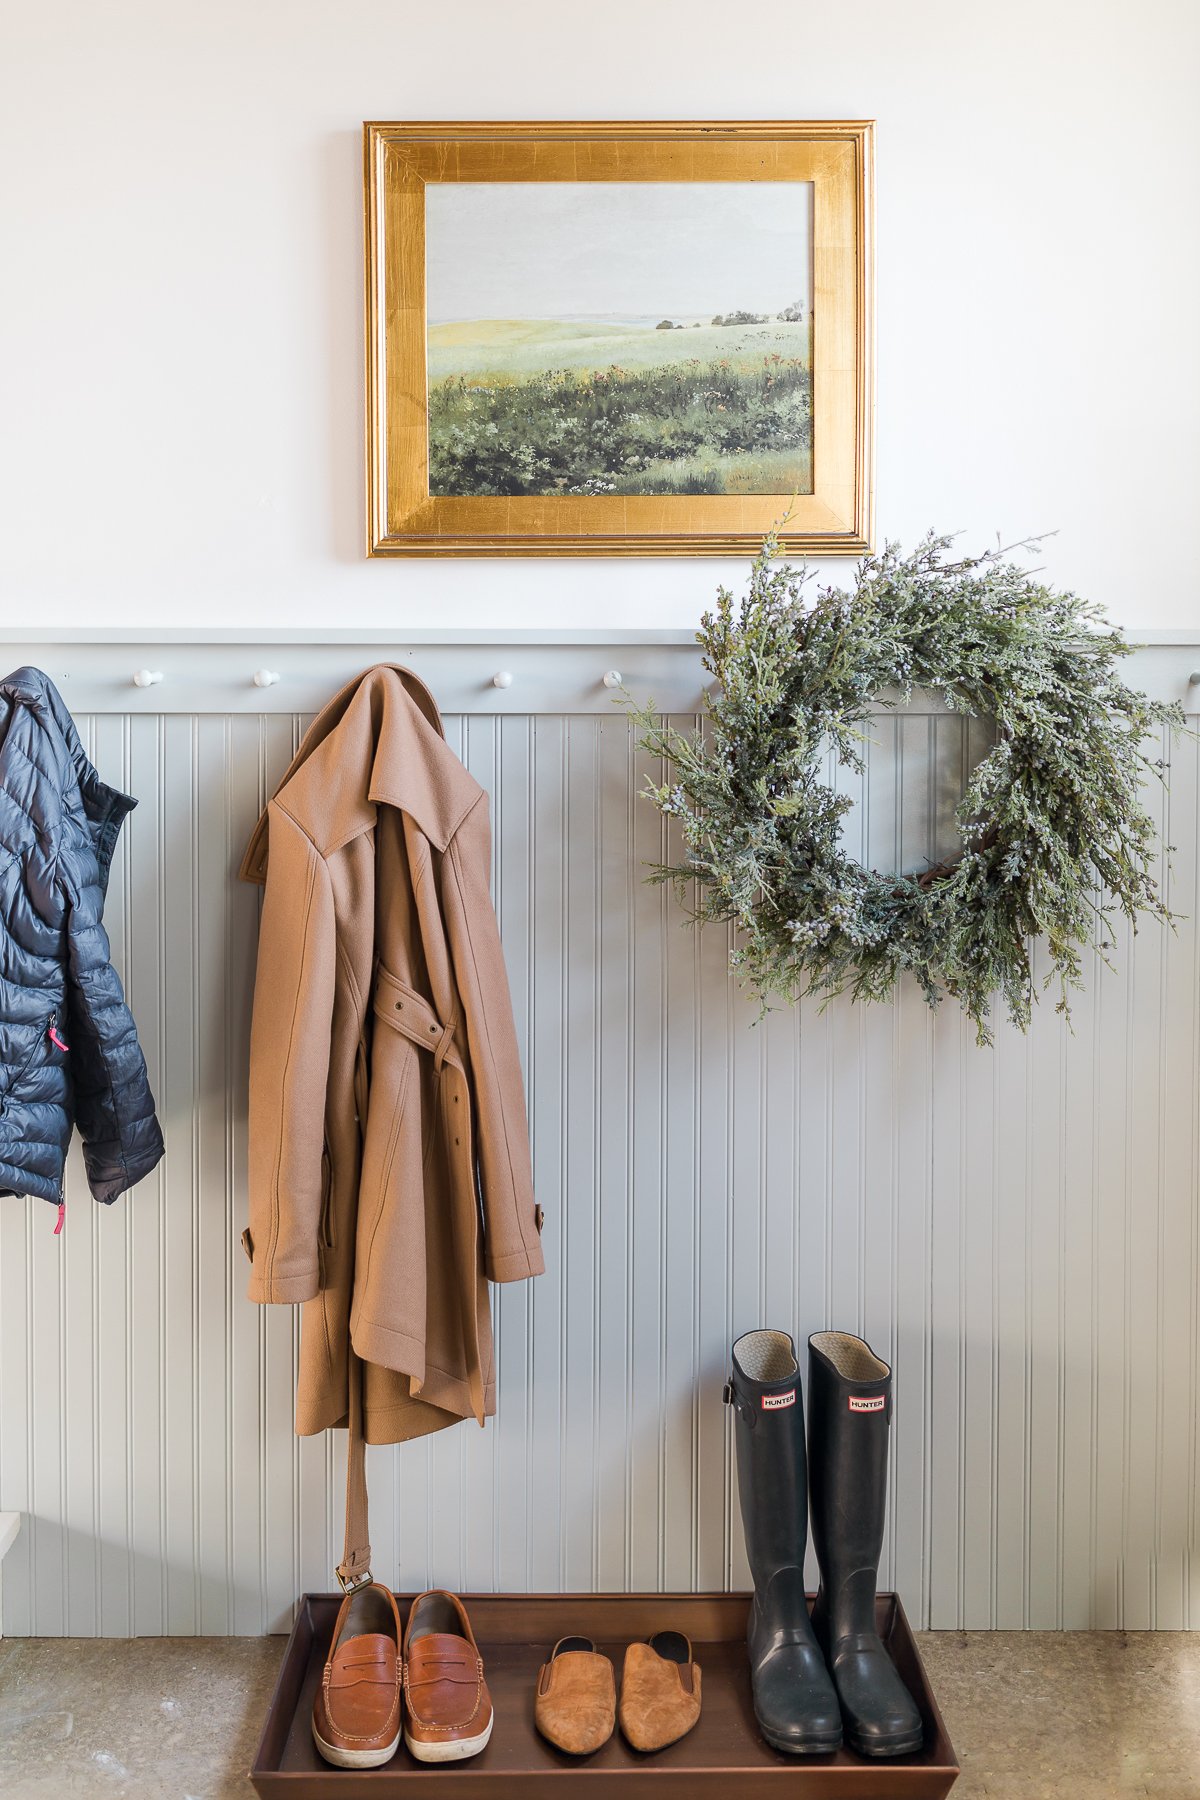
A classic application of beadboard is as a wainscoting, installed partway up your walls. This can be done in any room of your house – hallways, dining rooms, bedrooms, even bathrooms (more on that later).
A beadboard wainscot elevates any space from builder grade to custom. A long hallway instantly feels lighter and brighter with a classic wainscoting spanning its length. Beadboard makes a bedroom feel cozier and a dining room feel more inviting.
Painted white or cream, beadboard paneling adds a lovely layer to otherwise overlooked surfaces. It adds dimension and detail. The walls above it can be painted in any color, from subtle to bold. Any color looks beautiful with a neutral wainscoting.
I’ve also seen beautiful examples of wainscoting painted a color – along with the baseboard and trim – with the neutral tones on the walls above. The effect is striking!

Beadboard Bathrooms
Beadboard is perfect for bathrooms, which are often smaller and less well-lit than other spaces in our homes.
Installing it as a wainscoting adds so much charm and personality to a small space. Or hang it floor to ceiling for a simple but bold statement. Vertical boards will make low ceilings appear taller, or hang it horizontally for a less-traditional look that will make a small bathroom seem wider.
Paint beadboard in a high-quality semi-gloss or eggshell paint to withstand moisture and be easy to clean. It will be the perfect finish for your bathroom. Choose a color that will bounce light around the space – it will instantly brighten your room!
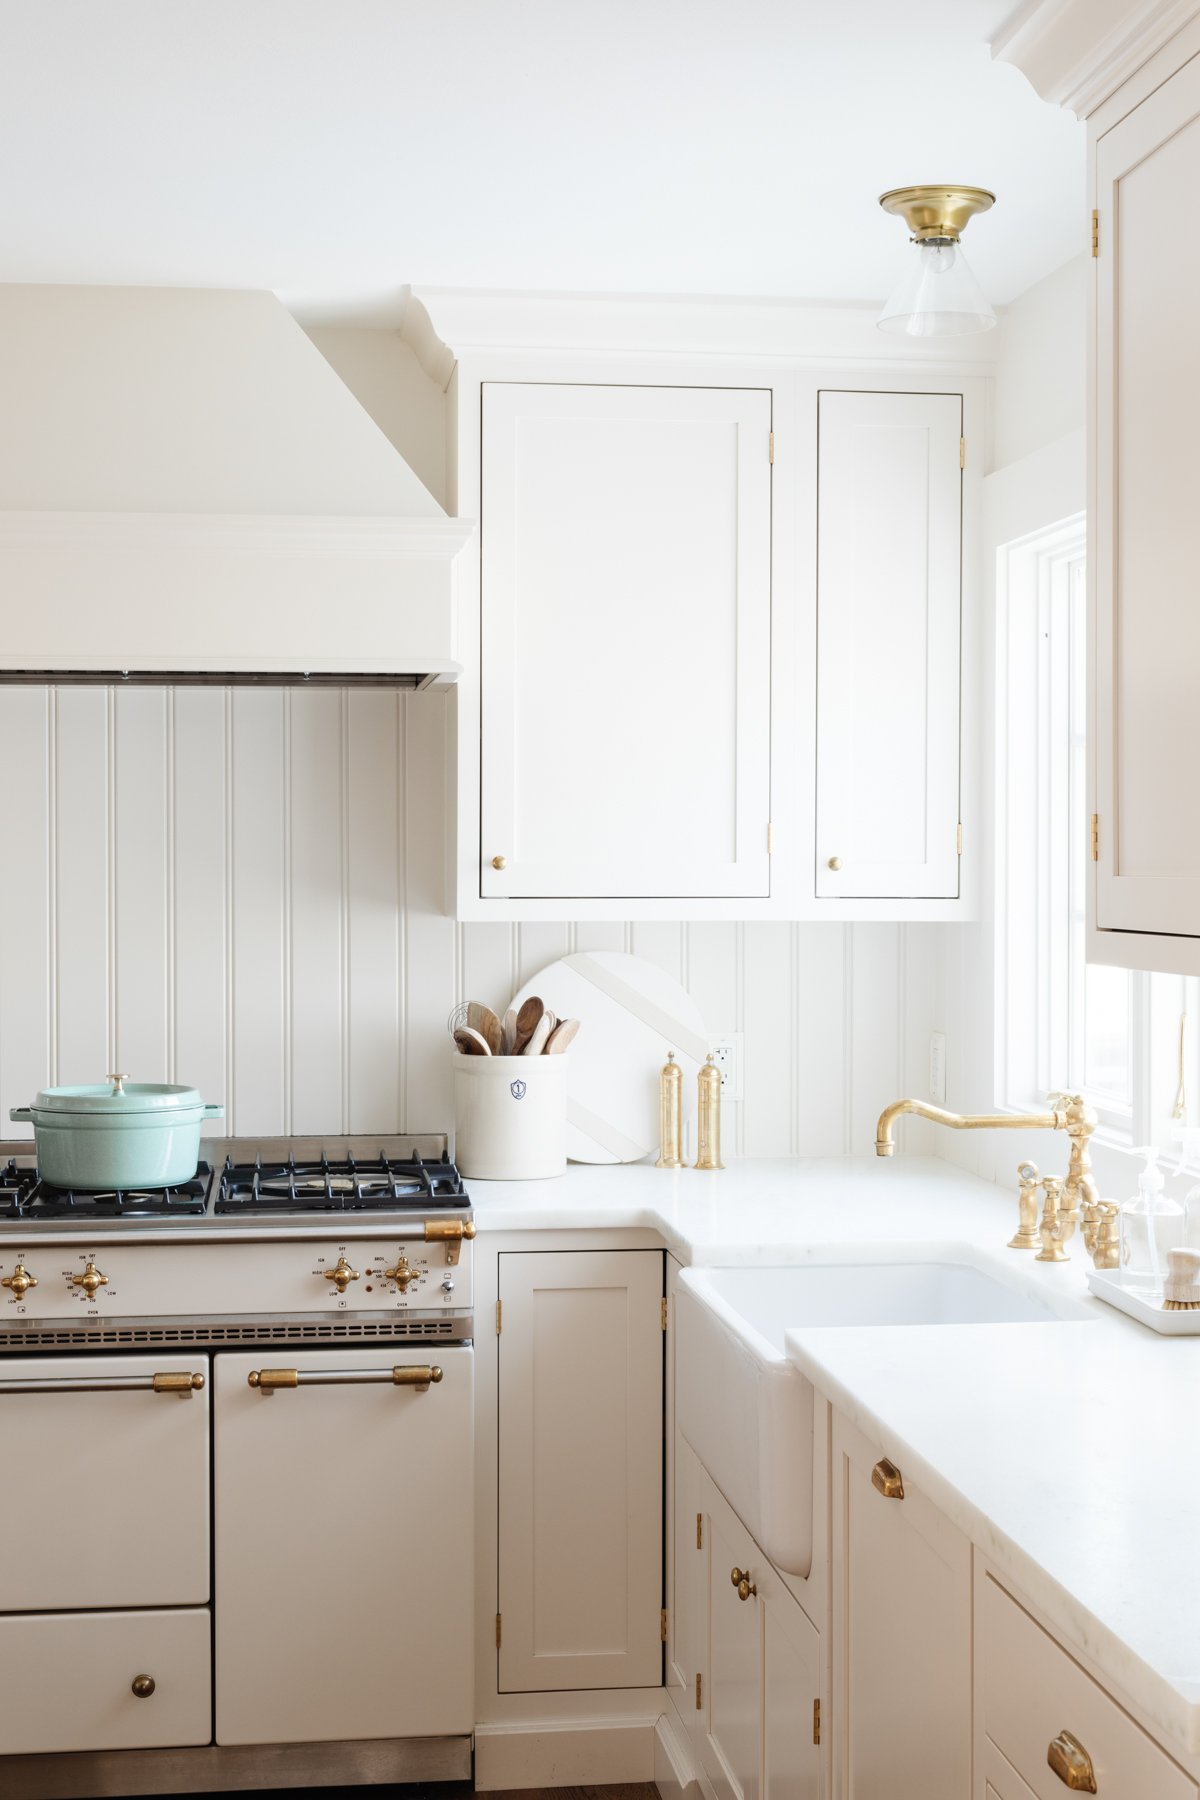
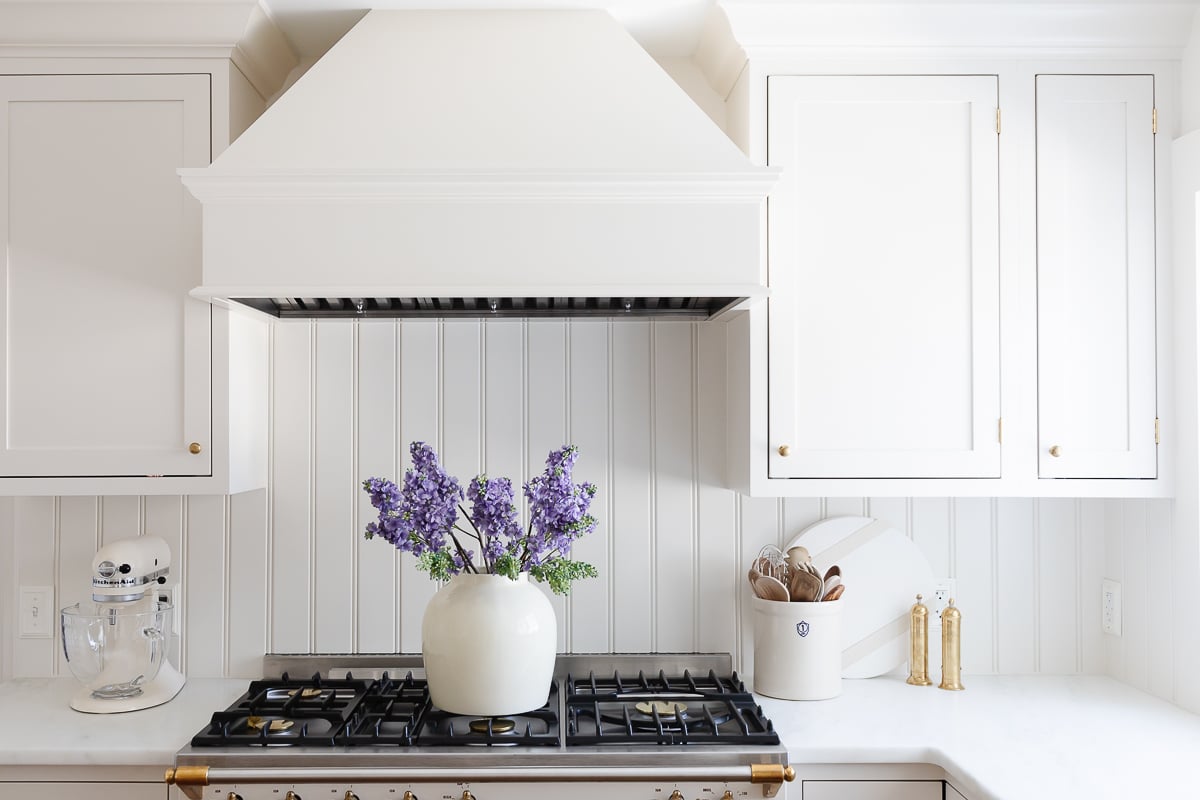
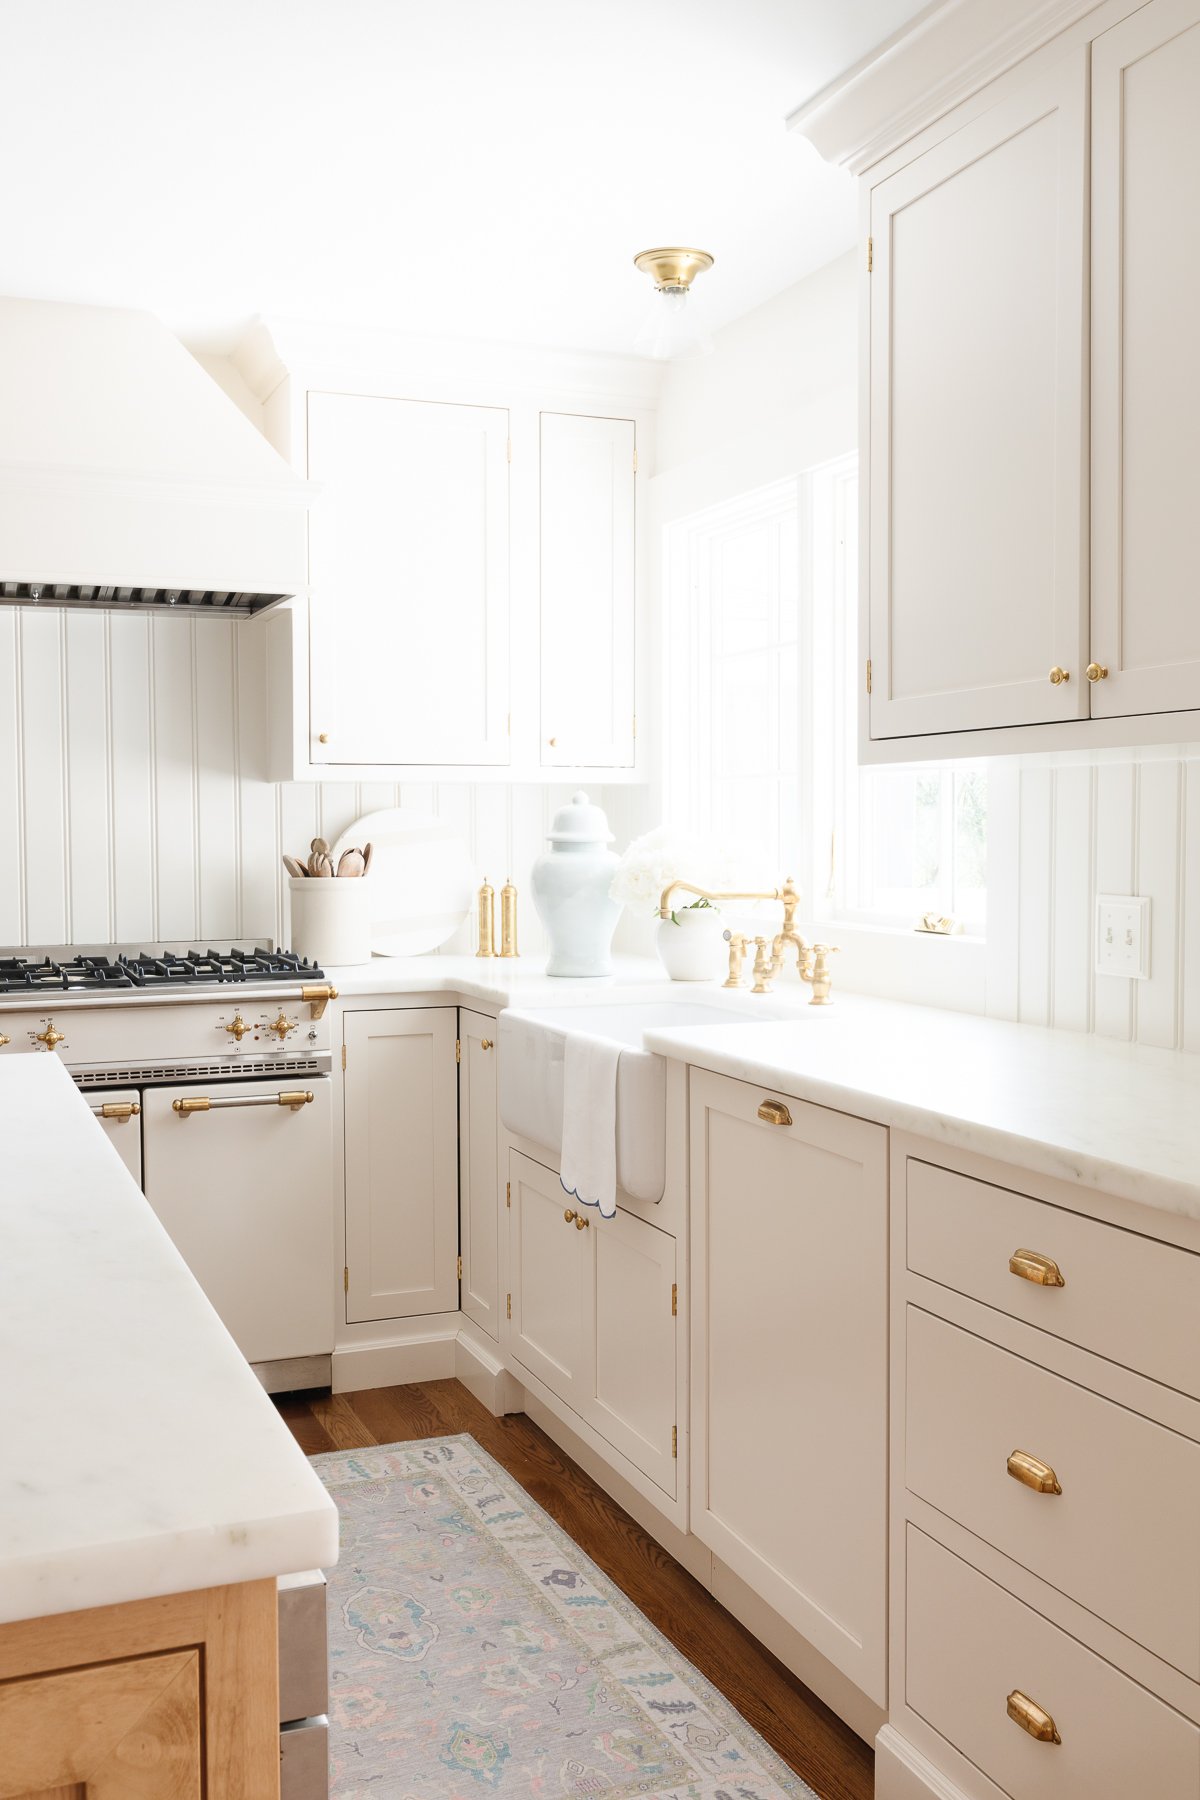
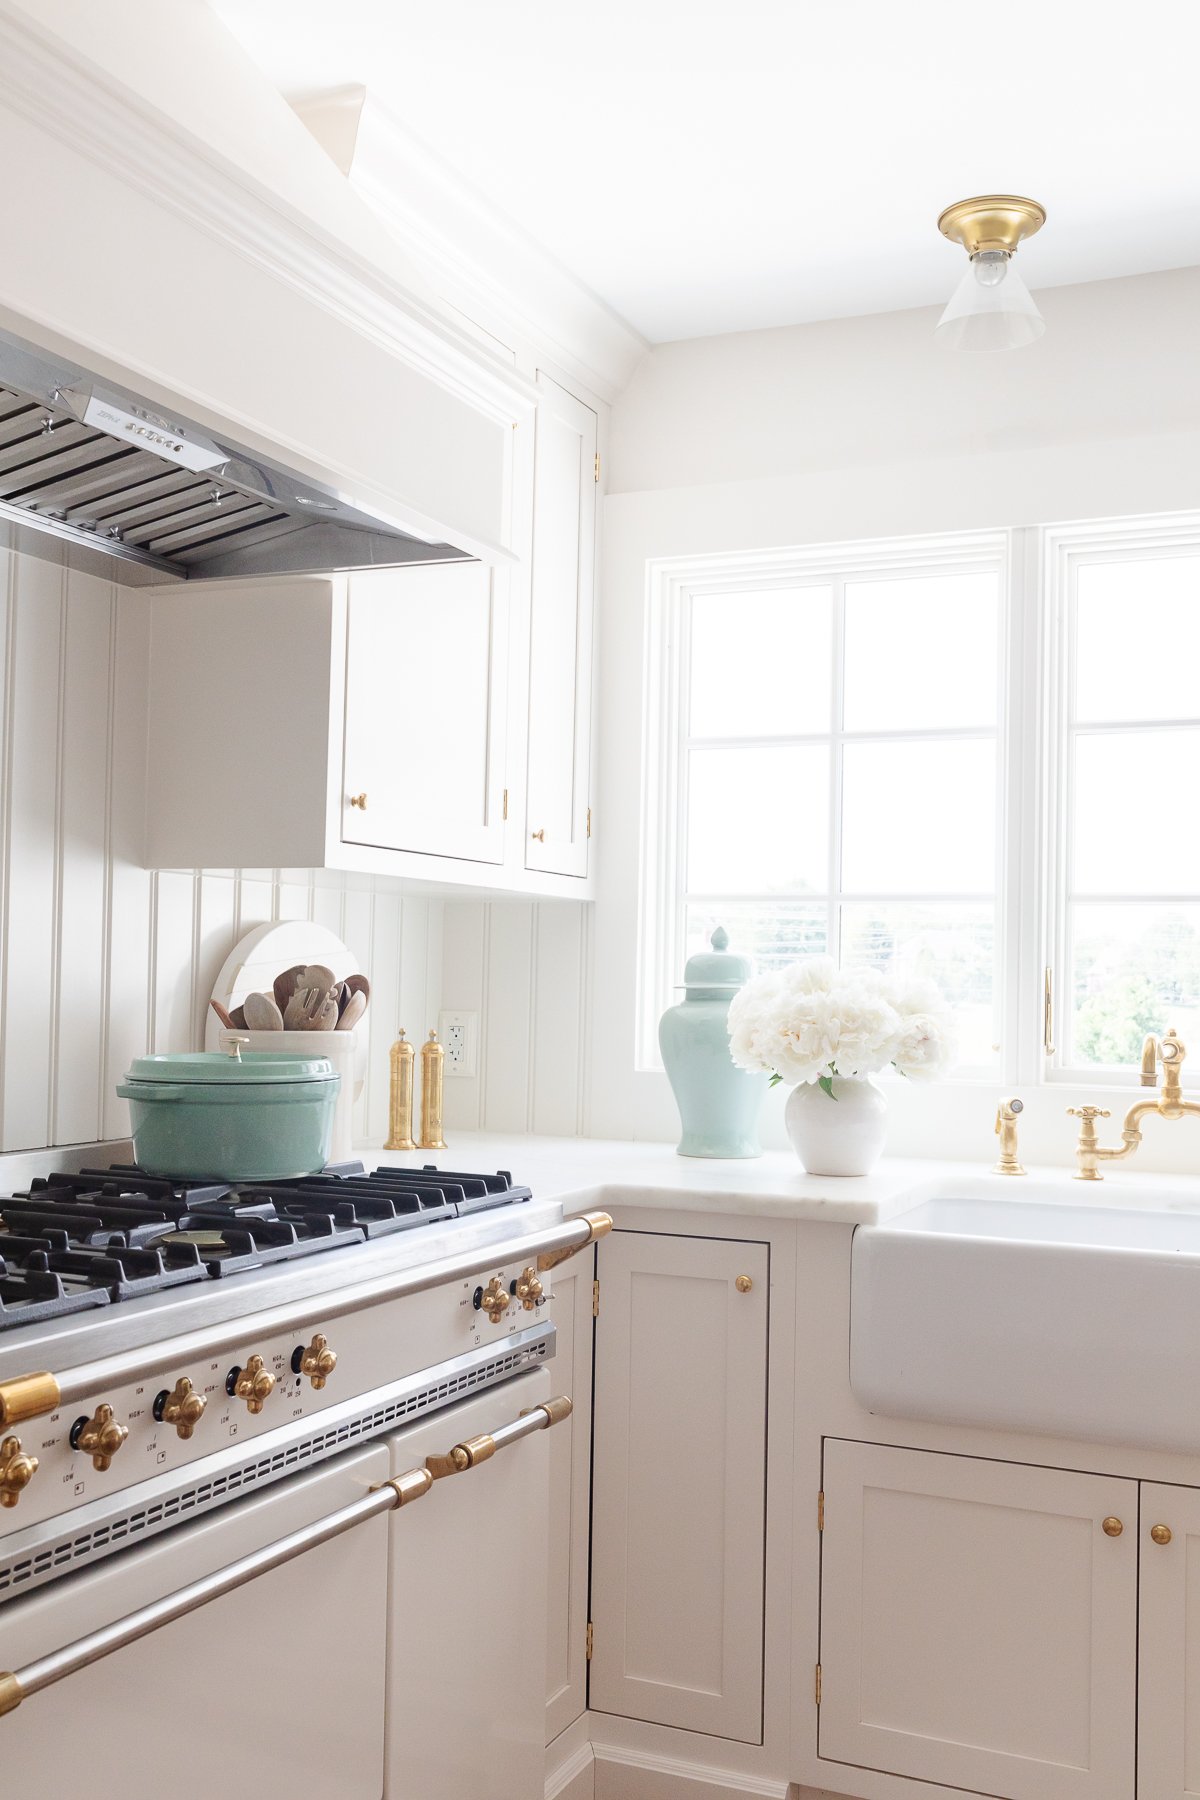
Beadboard Backsplash
There many not be a better kitchen backsplash material than beadboard. It is quick, easy, and inexpensive to install, and it looks gorgeous when it’s done. That’s the best of all worlds!
Beadboard is easier and faster to install than tile (although subway tile is another classic backsplash). It can be done in an afternoon for an instant refresh. Painted in your color of choice, it will breathe new life into your space.
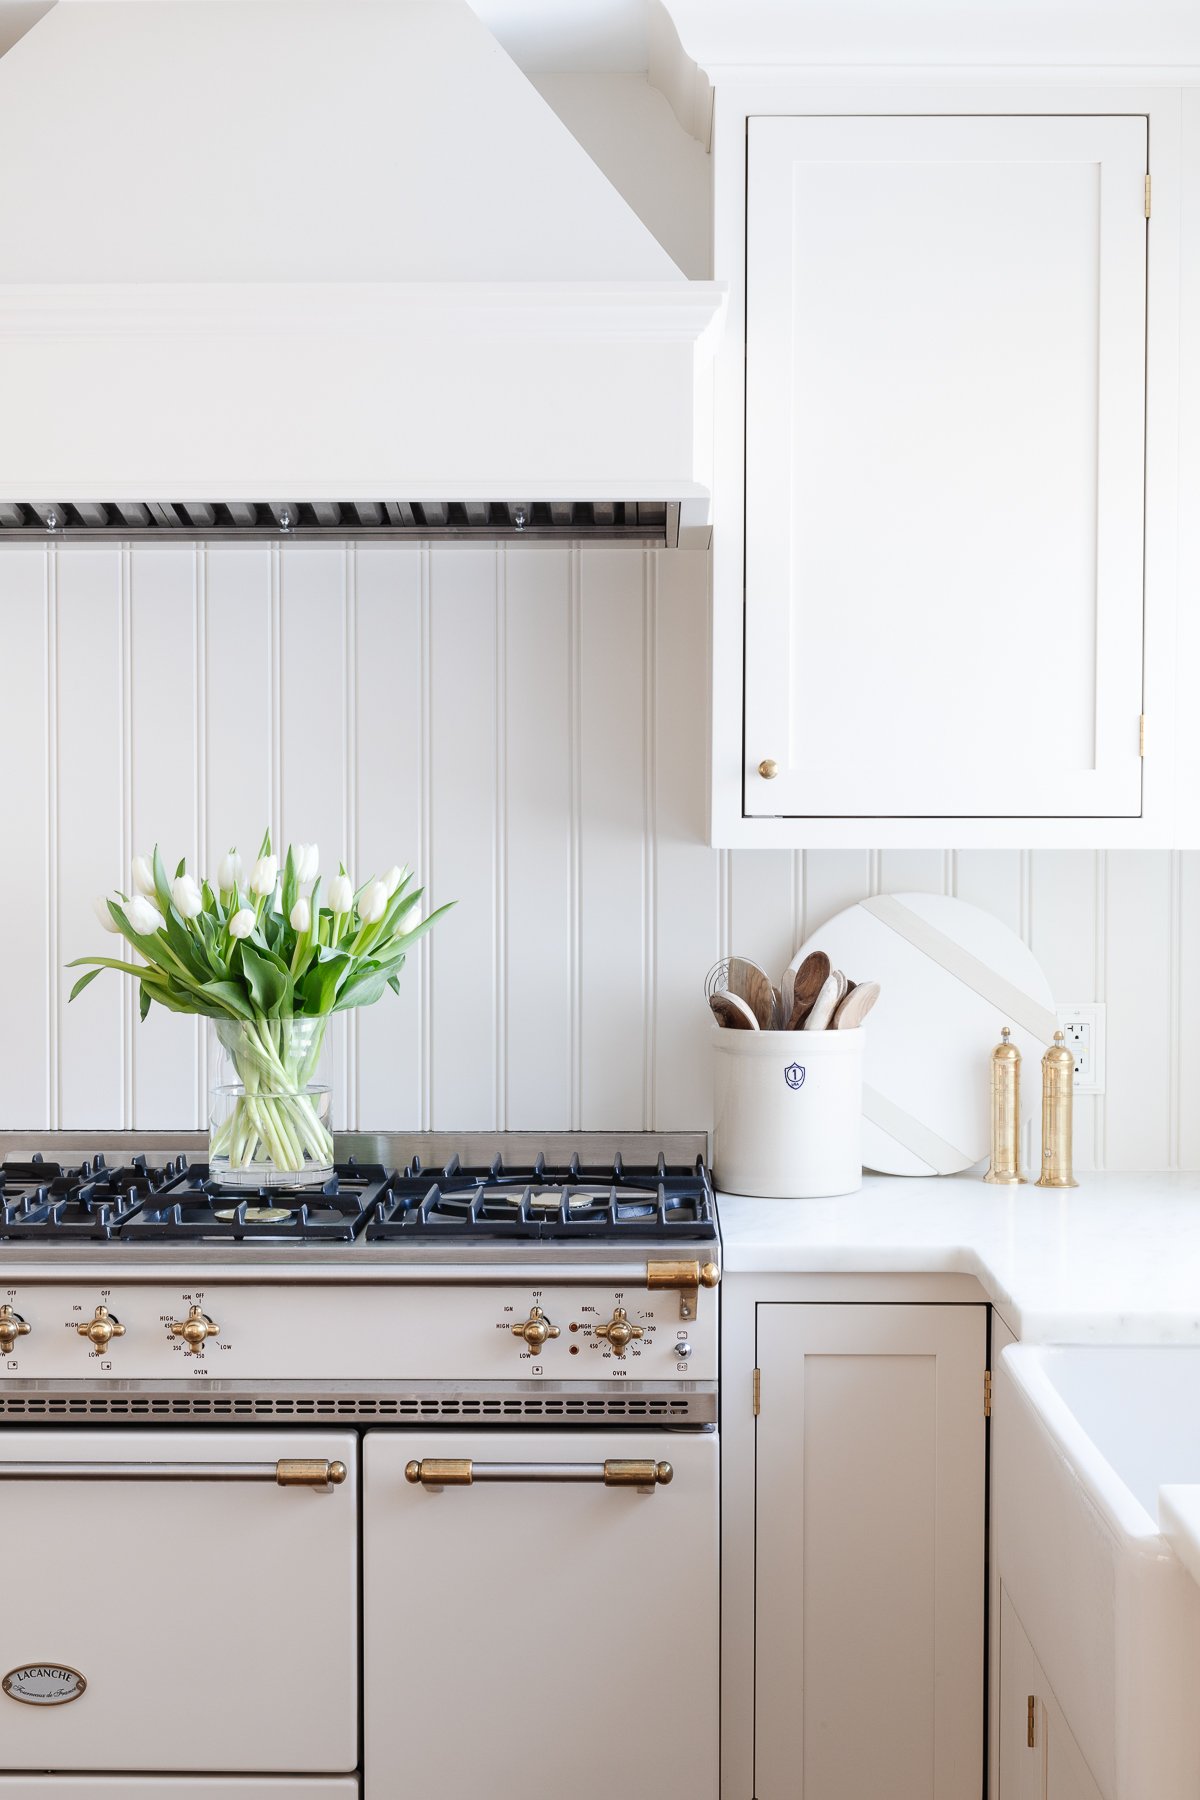
Make your backsplash the same color as your cabinets for a subtle, layered style. Or choose a contrasting color for a bolder statement. Either way, your kitchen is sure to look beautiful!
Sheets of beadboard are inexpensive enough that you don’t have to stop underneath your cabinets. Carry the backsplash up your walls, behind open shelving, and up to your ceilings for a stunning, customized look.
Using a high-quality paint will ensure that the finish will be super smooth and easy to clean – a must for any kitchen.
Beadboard Ceilings
Don’t forget the fifth “wall” of every room – the ceiling! They’re often overlooked, but ceilings have so much potential for adding style to your space.
Some ceilings are less than desirable. Perhaps you have some old water damage that has been repaired but still shows. Maybe you just don’t love the texture. Or perhaps you just want to take your room to the next level. A beadboard ceiling may be the perfect solution for you!
Since it comes in 4′ x 8′ sheets, beadboard is relatively easy to install on ceilings. Installation goes pretty quickly! Liquid nails and small finishing nails are enough to hold it in place. Just make sure to line up the beads (ridges) from sheet to sheet, or it won’t look quite right.
You’ll be left with sheets of beadboard separated by noticeable seams – not quite the look you’re going for. To cover the seams, simply run boards of wood or MDF along the seams.
You can build them out as much or as little as your prefer, using decorative trim along the edges or leaving them plain – whichever suits your style. Caulk seams and you’re done!
Choose the right ceiling paint for the perfect finish. The end result will be a gorgeous coffered ceiling, made up of crisscrossing beams with beadboard in between. It will look high end and create so much dimension in any space.
Installation Tips and Ideas
Rule of Thirds
One of the most important aspects of wainscoting is installing it at the right height. Even people who know nothing about design will be able to sense when the proportions are slightly off.
The guideline to follow is called the rule of thirds. It’s easy! Measure the total height of the wall you are working with, and divide it by three. That is the height of your wainscoting. Or you can hang it at the 2/3 mark for a higher wainscoting.
For example, 1/3 of a 9-foot wall is 3 feet, or 36 inches. Line up the top of your chair rail (top trim piece) at 36 inches, with the beadboard underneath. If you want a taller wainscoting, use 2/3 of the wall height. For a 9-foot wall that is 6 feet, or 72 inches. Easy, right? The result will be a visually appealing wall treatment.
Note: Make sure to measure your walls to find the right height for your wainscoting. The above example is based on a 9-foot ceiling, but your measurements will depend on the height of your ceiling. It’s all about proportions!
Full Walls
Don’t be afraid to break out of the norm and use beadboard from floor to ceiling, too. It adds texture and warmth, plus it is easy to install and paint or stain to suit your style.
Vertical “stripes” on walls make low ceilings appear taller. Simply install beadboard to your walls, then add baseboard and trim around the edges for a truly custom, built-in look.
Modern Installations
If you think beadboard can only be used in cottage, farmhouse, or traditional styles, think again! It can actually be used effectively in modern installations as well.
Traditionally, beadboard is hung vertically on walls. For a more modern look, install it horizontally on walls. This creates a more streamlined look, with an added benefit of making spaces appear larger.
For an even more modern look, stop thinking of up and down. And start thinking of angles! Sheets of beadboard can be hung on walls at an angle – 45-degrees for example, but any angle will work – for a contemporary style.
Cutting beadboard at angles will create more waste, but it is fairly inexpensive to begin with. Plus there are a lot of DIY craft projects to use up those scraps. Use your imagination!
Frequently Asked Questions
No, beadboard is a relatively inexpensive option. Real beadboard costs about $1/square foot, but you can find MDF options for as low as $.50/square foot. The higher-quality material you choose (such as nicer wood), the higher the cost will be. The good news is, the cost of professional installation is low compared to other materials like tile.
Yes! Beadboard has been in style for 400 years, and it isn’t going anywhere anytime soon. It is a classic style, not a trendy one. If you love beadboard, use it with confidence!
Yes, it is easy to paint beadboard with a high-quality brush and smooth roller, or with a paint sprayer. MDF beadboard comes pre-primed and ready to paint. Wood beadboard can also be stained, if desired. You can also purchase prefinished panels, in styles such as weathered pine or distressed oak – simply install and caulk.


Hi Julie, love your kitchen! My LaCanache stove will be arriving late fall. I currently have wainscotting as a backsplash throughout out my kitchen. The LaCanache is replacing a enamel stove fro 1922. Is the beaded board backsplash behind your stove fireproof? I was hoping to keep my wainscotting behind the stove, but worry that it might be a risk. Let me know when you have a moment. Best, Gretchen
Yes, it’s fire rated! I have no regrets.
What is the name of the color on your cabinets and the color of your Quartz. Thank you
These cream kitchen cabinets are a custom color – click for the code. It’s Danby Marble. Enjoy!
Hi Julie,
Your kitchen is absolutely stunning. May I ask how wide your beadboard is? I am debating between 3 and 4 inch for my own kitchen but LOVE your look. Thank you so much.
Thanks! I don’t know off of the top of my head, but I always link to the exact product used in posts for your convenience/reference.
Hi! May I ask where you purchased your beadboard? Thanks!
It’s linked in the post, enjoy!
Where exactly is the link ? We can’t find it –
Hi Netti,
Our kitchen beadboard is linked in this beadboard backsplash post. We’ll be sure to add the links to this post, as well.
Thanks for reading!
Julie
Hi Julie,
I would love to have a beadboard backsplash, but I’ve been concerned about putting it behind my gas stove. I see in this article that you have it behind your range. any advice?
Thanks so much,
M.A.
Using the proper material, it has been behind ranges in French and English kitchens for over a century.
Hey Julie! I’ve been inspired by your project for over a year now, and I’m finally getting around to installation. How has your beadboard held up behind the gas range, and have you found any particular cleaning method keeps things grease free? Thanks!
Hi Mary,
It’s held up beautifully, I’m happy to report. We use a basic all-purpose cleaner or even our marble cleaner for wipe-downs when necessary.
Enjoy!
Julie