Concrete floor paint is the easiest way to update concrete for a beautiful, durable finish on a budget.
Learn how to paint concrete floors for an instant update that works well for basements, laundry rooms, playrooms, screened in porches, and so many more spaces!

I always thought I’d have more luxurious flooring in our laundry room and mudroom, but having kids gave me a sense of practicality I never imagined. I started looking at concrete painted floors in a new light, thinking of them in an East Coast cottage.
Suddenly, my eyes opened to something far more beautiful than the garage I had originally envisioned. Cement floor paint is more than just utilitarian – it can be beautiful too! I’m going to show you how to paint concrete floors for a result you’ll love for years to come.
Concrete Paint for Floors
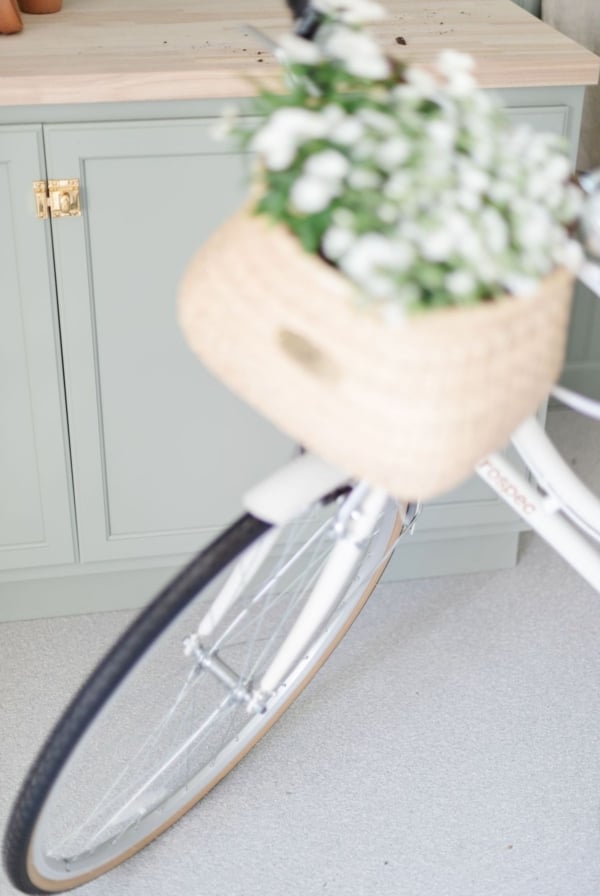
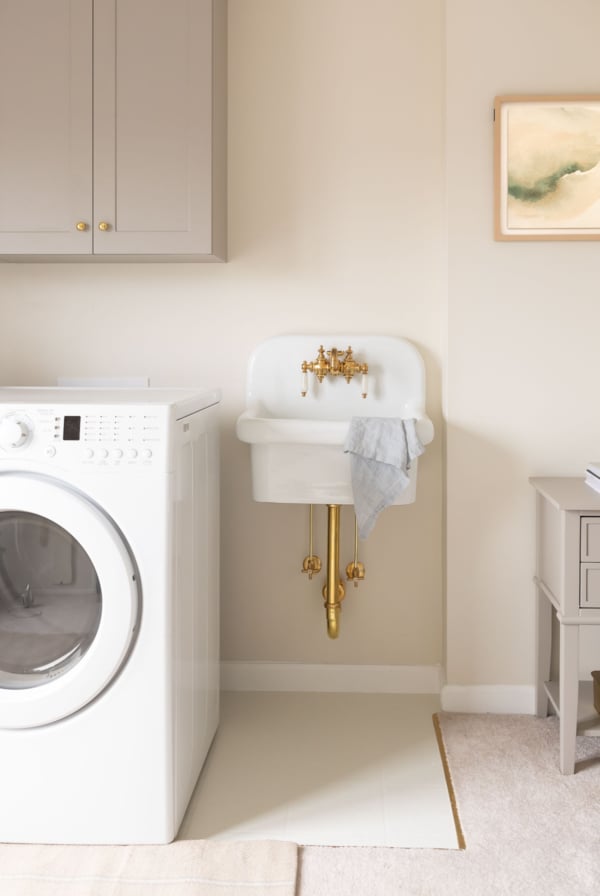
We absolutely loved the concrete paint in our closet converted mudroom. It was pristine and worry free, functional, and most importantly, durable. You can paint concrete floors to create your own fuss-free zone. Learn more about the full Mudroom Laundry Room here!
Above all, it’s an inexpensive way to update a space that you want to easily “wipe down,” similar to Tile Paint. Concrete floor paint is perfect for an unfinished basement, laundry room, mudroom, screened in porch, and so many mores spaces in your home!
Applying a coat of cement floor paint is quick, easy, and cost effective. It immediately enhances a space and makes it feel fresh and so clean, without a lot of effort.
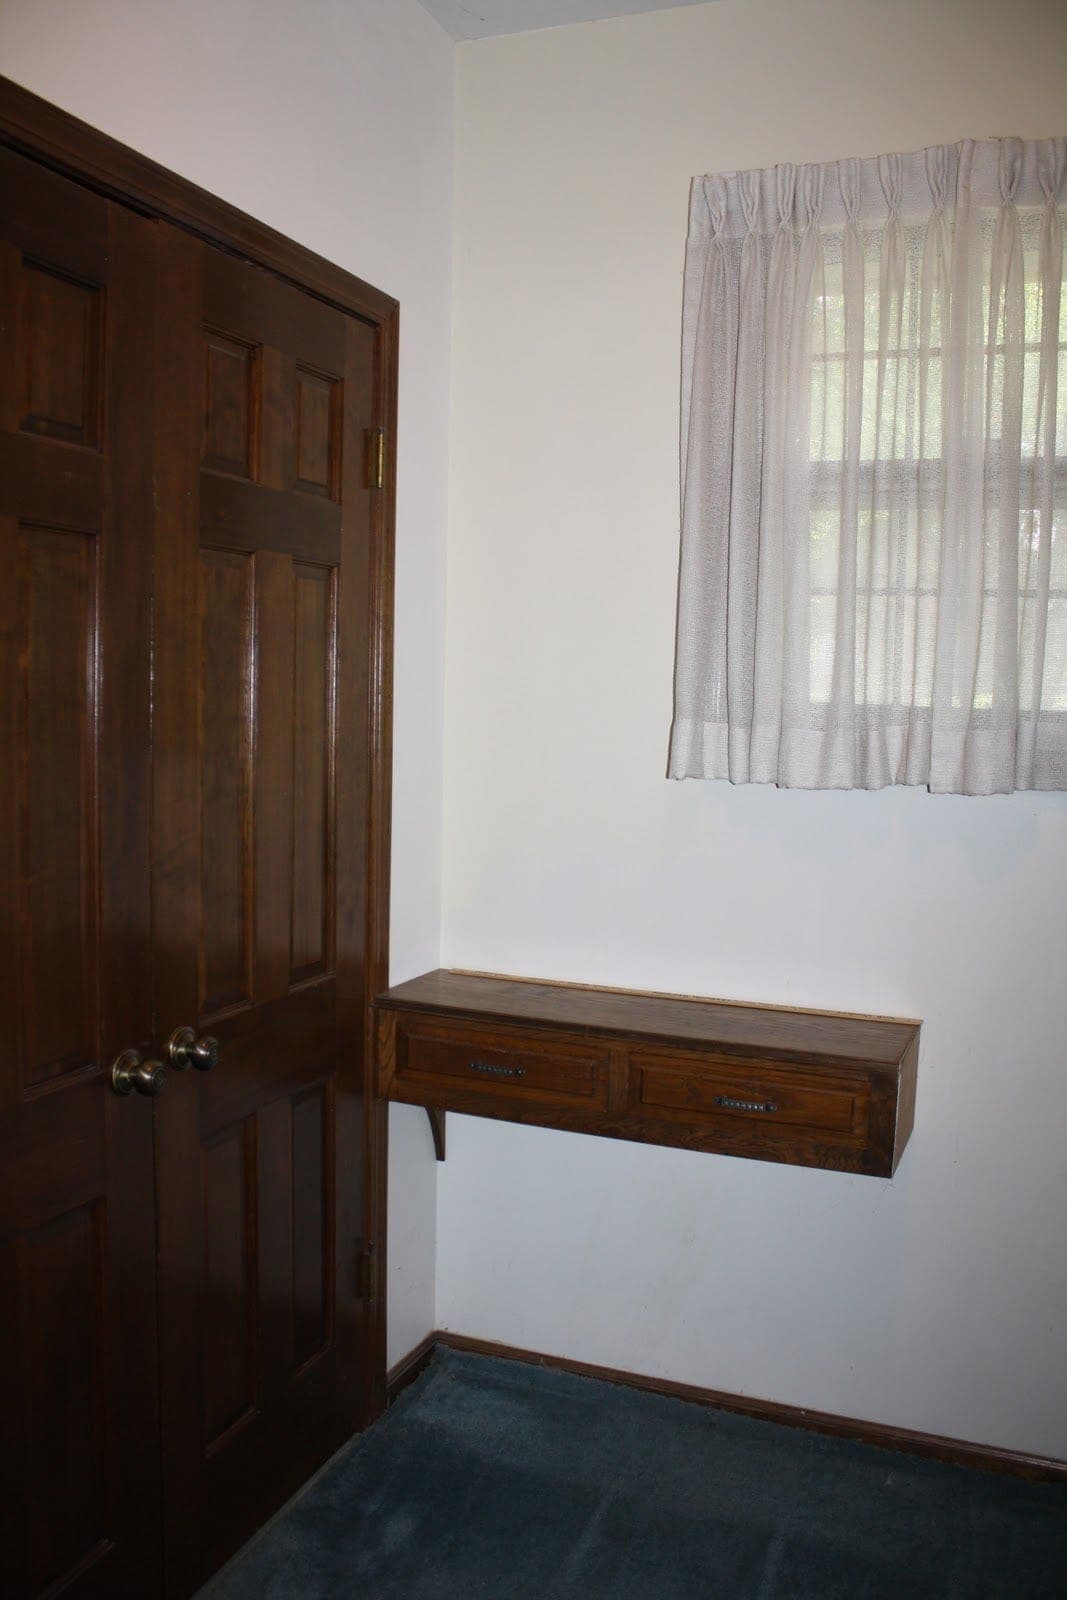
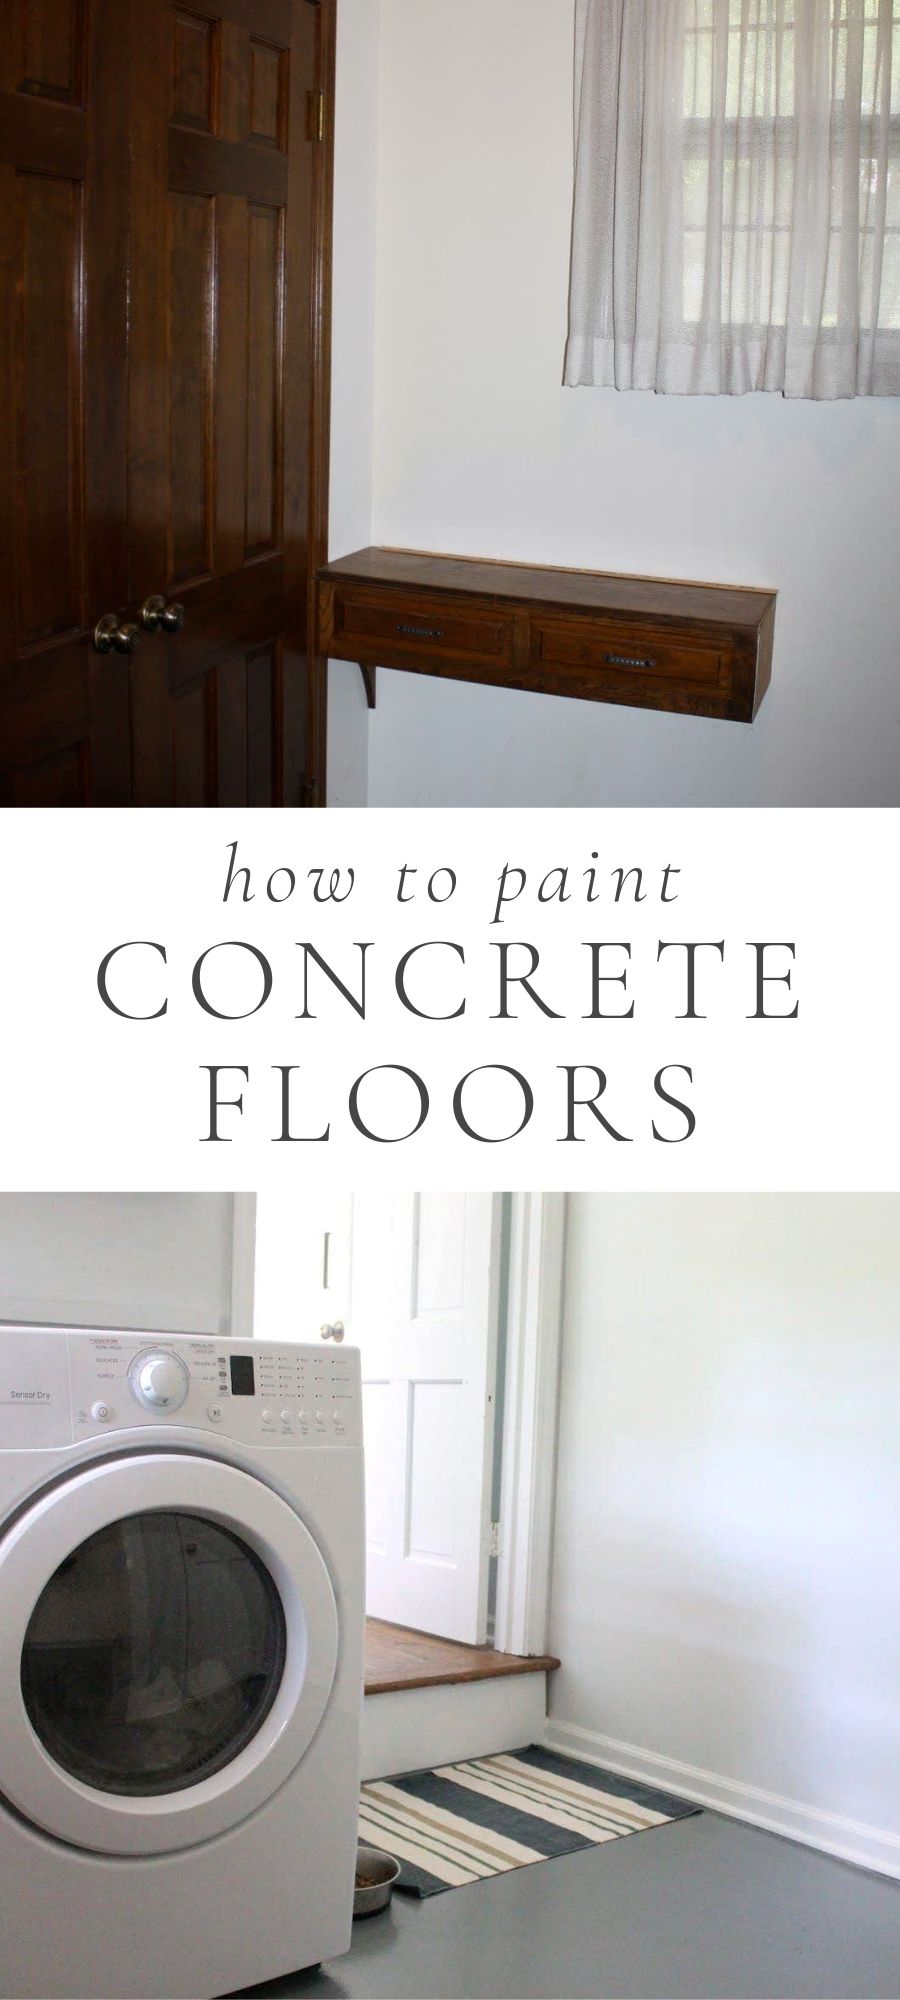
You can see from the photo below the dramatic before and after that concrete paint can offer!
It’s so important to choose the right product for cement paint. After lots of research and discussions with paint crews, I recommend a high quality concrete paint (also known as cement floor paint) that can withstand the natural expansion and contraction of the floor as temperatures fluctuate with seasons.
In fact, a properly painted concrete floor will also withstand scratching, high foot traffic, heat from the tires of your car, and even water. Certainly, cement floor paint helps waterproof the floor!
When applied to a dry surface, it seals the floor and doesn’t allow moderate water to seep into the concrete below, unless subjected to flooding.
I love chatting design details with you! Get all the details you need to choose between Subway Tile and Hexagon Tile right here!
Choosing The Best Concrete Paint
Concrete paint labeled for interior and exterior use tends to be more durable. One gallon can cover quite a few square feet. Usually it’s more than enough to cover a large room.
We used Glidden Porch and Floor Polyurethane Oil Gloss (in Steel Grey). You can find a lot of great options online, at your local hardware or paint store.
Epoxy paint is a little more difficult to work with. Most homeowners tend to lean towards latex options. For interiors, the following paints with a satin finish work well and are easy to apply.
- Rust-Oleum Concrete and Garage Floor Paint – An indoor/outdoor self-priming paint that results in a satin finish. It’s specially formulated to resist high heat from cars!
- Drylock Concrete Floor Paint – A low-luster acrylic latex paint that resists peeling and scuffing, as well as sustains UV rays. It is known for covering up imperfections, which is great for unfinished spaces or damaged concrete that was previously covered by other flooring.
- Kilz Porch and Patio Paint – Despite the name, this paint is amazing for basement floors as well! It forms a barrier to keep water and dampness out.
- Kilz Over Armor – This product has texture for anti-slip, so it’s best used outdoors for a porch or garage.
- Kilz Basement and Masonry Waterproofer – This tinted base is great for keeping dampness at bay. In just 2 coats you’ll have a smooth, glossy finish that dries in just an hour.
- Insl-x Sure Step – Another acrylic cement paint option that’s very affordable! It is anti-slip with a slight texture, so best used outdoors.

Tools Needed to Use Cement Floor Paint
Don’t let this list make you nervous. This entire process is fairly easy and straightforward. Are you ready?
- Floor scraper
- Stiff bristle push broom or brush
- Masonry crack filler
- Caulking gun
- Small putty knife
- Hand sander & 100-grit sandpaper
- Wet/dry shop vacuum
- Tack cloth
- Brush
- Paint roller and roller covers
- Paint tray and tray liners
- Painters tape (optional)
- Masonry primer
- Concrete floor paint
- Masonry sealer
Preparation
As with any painting project, preparation is key. You will spend more time preparing your floor than you will actually painting it. This is necessary to ensure a smooth, durable finish that will last.
Clean Your Floors
- Remove old floors – First, remove any existing flooring. In our case, it was carpet, which meant we had tack strips to remove. Remove any tack strips or nails carefully, so as not to chip the concrete. For glue-down floors, remove any leftover adhesive using a floor scraper. If your space is outdoors, consider using a pressure washer to make the job go quickly!
- Remove trim (optional) – Remove baseboards and trim, if desired. Trim can remain in place during this process as well, so there’s no need to remove them unless you plan to replace them. However, removing old flooring may have left a space between your trim and concrete. You can remove the baseboards now and reposition them lower after painting your concrete, or you can cover the gap later using a quarter round trim (easiest option).
- Vacuum – Use a shop vac to vacuum up any loose dirt and debris using a shop vac. You’ll repeat this step later, but you still want to be as thorough as possible now.
- Clean floors – Next, thoroughly clean concrete floors using a damp wire bristle broom or brush. Depending on the state of your floors, you may need to use a specialized cleaning product such as Krud Kutter to remove grease, oil, dirt, built up wax, dried paint, and more. Tip: For indoor spaces, use a pump sprayer (the same kind you use to spray your yard) to lightly dampen your floors for cleaning.
- Rinse – Rinse floors with water and allow to dry.
Level and Smooth
The next phase of preparation is to make sure your floor is level and free from any cracks or bumps. Any flaw that is visible now will still show once the floors are painted, so it is vital that you take the time to do this phase right!
- Fill Cracks – For starters, fill any visible cracks with a masonry crack filler. Be sure to first clean each crack out as well as possible and remove any loose pieces or chips of concrete. Then, using a caulk gun, apply an even bead down each crack. Try to get filler down inside cracks as much as possible. Smooth any excess filler using a small putty knife.
- Concrete Patch – For larger voids and chips, you may need to use a concrete patch. There are many types of concrete patch products, so choose the one that best suits your space and needs. Follow package instructions, making sure to smooth the finish as much as possible using a larger putty knife. Allow to dry completely.
- Sand – To ensure a smooth surface, you’ll need to sand any excess filler away from cracks and chips. Use a hand sander or sand by hand using a 100-grit sandpaper.
- Clean Dust – Vacuum any dust created by sanding, and use a tack cloth to wipe up any remaining dust. Note: Paint will adhere only to clean, dry floors, completely free from dust and debris. Do the work now to ensure that your floors are clean and ready to accept paint!
How to Paint Concrete Floors
- Prime Floors (optional) – First, you may need to prime floors using a high-quality primer designed for concrete floors. Many companies make concrete floor primers, including Kilz, Rust-oleum, and Zinsser. Primer enhances paint adhesion, making sure that you end up with a strong, durable floor. Read the instructions on your specific paint to know if using a primer is the right option for you. If using primer, follow the same steps you would for painting (4 – 7). Allow to dry completely before applying paint.
- Far Corner – After primer has dried, begin applying paint at the far corner of the room. Start opposite the exit you intend to use, so you don’t inadvertently paint yourself into a corner!
- Paint Edges – Paint along the edges of your baseboards or walls using a short handled, high-quality paintbrush. You can tape off your baseboards with painters tape first, if that helps you feel more confident in keeping a crisp, clean line.
- Roll Floors – Next, paint the floor (main area) with a paint roller, just as you would a wall. Use a roller brush with an extension handle for comfort. Saturate your roller cover, to eliminate air pockets (this will decrease likelihood of small air bubbles in your painted finish). You can either pour paint into a tray, or pour a small amount directly onto the floor and spread it from there.
- Smooth Lines– Work in small, narrow sections, no larger than what you can comfortably reach with the extension handle (about 5′ long x 2′ wide – but do what’s comfortable for you). Roll paint smoothly in a large W shape, trying not to leave lines or ridges between strokes. Press lightly, since pressing too hard is more likely to leave lines and air bubbles.
- Dry Completely – Work your way out of the room, painting in sections, and allow paint to dry 24 hours or per the instructions for your cement paint. Remember paint will be dry to the touch before it is fully cured, so resist the urge to walk on it once it feels dry. Follow the instructions on your specific paint’s packaging!
- Sand and Dust – If you plan to do a second coat, you can sand any drips or ridges lightly after the first coat is fully dried. Use 100-grit sandpaper and lightly buff away any high or rough spots. Wipe up any dust using a clean tack cloth.
- Second Coat – Finally, apply a second coat (follow steps 4 – 7) and allow it to dry completely before applying any normal wear and tear. Alternatively, you may do some light touchups if there are only small areas that need a second coat.
- Apply Masonry Sealer (optional) – Apply a masonry sealer if desired, following package instructions. A sealer offers the most durable and stain-resistant finish. However, you may want to skip it if you know you’ll want to touch up or reapply paint periodically. It’s easier to do additional coats without a sealer. Do your research to determine what is best for your space and your particular type of paint.
Tips and Tricks
- Wet Edge – Try to keep a “wet edge” as you work, meaning that you don’t let one section dry out before going over it with the next. Painting over semi-dry paint affects the finished texture, and it will be visible in certain lights. Remedy this by working quickly so that your paint doesn’t dry out before you’re ready.
- Long and Smooth– Use long, smooth sweeps with the roller. Small, choppy passes will show in your finished surface, since the texture is affected and will pick up the light differently.
- Work as a Team – Work with a partner. Two people working helps to ensure that your paint doesn’t dry out too quickly. For example, one could paint edges while the other rolls the floor. Or one could pour the paint and make sure there is always an even supply to work with. It’s also helpful to have a second set of eyes to catch any drips or unevenness.
- Store Wet Brush and Roller – You can store wet brushes and rollers in the refrigerator to reuse again later. Simply wrap them tightly in plastic wrap, making sure they are well sealed. Remove them from refrigerator and let them sit out until they reach room temperature. They’ll be ready to go!
- Removing painter’s Tape – When removing painter’s tape, either remove it while paint is still slightly wet, or use a box knife to score the edge before your tear it away. Pulling it away from dry paint without scoring it first will cause your paint to tear away in sections. If that happens, touch up with a small paint brush.
Concrete Floor Paint Design Ideas
Now comes the fun part! Of course, you can choose to leave your floors a single, solid color. But since you’re just working with paint, you can also choose to paint them in any design and style that you love.
So go ahead and think beyond the basic! Take your project – and your space – to the next level, using just a little paint. That’s right, turn your floor into decorative concrete. The options are endless. There are so many ideas for concrete floor paint designs, or you can be totally unique and design your own.
- Stencil – Purchase or create a stencil in any design you prefer. For instance, use a repeating, square pattern to mimic the look of tile. Or paint a curved design, such as a fleur-de-lis, randomly for a more free form look.
- Border – Add a border using a contrasting color or design. Even this one small detail can add so much depth to a space.
- Marble – Freehand paint veining to look like marble. There are many great tutorials online, and the final look is luxe! The beauty of this DIY is that you can add more or fewer veins, with as much or as little contrast as desired, to achieve your perfect look.
- Checkerboard – Retro black and white checkerboard floor, anyone? Choose any two colors and alternate them to create this fun pattern. A checkerboard marble floor would be lovely – a lot of work, but lovely!
- Harlequin – Simply a checkerboard turned on the diagonal, but it feels more elegant, don’t you think?
- Stripes – Classic stripes will never go out of style. This is a simple way to create a decorative concrete floor with minimal effort and just a few tools.
- Geometric – For a more contemporary look, choose a geometric shape and paint it in a repeating pattern. Hexagons, for instance, would look incredible on the floor! You’ll definitely want to get an accurate pattern to work from first, since hexagons need just the right angles in order for the shape to repeat correctly. Choose your favorite shape and go with it!
- Rug – Paint a “rug” on your floor, in any colors or pattern you like, by taping off the area and painting. Rugs – even faux ones – can help visually ground an area and define a space. I love that this project can warm up an outdoor living space with just some elbow grease and paint. Once finished, it’s the ultimate low maintenance rug!
- Games – For play spaces, paint games onto your floor! Think hopscotch, four square, and Twister. Or go big and create an indoor basketball court! The options are endless and so much fun!
While you’re choosing a flooring design, keep in mind the overall design of the space. A large, bold design may seem like a great idea in an empty room, but once everything is moved back in, it could quickly overpower the other elements in the room.
Higher contrast, bold shapes and patterns, will grab attention away from other design elements in your space. That’s fine if you want the floor to be the star of the show. However, if you’re looking for it to be a nice layer without being overpowering, stick to choosing colors in soft neutrals with small, simple patterns.
What flooring design ideas do you have or have you tried in your home? I’d love to see all of your beautiful interpretations of this practical flooring option. Paint can change everything in a space!
How Do You Clean Concrete Floor Paint?
Although this new surface is very easy to care for, you’ll need to clean it occasionally of course! To care for your newly painted surface, simply follow these easy steps:
- Sweep – This may seem obvious, but regular maintenance, such as a quick or sweep, light mop, or quickly cleaning up spills when they happen goes a long way in keeping your floors looking as good as new.
- Mop – Clean your floors the old fashioned way and use a solution of dish soap and warm water, along with a standard mop. Wring out excess water before mopping, and mop only with a lightly damp rag. Dry with a towel or allow to dry fully on their own before heavy use.
- Quick Mop – A Swiffer mop works well for a quick mopping. You don’t always have to do a detailed mopping of every nook and cranny. Even a quick, light mop helps to keep your floors feeling fresh and new.
Most of all, I love that this concrete coating is extremely durable and can withstand most cleaners. Because of this, it’s a floor we can enjoy for years to come!
Thankfully, yes! If you’re looking for something beyond the basic utilitarian gray colors of years past, you are in luck! Most of the concrete paints listed above are available in a variety of colors. This makes customizing your cement floor paint so easy. With so many options, the hardest part will be choosing your colors!


We are thinking of painting our laundry room, very small space with unfinished floor. We have a little unevenness in the floor from the original demo we did two years agao, any advice on how to prep that space before we paint?
I’m not sure you can do much beyond a thorough cleaning, but it’s a thicker paint, so it will help conceal some imperfections. Ours was far from an even, pretty surface before.
Even though the laundry room is a basic room in any house, you have created a rather elegant feel to your laundry room. Sometimes painting over the concrete can hide tiny imperfections that would otherwise show up. With the floor being painted, it adds a really nice shimmer to the floor.
So, I have a condo (townhouse style). Downstairs, I pulled up the carpeting in the living/dining room and painted the slab cement floor. I started to fill in the holes where the tack strips were (but did not do all of them), because eventually, I will cover the entire floor with “hard wood” looking tile. Since I did not have the money to do this tiling project right away, I decided to paint the floor, forego most of the filling in of the holes, purchase two inexpensive rugs, and everything looks decent until I can get the tiling project handled and paid for!
Yay!!! So glad it helped you achieve what you were looking for.
Hi! We want to paint our basement floors, but pulling up the old carpet and tack strip has left us with some small potholes all around the edges.. did you have these? If so, did you fill them first & with what? thanks!
A few, but the paint is so thick it filled them.
Did these hold up? we are thinking about painting our laundry room floor but my husband thinks its will chip fast
They held up incredibly well! 3 years & no chips or noticeable scratches…I was very impressed. I thought they’d show wear, but didn’t!