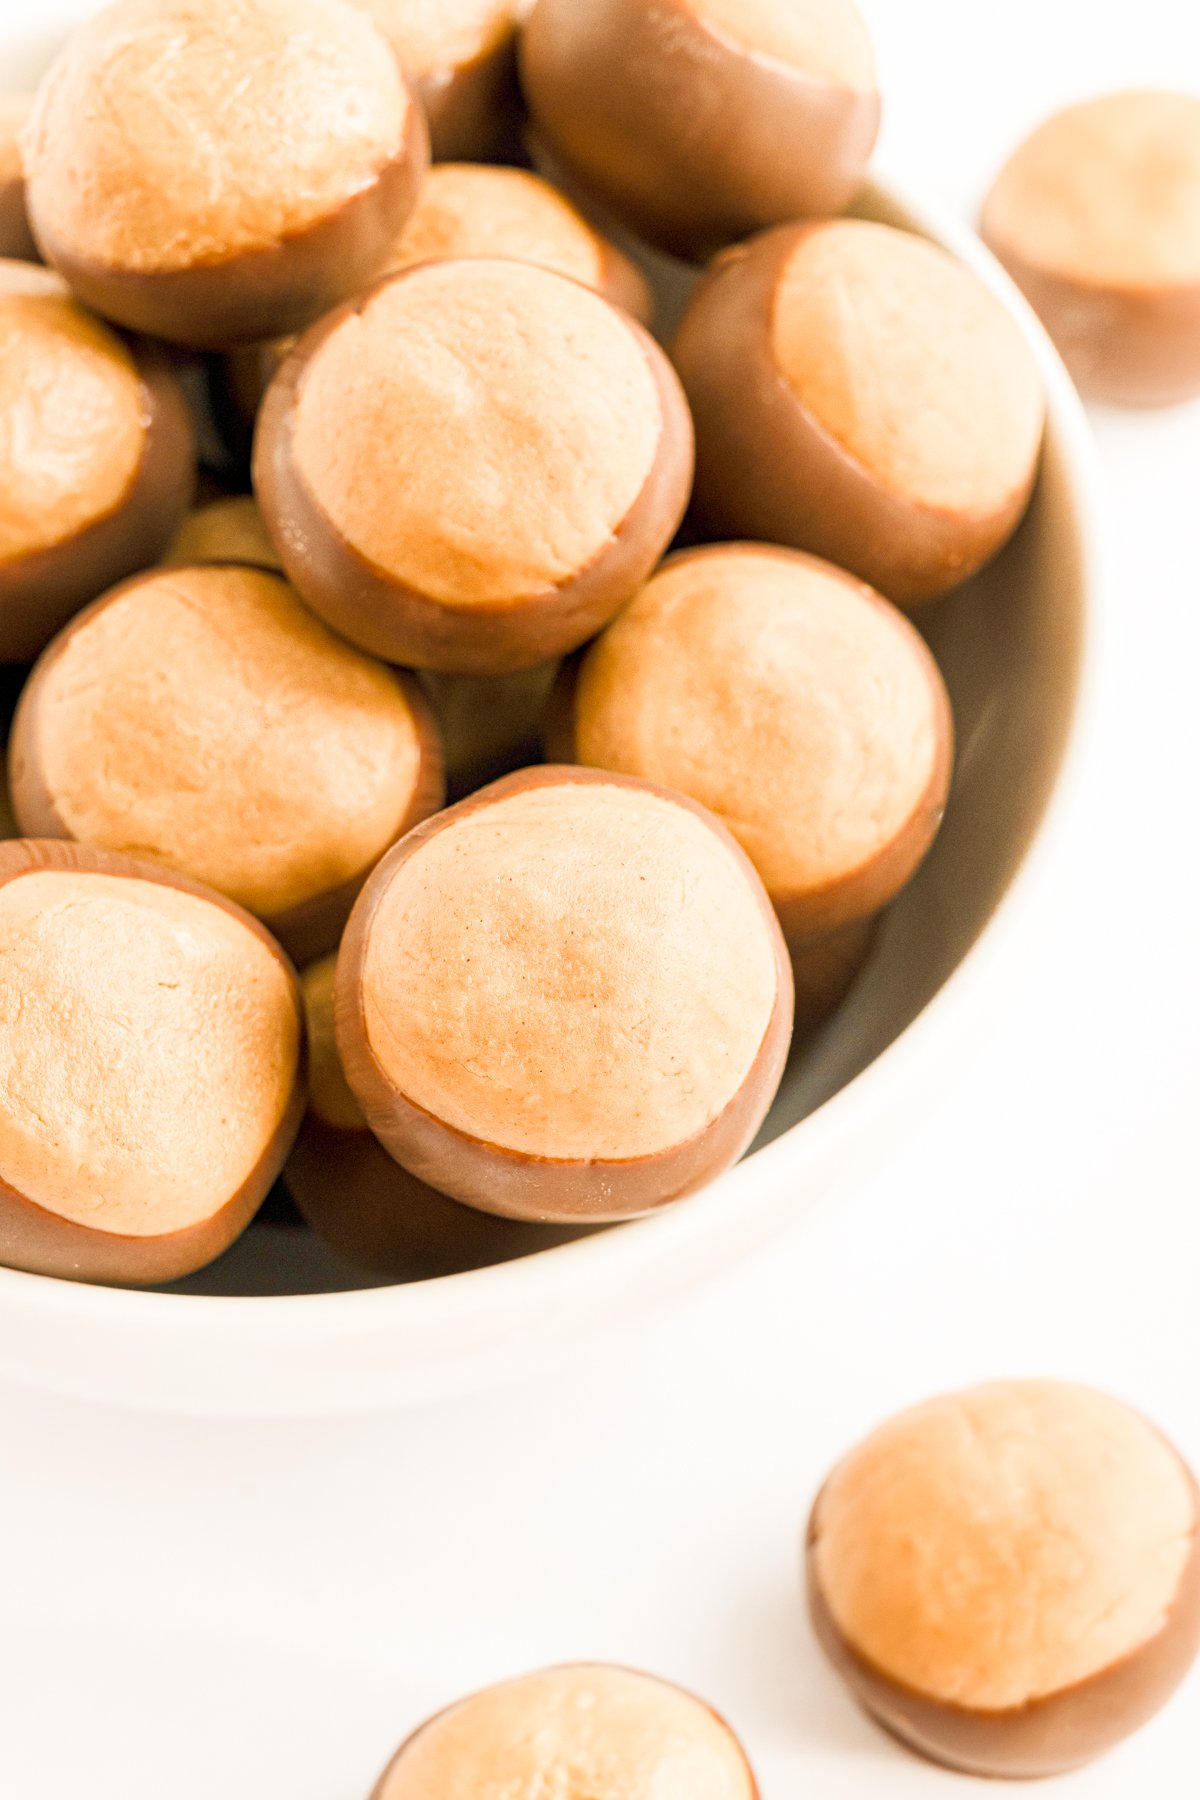
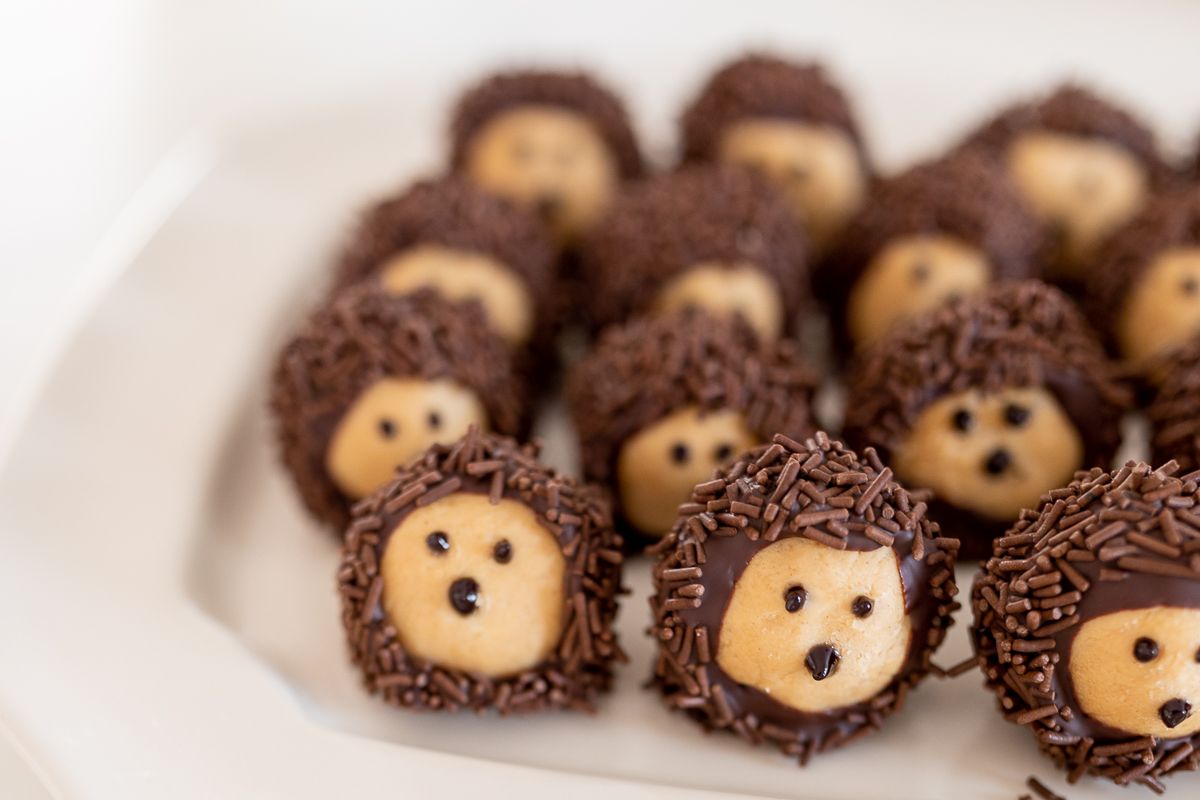
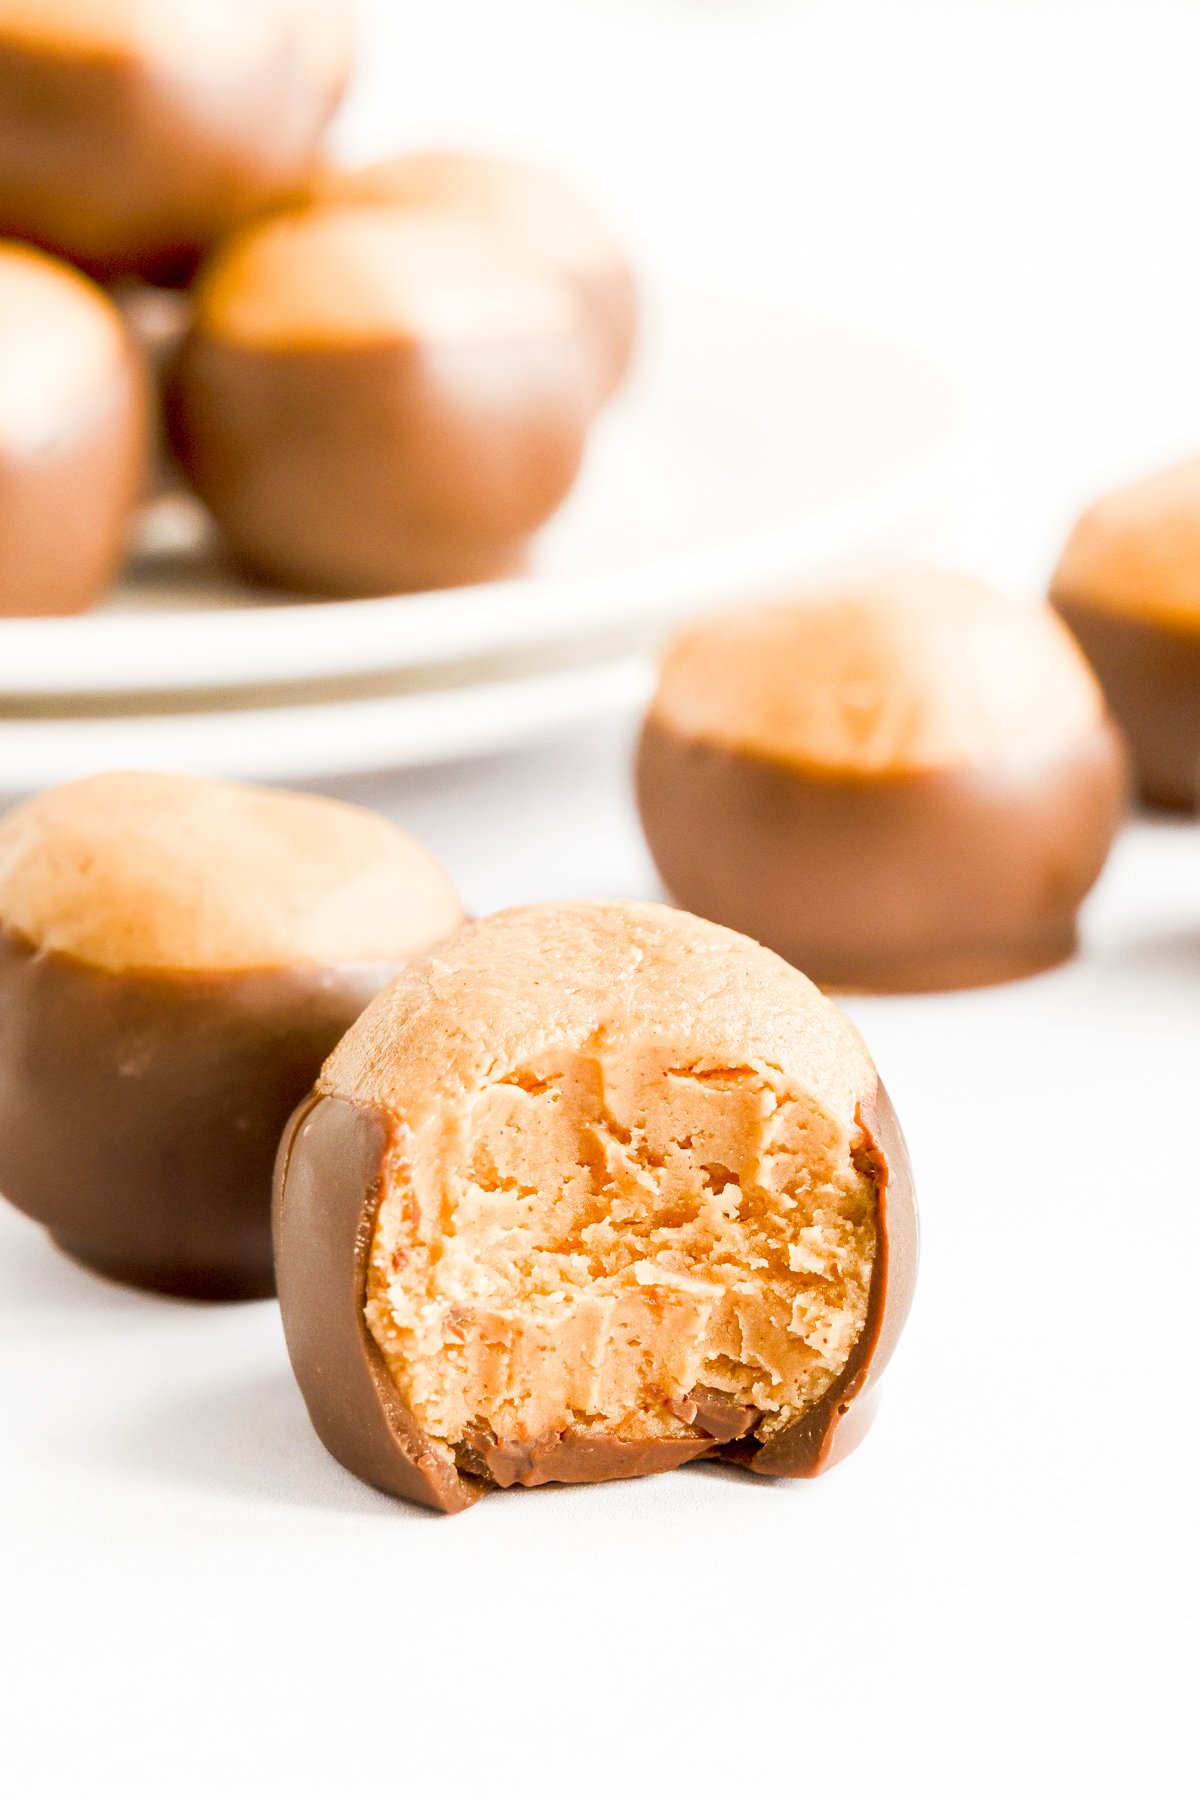
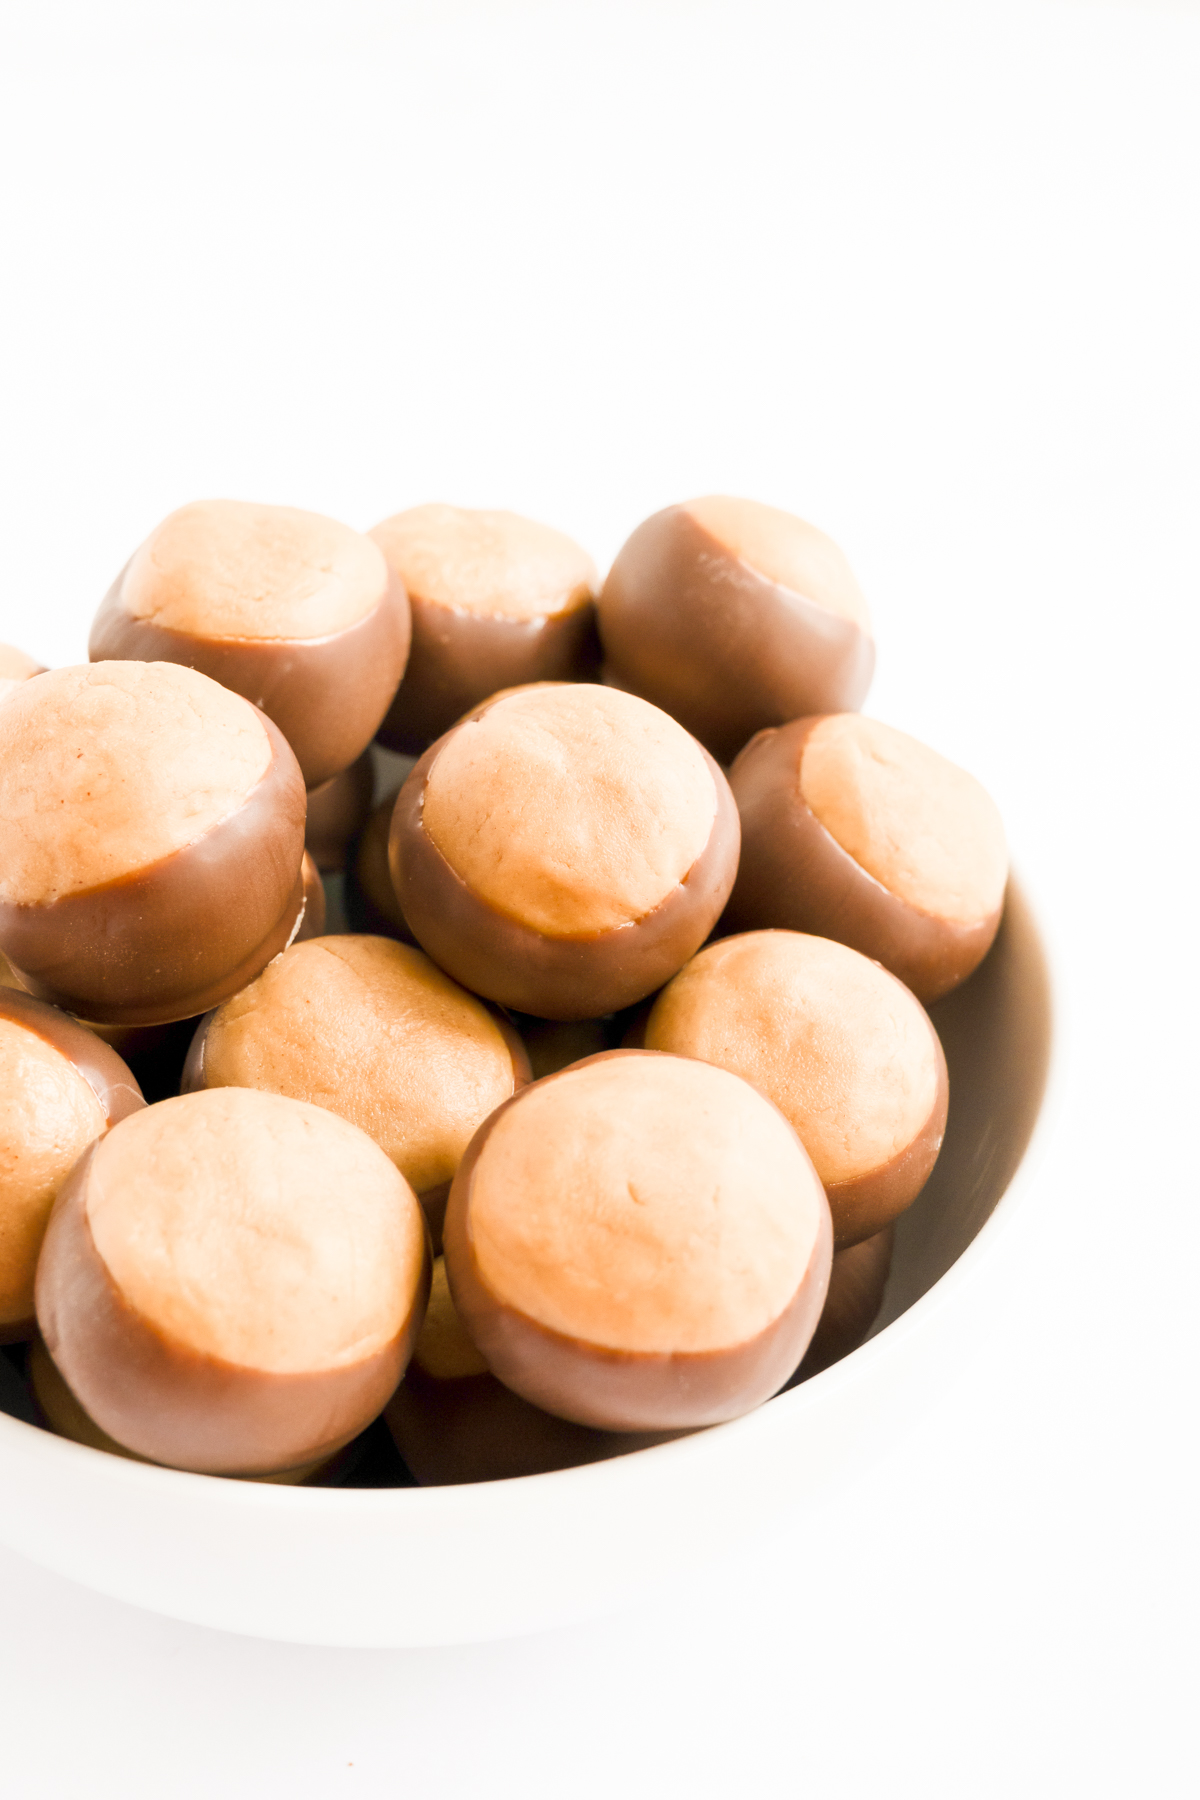
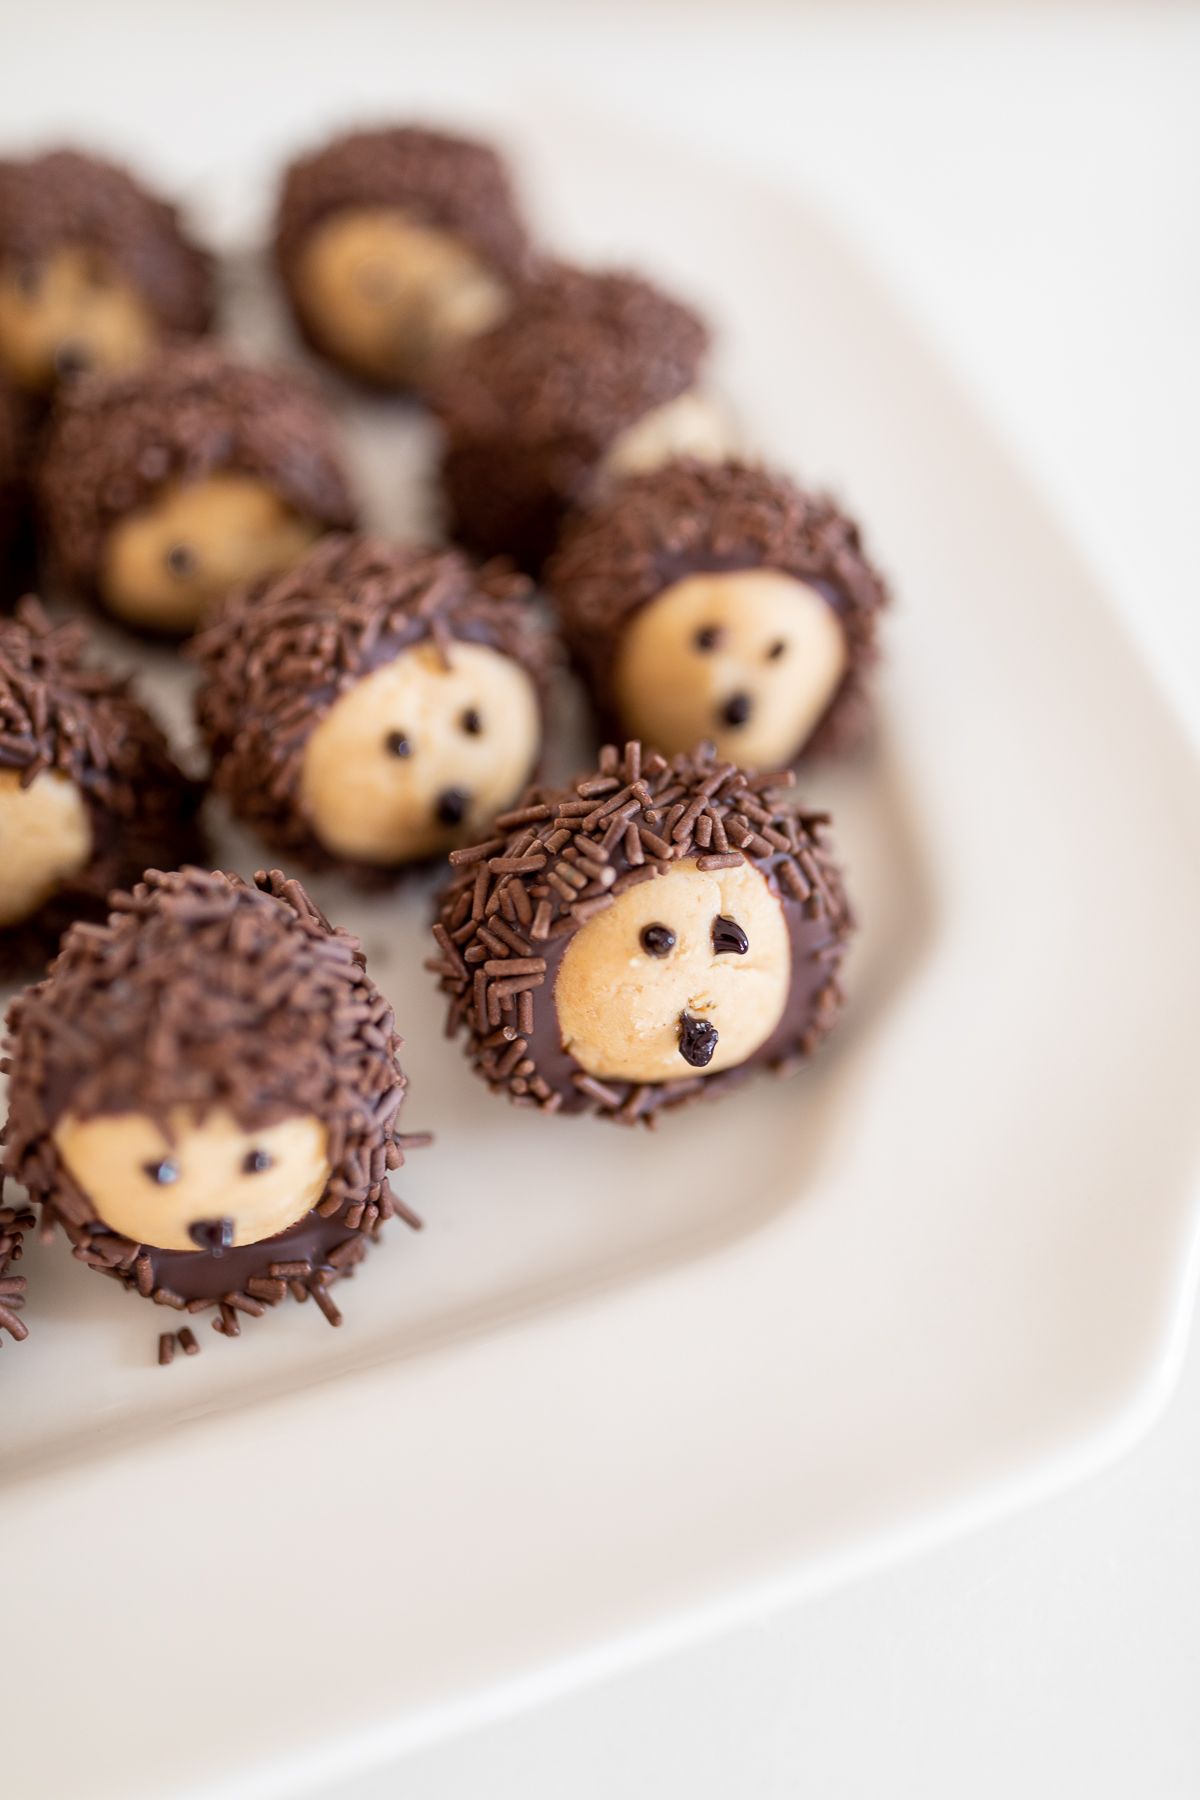
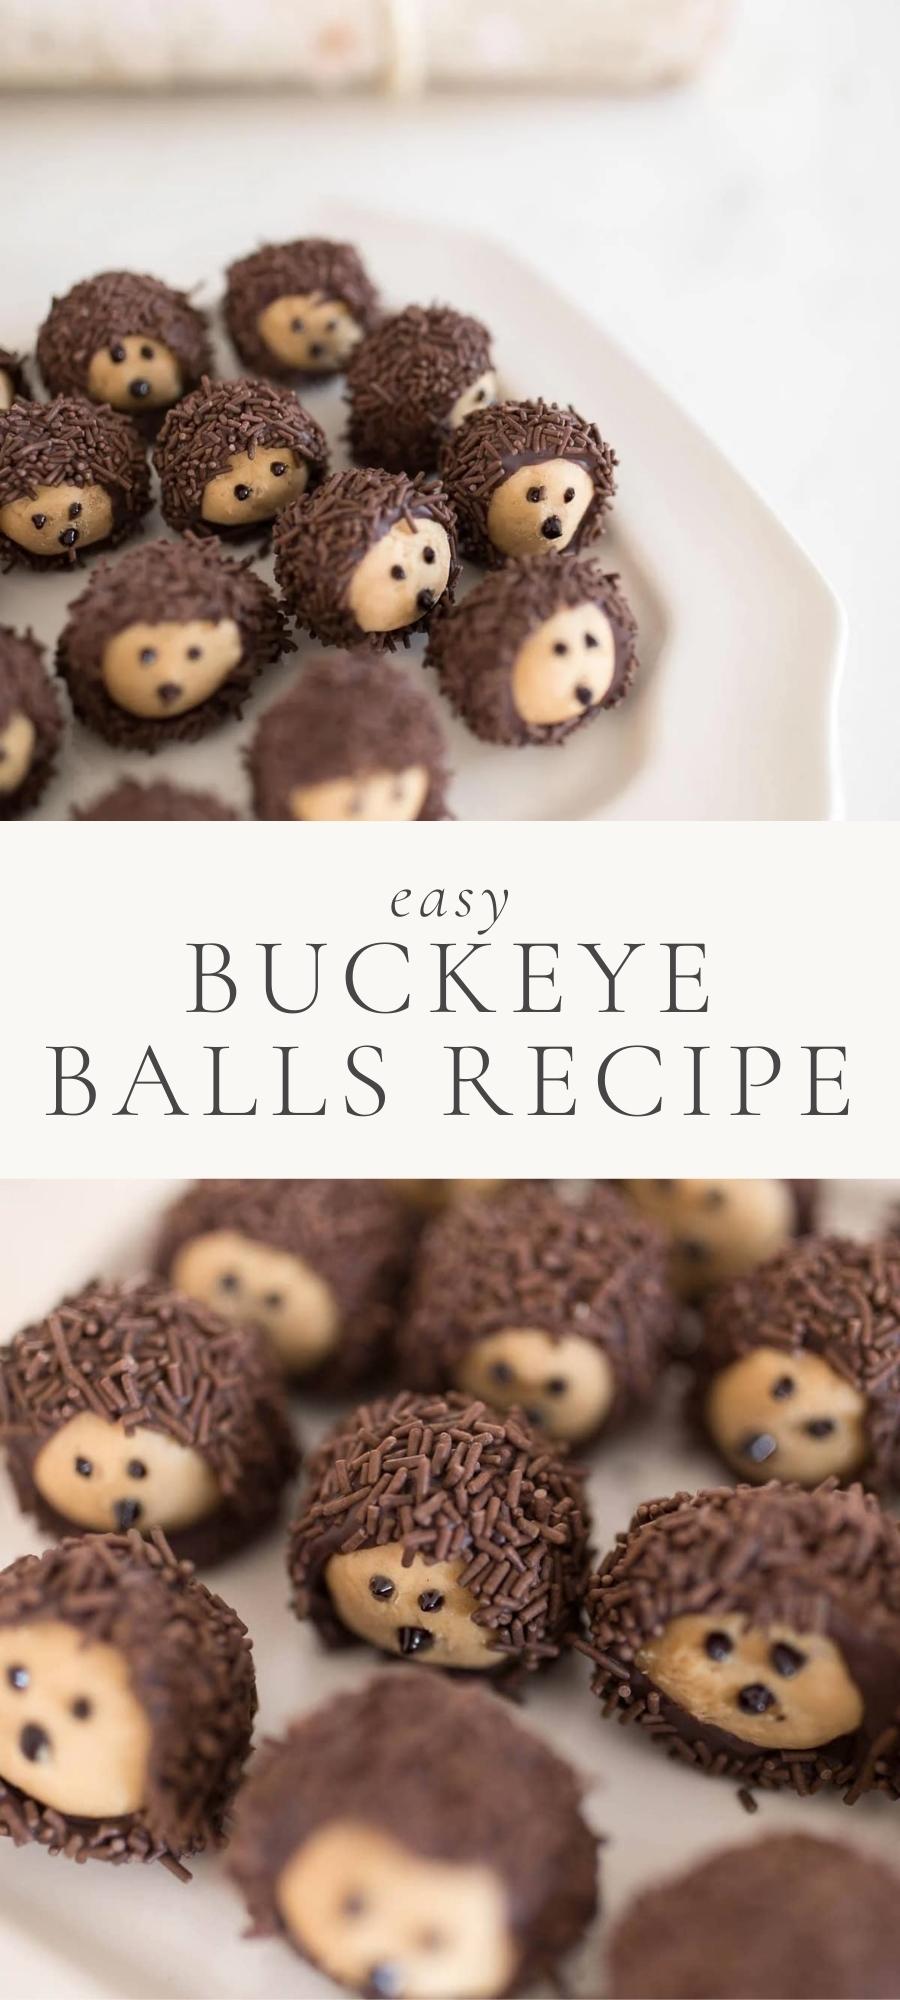
This Buckeye Recipe is the most delicious combination of a creamy peanut butter center and chocolate exterior. I’m even showing you how to turn this classic treat into the cutest little chocolate hedgehogs!
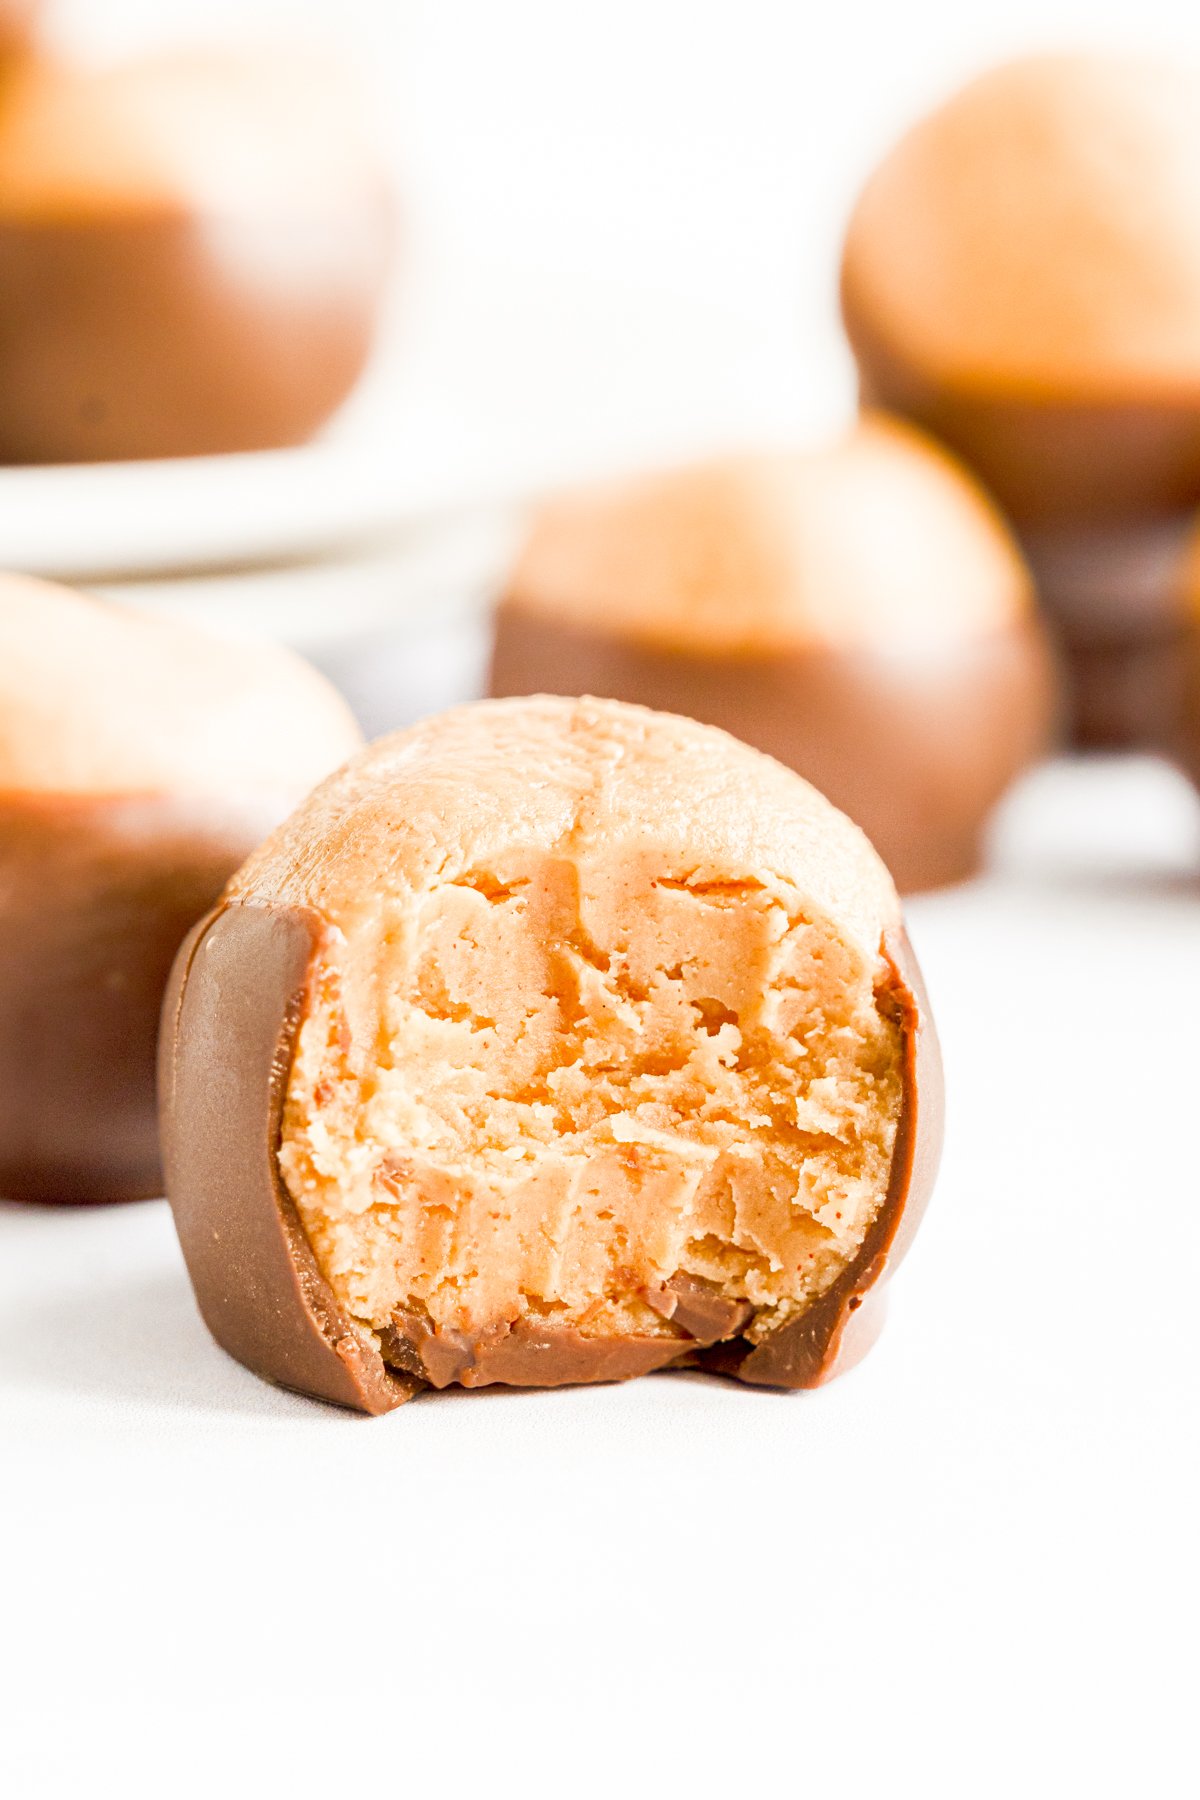
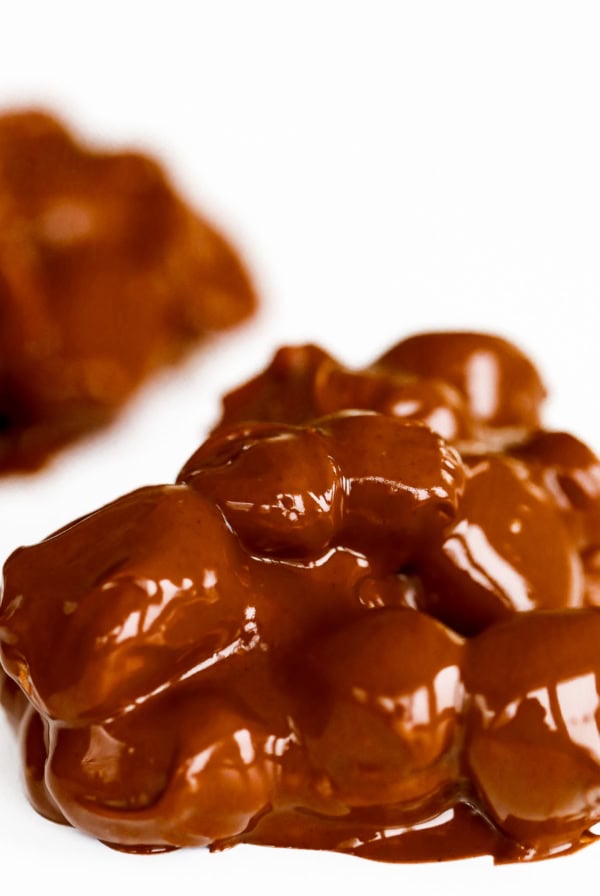
This no-bake treat is delightfully sweet, salty and creamy. When the peanut butter mixture is dipped in sweet melted chocolate, the result is similar to a peanut butter cup. They are as fun to make as they are to eat!
If these classic peanut butter treats are delicious, then my hedgehog version is even more so, thanks to the texture that the sprinkles add. I love these buckeye balls with or without sprinkles, and I also make them into peanut butter football truffles too!
My classic buckeye recipe uses a very simple method of melting the chocolate (paraffin free)! In fact, it’s my secret that creates the perfect chocolate exterior to balance the creamy peanut butter.
copy and paste to add ingredients to your grocery list
Shopping List
- Powdered Sugar
- Creamy Peanut Butter
- Salted Butter
- Vanilla Extract
- Milk Chocolate Melting Wafers (or chocolate chips)
- Vegetable Oil
- Chocolate Sprinkles + Food Safe Marker (Optional if you’re making hedgehogs)
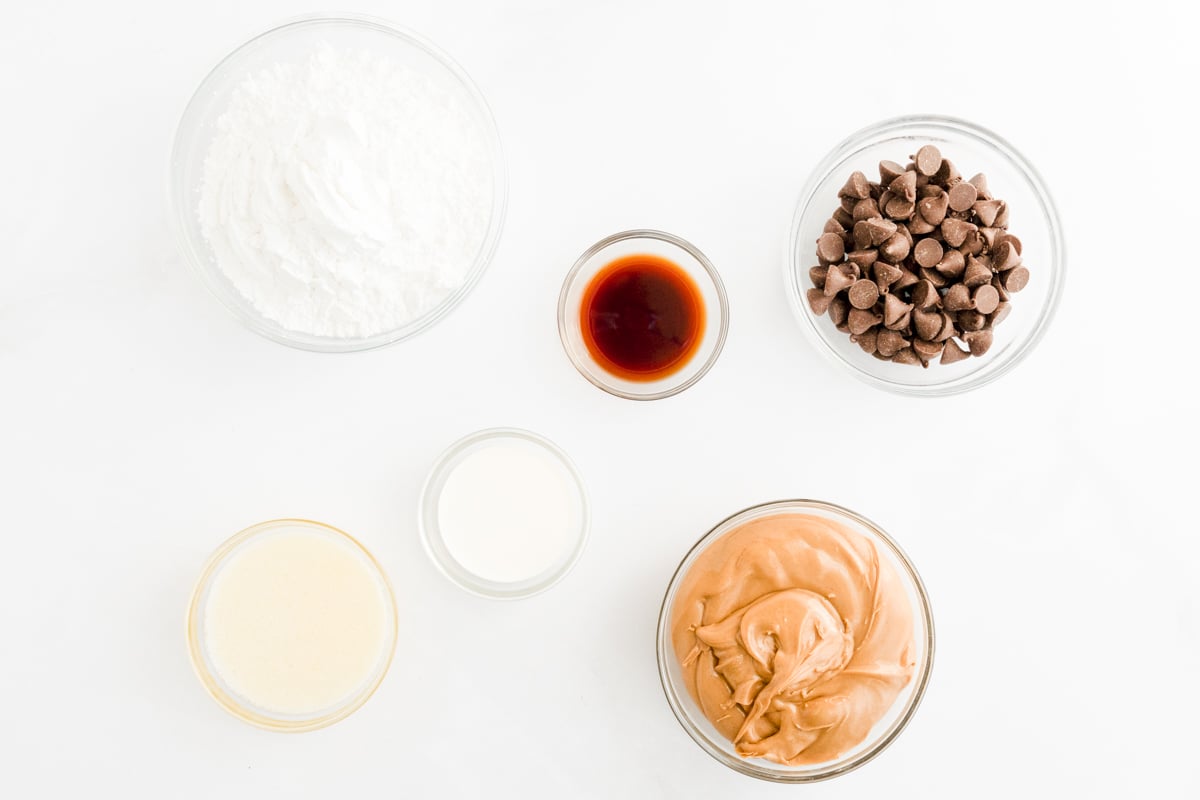
Ingredients and Substitutions
- Peanut Butter – Do not use natural or homemade peanut butter for this recipe, as the consistency won’t be the same. Try a crunchy peanut butter instead of creamy if you want a little more texture.
- Salted Butter – Use unsalted if you prefer.
- Vegetable Oil – Use canola oil if that’s what you have on hand.
- Vanilla – Substitute with almond extract if you prefer.
- Powdered Sugar – Learn how to make powdered sugar here.
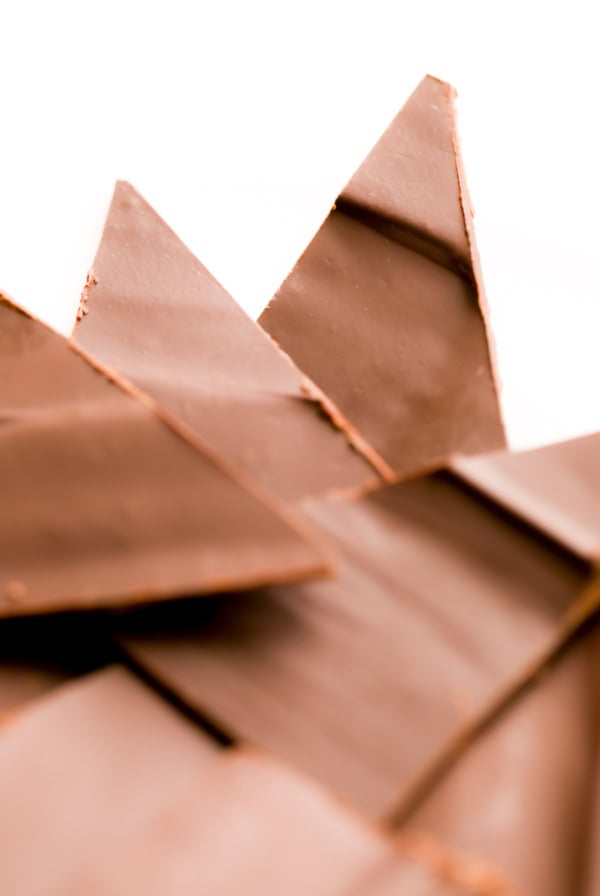
- Chocolate Chips – Use your favorite type of chocolate – semi-sweet, dark, milk chocolate or any kind! After experimenting (and after our photos) we found that Ghirardelli melting wafers work even better than chocolate chips, as they melt perfectly and can be reheated as necessary.
How to Make Buckeyes
Cream – Beat the peanut butter, butter, and vanilla together until smooth.
Stir – Gradually stir in the powdered sugar.
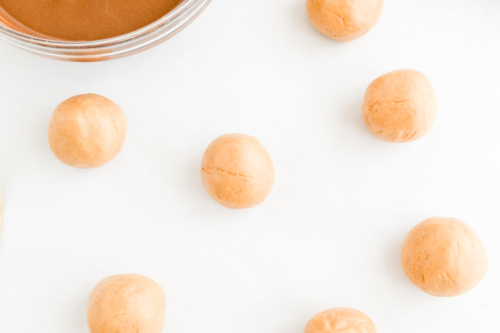
Roll – Scoop and roll you batter into smooth, round balls.
Cool – Freeze your balls before dipping.
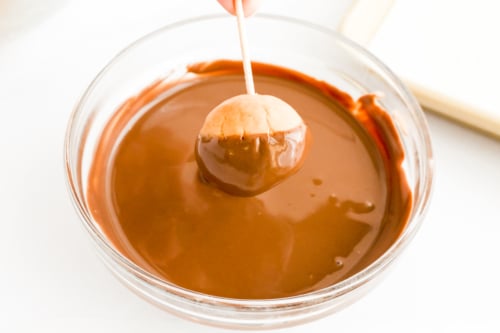
Melt – Microwave your chocolate and vegetable oil until smooth.
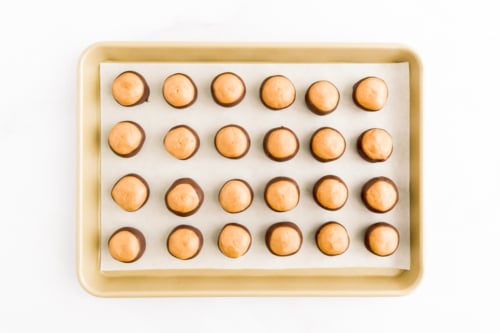
Dip – Use a toothpick inserted into the center of each ball to dip most of the way into the chocolate. Place on a parchment-lined sheet pan.
Cool (Again!) – Refrigerate the buckeyes until the chocolate has hardened.

Tips From My Test Kitchen
- Line your baking sheet with parchment paper to prevent sticking and allow for easy clean up.
- If dough is a bit too sticky to roll, try adding an extra tablespoon of powdered sugar.
- You can use the gel writing icing to add the hedgehog face before or after refrigeration. To ensure you won’t have bleeding, add gel faces after refrigeration.
Storing Leftovers
Buckeyes will last up to 2 days at room temperature, stored in an airtight container. Store them in an airtight container in the fridge for up to 2 weeks, or pop them in a freezer bag and freeze for 2-3 months.
Frequently Asked Questions
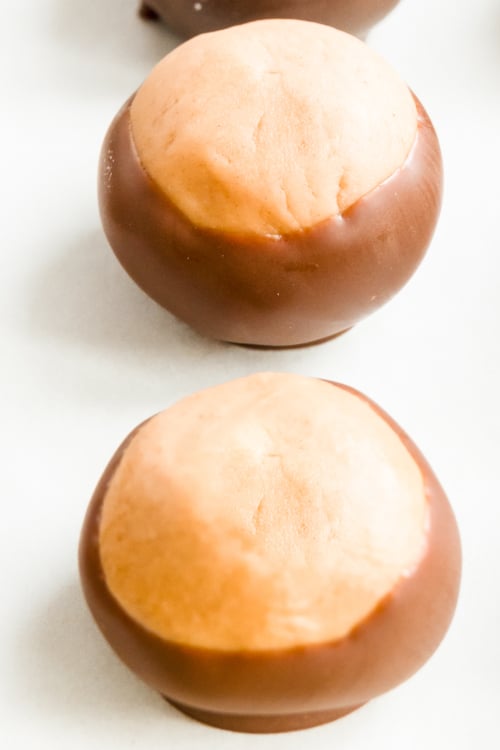
The difference between chocolate peanut butter balls and buckeyes candy are that chocolate peanut butter balls are coated entirely in chocolate, while buckeyes leave the a little peanut butter showing at the top.
Buckeyes are a little different from traditional chocolate and peanut butter balls, which are completely covered in chocolate. They resemble the nut of the Ohio buckeye tree, which the state tree of Ohio, hence the name.
Use a toothpick to stick into the peanut butter, hold onto the end of the toothpick and dip them into the chocolate – works like a charm!
I prefer to use one of the mainstream brands for this buckeyes recipe because they contain the necessary natural oils to keep the peanut butter from separating.
Absolutely! This chocolate-covered treat is all about your preference. If you prefer a less sweet treat, using dark chocolate instead of semi-sweet will help you achieve that goal.
Yes, you can! You can add nuts, or mini M&M’s are another fun option.

Buckeyes Recipe
Ingredients
- 2½ cups powdered sugar
- 1 cup creamy peanut butter
- 6 tablespoons salted butter melted
- 1 teaspoon vanilla extract
Chocolate topping
- 8 ounces semi-sweet chocolate chips or wafers
- 1 teaspoon vegetable oil
For Decorating as Hedgehogs (optional)
- ½ cup chocolate sprinkles
- Black writing gel icing
Instructions
- In a large mixing bowl, beat peanut butter, butter and vanilla until well combined.1 cup creamy peanut butter, 6 tablespoons salted butter, 1 teaspoon vanilla extract
- Gradually add powdered sugar, ½ cup at a time until combined.2½ cups powdered sugar
- Scoop and roll into round balls and place onto a parchment lined cookie sheet.

- Freeze 30 minutes.
- While the peanut butter balls are in the freezer, microwave chocolate and vegetable oil in a small bowl in the microwave. Use 30-second increments and stir until smooth.8 ounces semi-sweet chocolate, 1 teaspoon vegetable oil
- Take the sheet pan of peanut butter balls from the freezer. Holding a toothpick, spear the ball of peanut butter and gently dip each one into bowl of melted chocolate. Return to sheet pan to dry.
- Optional: dip in sprinkles and place on the cookie sheet.½ cup chocolate sprinkles
- Refrigerate 30 minutes or until chocolate has hardened for serving. Serve at room temperature.

To Turn into Hedgehogs
- Optional: dip in chocolate sprinkles before chocolate fully sets, and place on the cookie sheet.
- Use chocolate writing gel icing to add eyes and a nose to each buckeye.Black writing gel icing

Julie’s Tips
-
- Line your baking sheet with parchment paper to prevent sticking and allow for easy cleanup.
- If the dough is too sticky to roll, add an extra tablespoon of powdered sugar.
- We found that Ghirardelli melting wafers work even better than chocolate chips, as they melt perfectly and can be reheated as necessary.
- Rolling them in sprinkles can add a seasonal touch or help them coordinate with an event (like our hedgehogs). Try red and green sprinkles for Christmas or pastel nonpareils for Easter.
- Hedgehogs – You can use the gel writing icing to add the faces before or after refrigeration. We added them after refrigeration to prevent any bleeding color.
Estimated nutrition information is provided as a courtesy and is not guaranteed.


Couldn’t give a minus star or I would! No amounts on the ingredient list!
You didn’t click or scroll to the printable recipe card.
I love love love this recipe. Ive got a friend who can’t get enough Peanut butter. Mine is too dry, I’m sure it was too much powdered sugar. Ive covered my mixing bowl with plastic wrap. I Havent rolled and put them in freezer yet. Please help.
Thank you
Claudia
Oh no! What kind of peanut butter did you use? Also, were they exposed to air for very long? You can reduce the powdered sugar, but to “fix” these, you can add more peanut butter until they achieve the right consistency.
Hi, I haven’t made these, yet, but a tip I like to use when I’ve made Butter balls/Buckeyes is coconut oil. I use extra virgin cold pressed and oh my, the flavor that couple TBS brings is a step up! It pairs delectably with the chocolate and peanut butter.
I want to make these with biscoff. My son has severe allergy to pb. But I love it. Is biscoff to runny? Maybe I could add more powdered sugar? They look absolutely adorable!!!
Hello!
That sounds like a wonderful idea, though we’ve never tested it! If you give it a try, please be sure to report back and let us know how it goes.
Enjoy,
Julie
This is super close to my moms recipe–minus the paraffin. I like that you do not use paraffin because it leaves an unappealing texture in my mouth. I also wanted to ask if you have ever added a little sea salt to the top? I think I will try it! I love salted chocolate as much as salted caramel!
Um, yes! I loooooove adding thick flakes of sea salt to just about everything. And I agree, I’ve never been a fan of paraffin for the same reason. Enjoy!
Thinking about make these and the hedgehog way ! Did you just use sprinkles for the eyes and nose? ??
I’m not sure I knew there was a hedgehog ? emoji, but now that I do, watch out!
I used black gel icing purchased in a tube in the cake aisle. Sorry I didn’t mention that. Hope you enjoy them, too! The crunch takes them over the top!
What is the yield on this recipe?
24
Do the eyes and nose go on after refrigeration?
Hi Victoria,
You can do it either way. I try to do them after refrigeration though, just to ensure that there’s no bleeding with the gel icing.
I hope you enjoy these delicious little treats!
Happy Thanksgiving,
Julie
Hi
I just wondered how long these can store for ?
Thanks!
Two weeks refrigerated in an airtight container, enjoy!
How many does this recipe make???