How to make a teepee without sewing – a quick and easy diy teepee tutorial!

Hello! Welcome from Pinterest, Google, or wherever you stumbled across my little blog. I am so excited to meet you! I hope you enjoy learning how to make a teepee with this easy tutorial and follow along on Instagram or subscribe here for more effortless ideas.
Ani’s birthday is just a week after Christmas, which makes gift-giving nearly impossible for her. We are fortunate to have a home full of toys, books, games and clothes. Still, I want her birthday to feel special, regardless of the date.
How to Make a Teepee
I thought about what I loved as a child and remembered a {Popples} tent that was securely placed on my bed for months on end. It was almost magical as a child to read books and play with my dolls in there.
My love for licensed merchandise ended with my youth and I wanted to create something beautiful that she could leave up – a fixture in her room, like Adalyn’s play table.
I decided to make her a teepee tent!
After researching them, I was taken aback by the cost and couldn’t find the “perfect” kids teepee to fit the color palette and style of her room. That’s how most of my DIY projects begin – with a “need” to fill and no source to fill it.
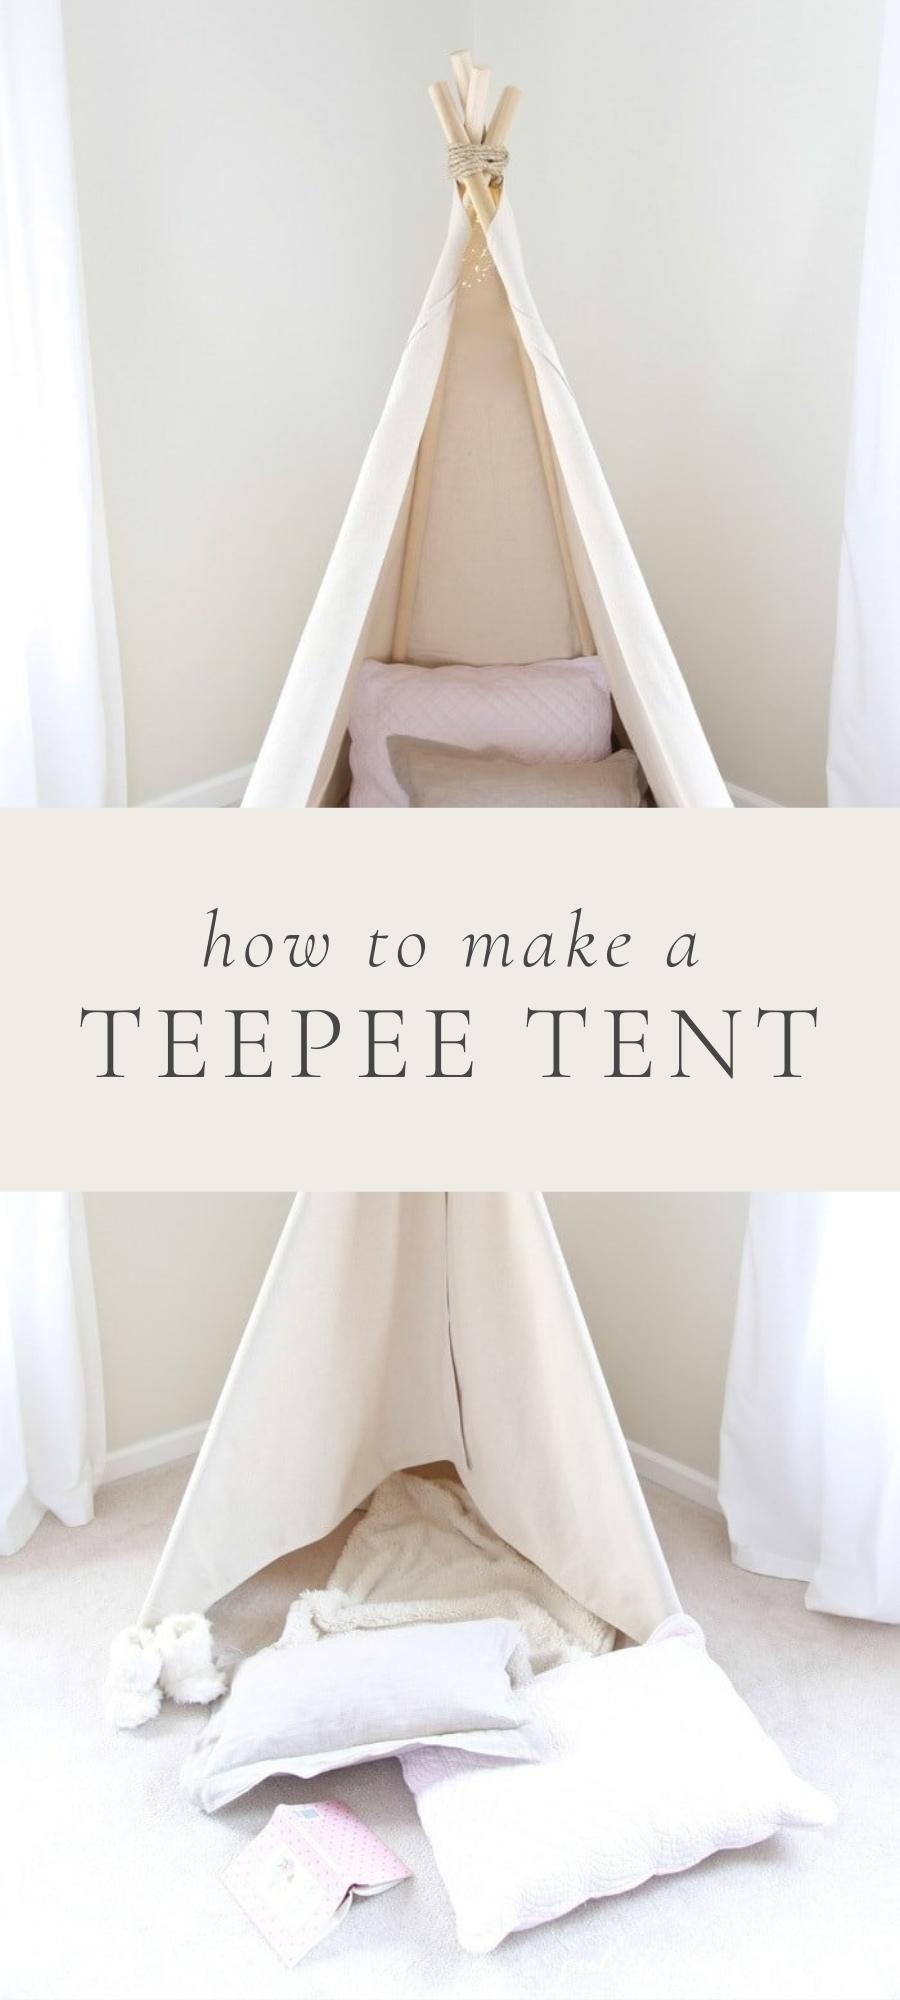
You guessed it, today I’m sharing how to make a teepee! This simple do-it-yourself project is a true no sew teepee you can create in less than an hour for $60.
Don’t let the instructions intimidate you…it’s like washing your hair: lather, rinse, repeat.
How to Get Started
Before starting this project, I was a bit overwhelmed and worried it wouldn’t work. All of the methods I found demonstrated how to create no sew teepees with stitch witchery or by weaving fabric.
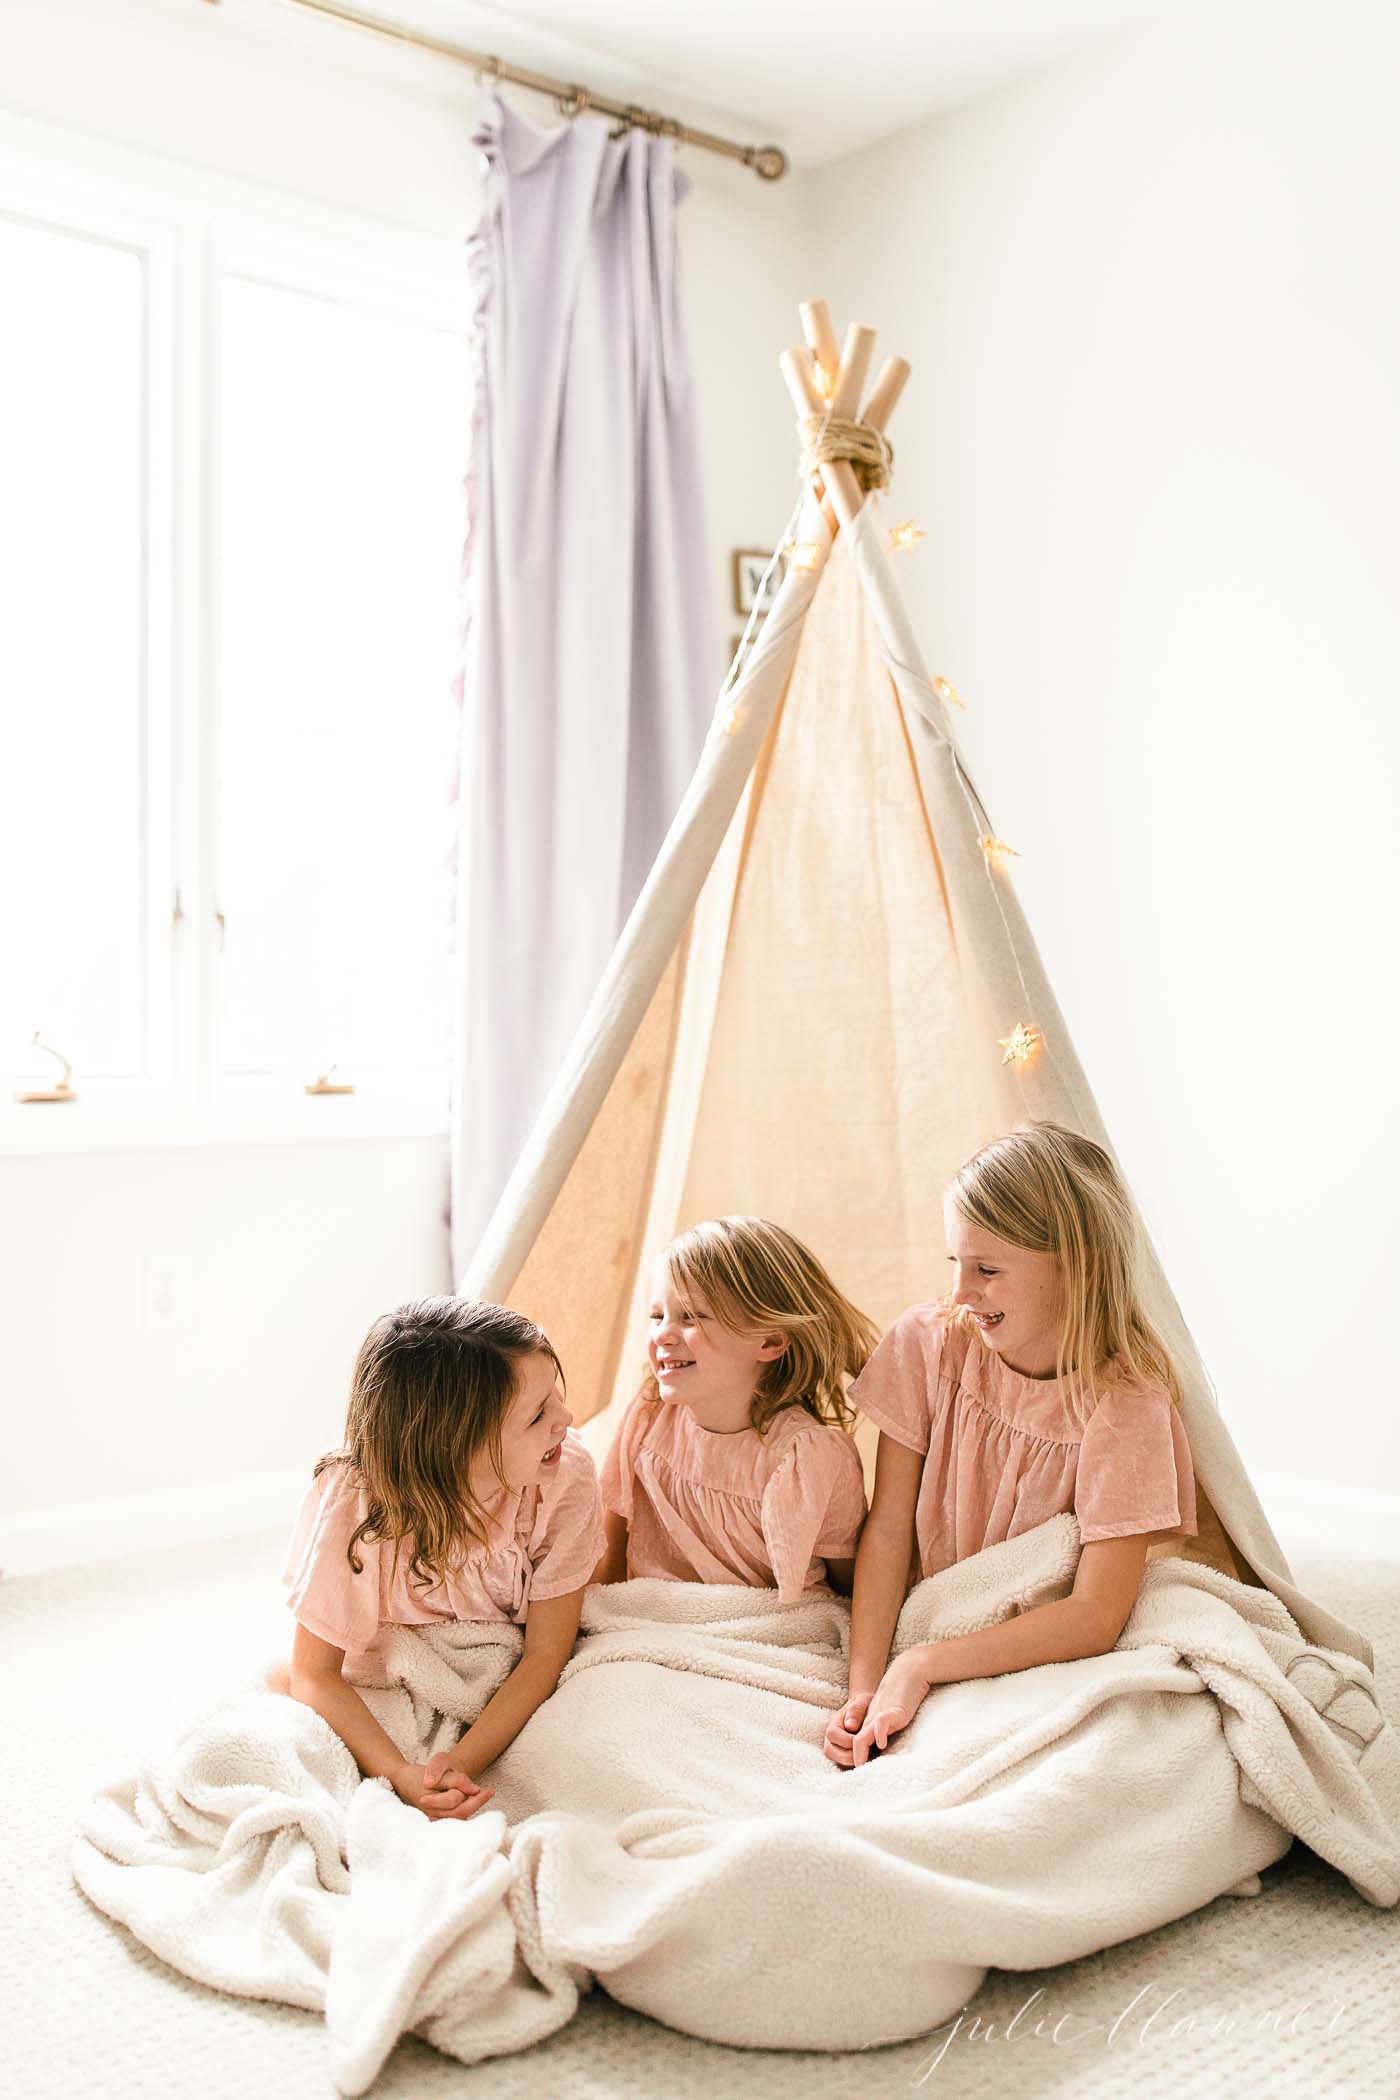
We wanted to create a teepee that would stand the test of time and show durability for our three toddlers.
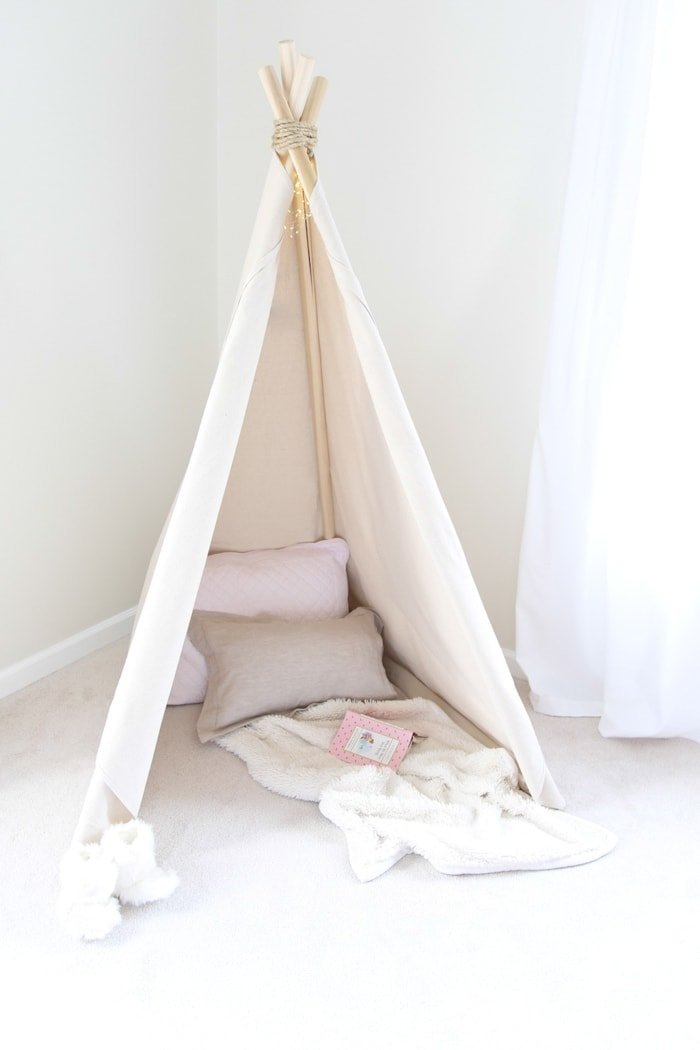
The teepee tent can easily fold up and be stowed away or be taken outdoors for an evening of fun. It is also the perfect size for a bedroom – 3 girls easily fit in it and have spent hours reading and playing.
I’m so thankful we took the leap and made a teepee for Ani. I hope they share the same fond memories I did as a child.
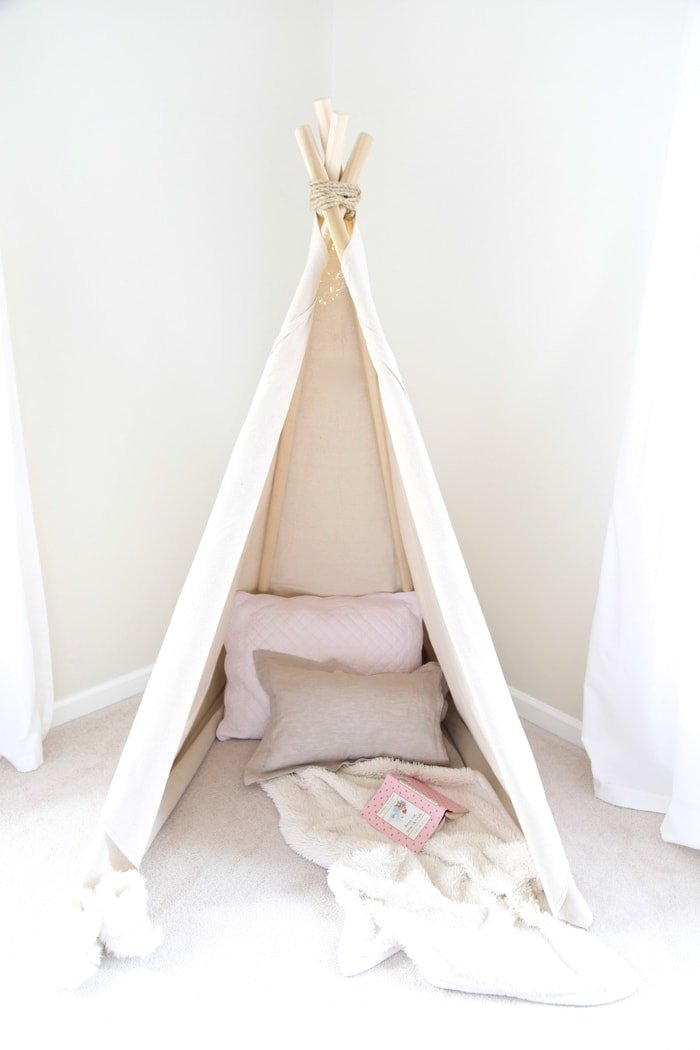
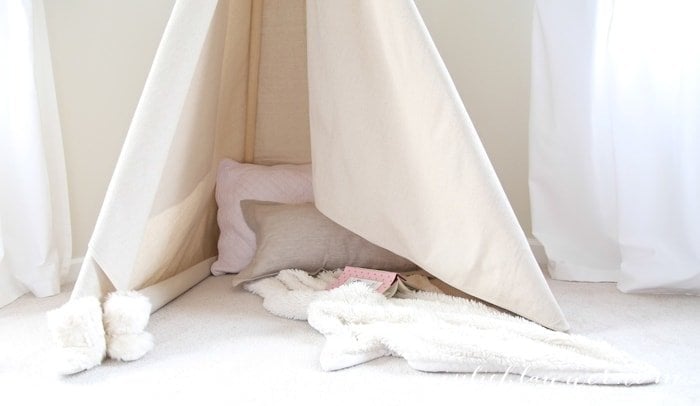
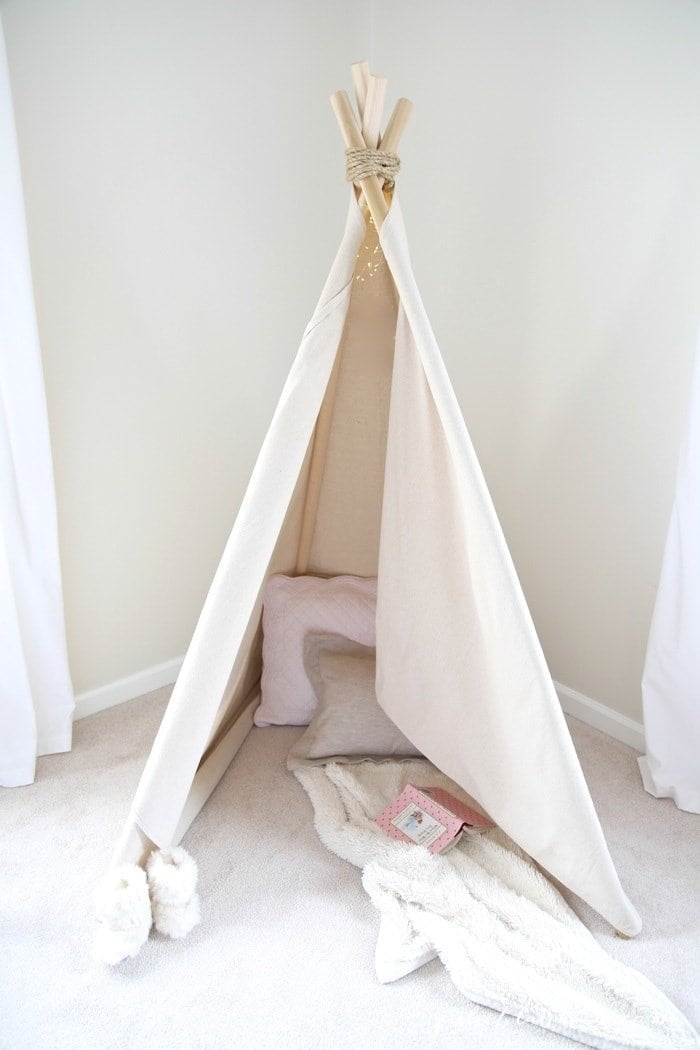
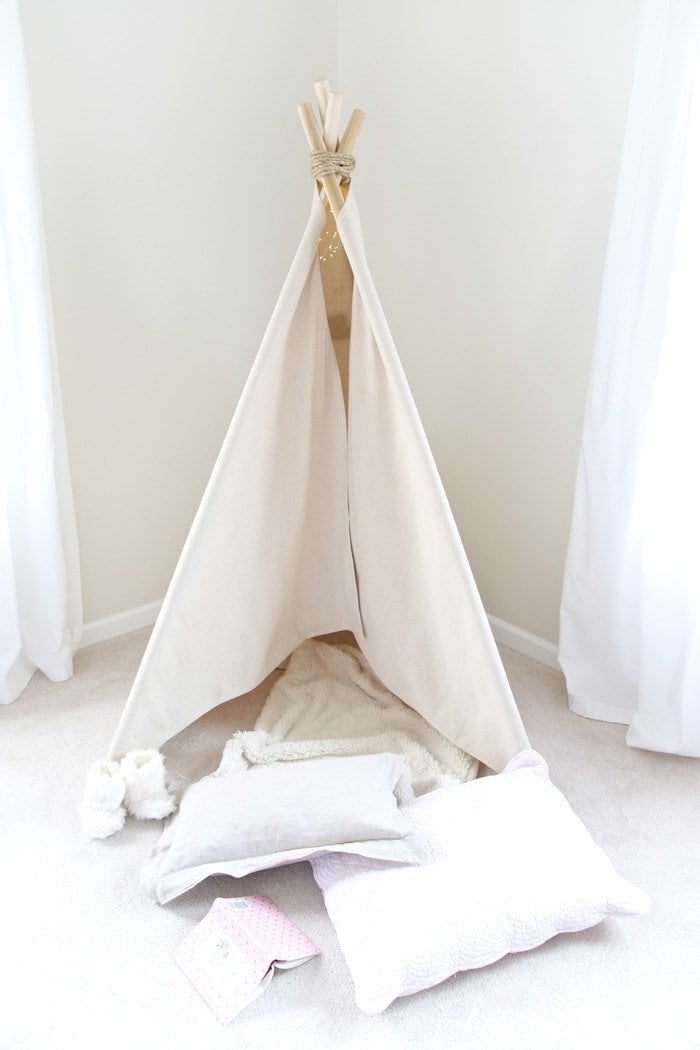
Because our girls are little, I decided not to do ties. The heavy canvas folds back beautifully and stays without effort.
The heavy canvas drop cloth is durable, making it a great long-term teepee that’s stable as well. I added battery operated lights through the top of the teepee to make it even more enchanting!
Supplies
- 4 1¾’x6′ poplar dowels {link it to slightly thicker dowels}
- 3/8″ sisal rope
- 6×9′ canvas drop cloth
- 3 screws
- 3 washers
Tools:
- scissors
- lighter
- drill
How to Make a Teepee
Time: 30-45 minutes.
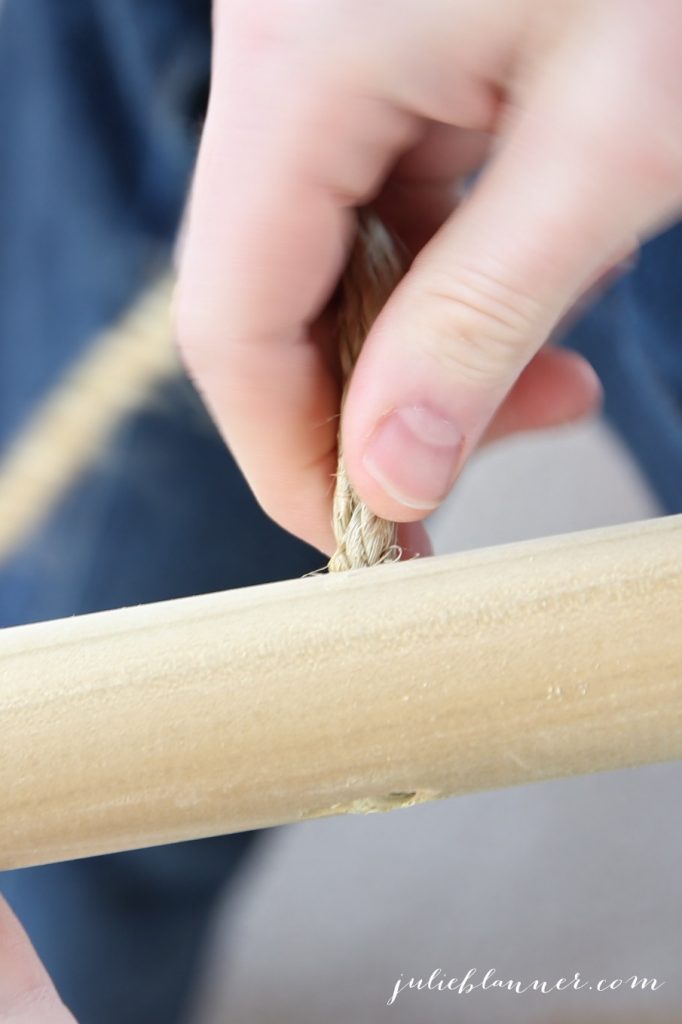
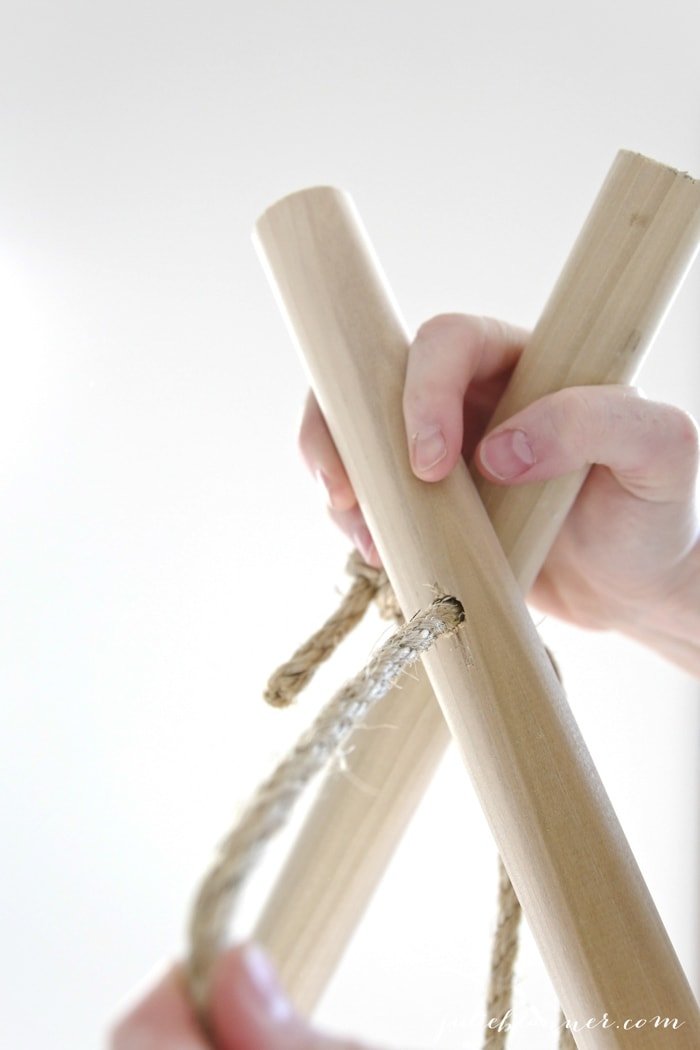
- Cut a large length of rope & burn the end.
- Drill hole in first pole at 5″.
- String rope through the hole & tie a knot where it meets the pole.
- Create a faux teepee with your poles to see how they need to lay to be stable. Using 4 poles, it’s best to have the front wider & the back of the teepee more narrow. See how pole #2 lies to meet pole #1 & drill a hole at that distance.
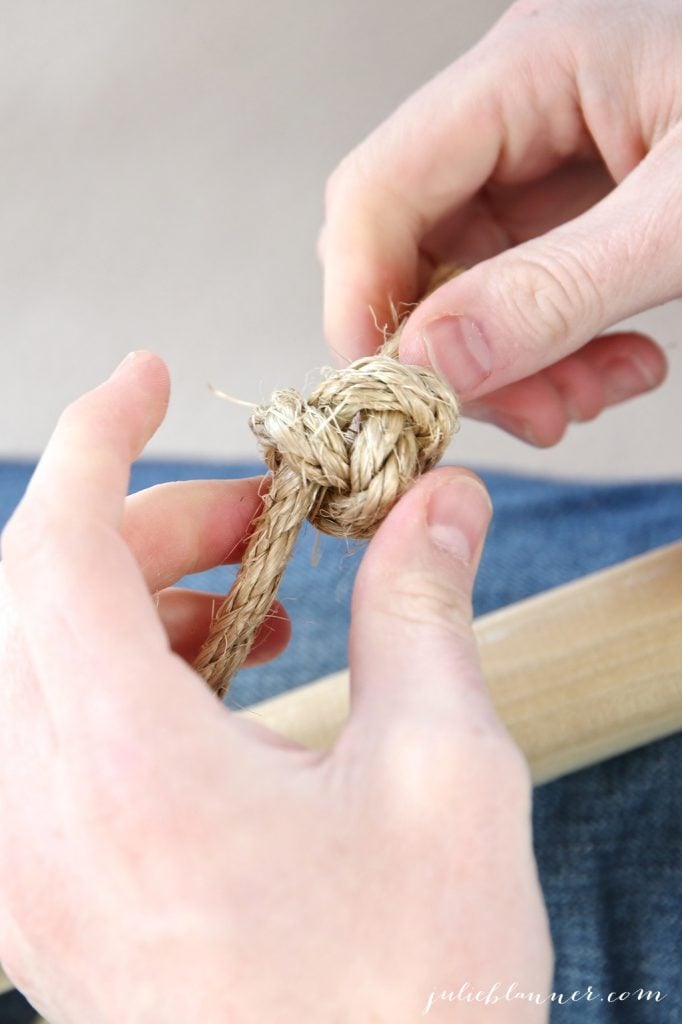
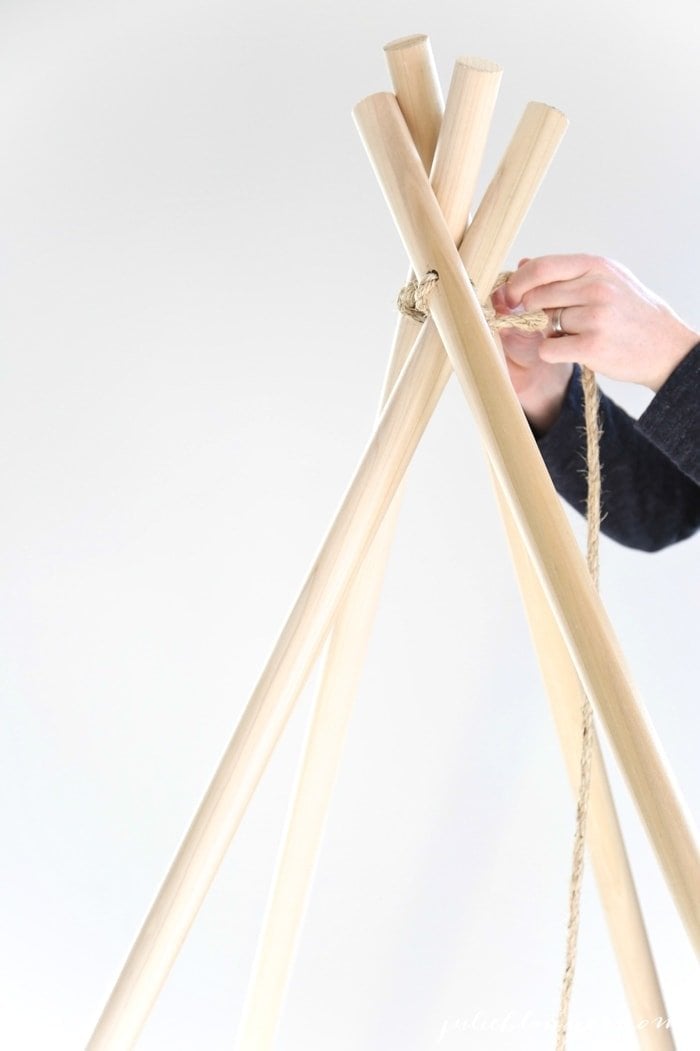
- Feed the rope through pole #2, then wrap it around a couple times in various directions to stabilize it.
- Add pole #3, testing where to place it, drill hole, feed rope & wrap.
- Repeat for pole #4. Wrap the rope over & under, then around the teepee several times.
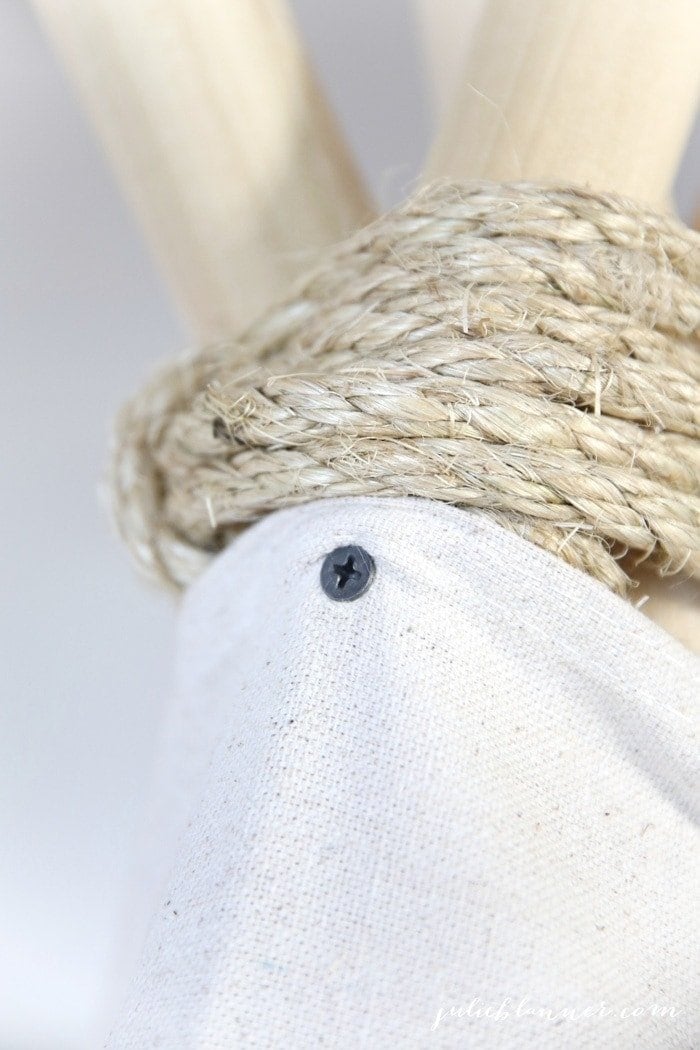
- Open your drop cloth horizontally & find the middle. Start draping it from the back of the teepee & secure at the top of your teepee {where the poles meet} with one screw. Drill a hole through the pole first, add a washer to your screw & insert screw through both fabric & pole.
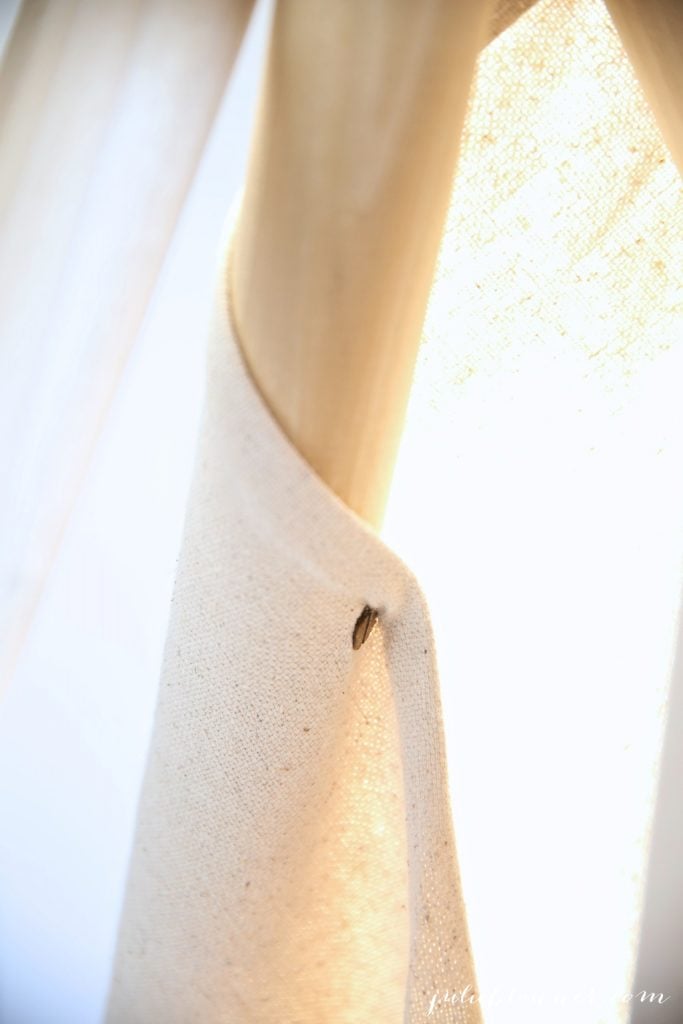
- Continue draping your fabric around the sides as it falls naturally, tucking excess at the floor under, trying to keep it tight & uniform where your poles meet. Adjust your poles slightly if needed, then use a screw on each side {same method} to secure the fabric.
 Optional: roll or cut the excess fabric in the interior. We chose to roll.


Thank you. Love it. Inspired by you, I am off to buy a drop cloth, dowels, rope……and everything else on the list.
My grandchildren will love it. 🙂
Very much appreciate your idea.
Michele
Thanks, Michele! Hope they enjoy it!
did you wash the dropcloth before hand or iron it…? I have most everything on hand, getting ready to make it for my 4.5yo ! many thanks!
No, but I’m a no fuss gal! I hope your kiddo enjoys it as much as ours do!
Extremely easy to make. I used 3/4 inch pc instead of wooden dowels. Just because I had them on hand and I wanted to make it before my grand daughter arrived. Took about 30 minutes and I had 20 minutes to spare. She loved it! Thanks for sharing the tutorial.
Oh perfect! So glad you enjoyed it, Ruth!
Hi!
Thank you so much for this DIY turtorial!
I have one question, how tall is the teepee in centimeters, and what is the diameter in centimeters?
I want to say it’s 6′ tall
So adorable! I just have to make one of these. Thanks for sharing, love it.