How to make a teepee without sewing – a quick and easy diy teepee tutorial!
Hello! Welcome from Pinterest, Google, or wherever you stumbled across my little blog. I am so excited to meet you! I hope you enjoy learning how to make a teepee with this easy tutorial and follow along on Instagram or subscribe here for more effortless ideas.
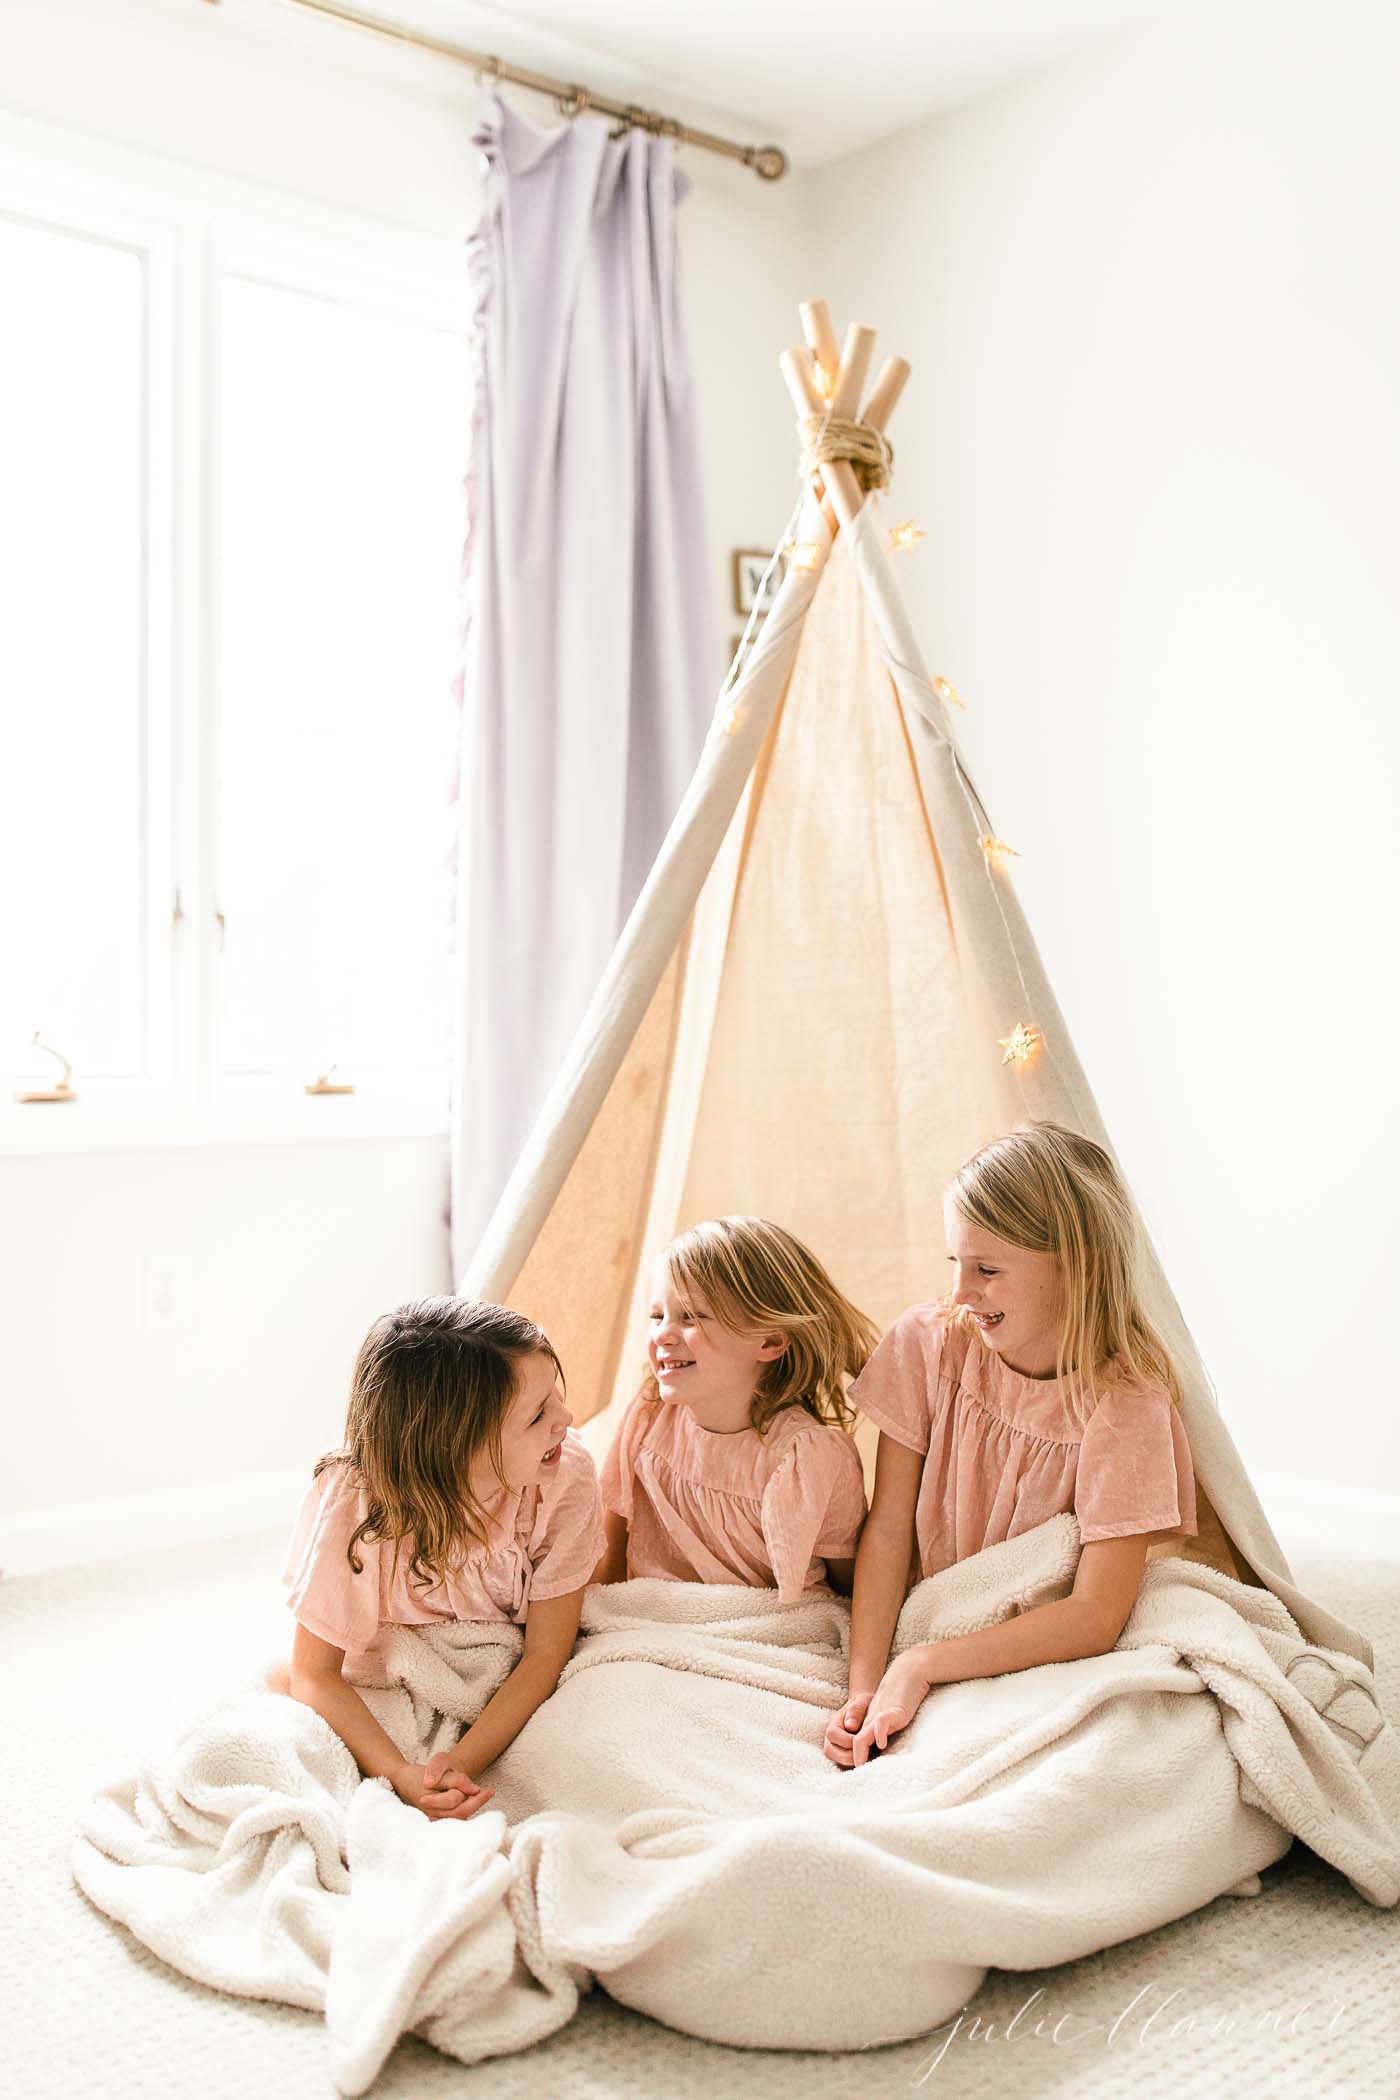
Ani’s birthday is just a week after Christmas, which makes gift-giving nearly impossible for her. We are fortunate to have a home full of toys, books, games and clothes. Still, I want her birthday to feel special, regardless of the date.
I thought about what I loved as a child and remembered a {Popples} tent that was securely placed on my bed for months on end. It was almost magical as a child to read books and play with my dolls in there. My love for licensed merchandise ended with my youth and I wanted to create something beautiful that she could leave up – a fixture in her room, like Adalyn’s play table.
I decided to make her a teepee tent!
After researching them, I was taken aback by the cost and couldn’t find the “perfect” kids teepee to fit the color palette and style of her room. That’s how most of my DIY projects begin – with a “need” to fill and no source to fill it.
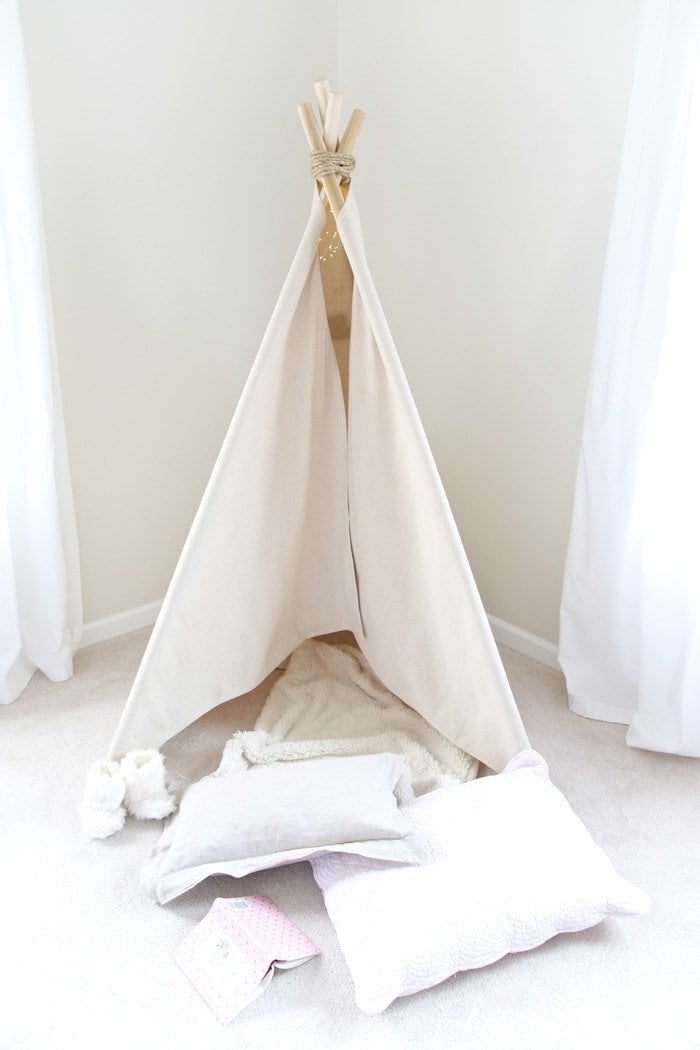
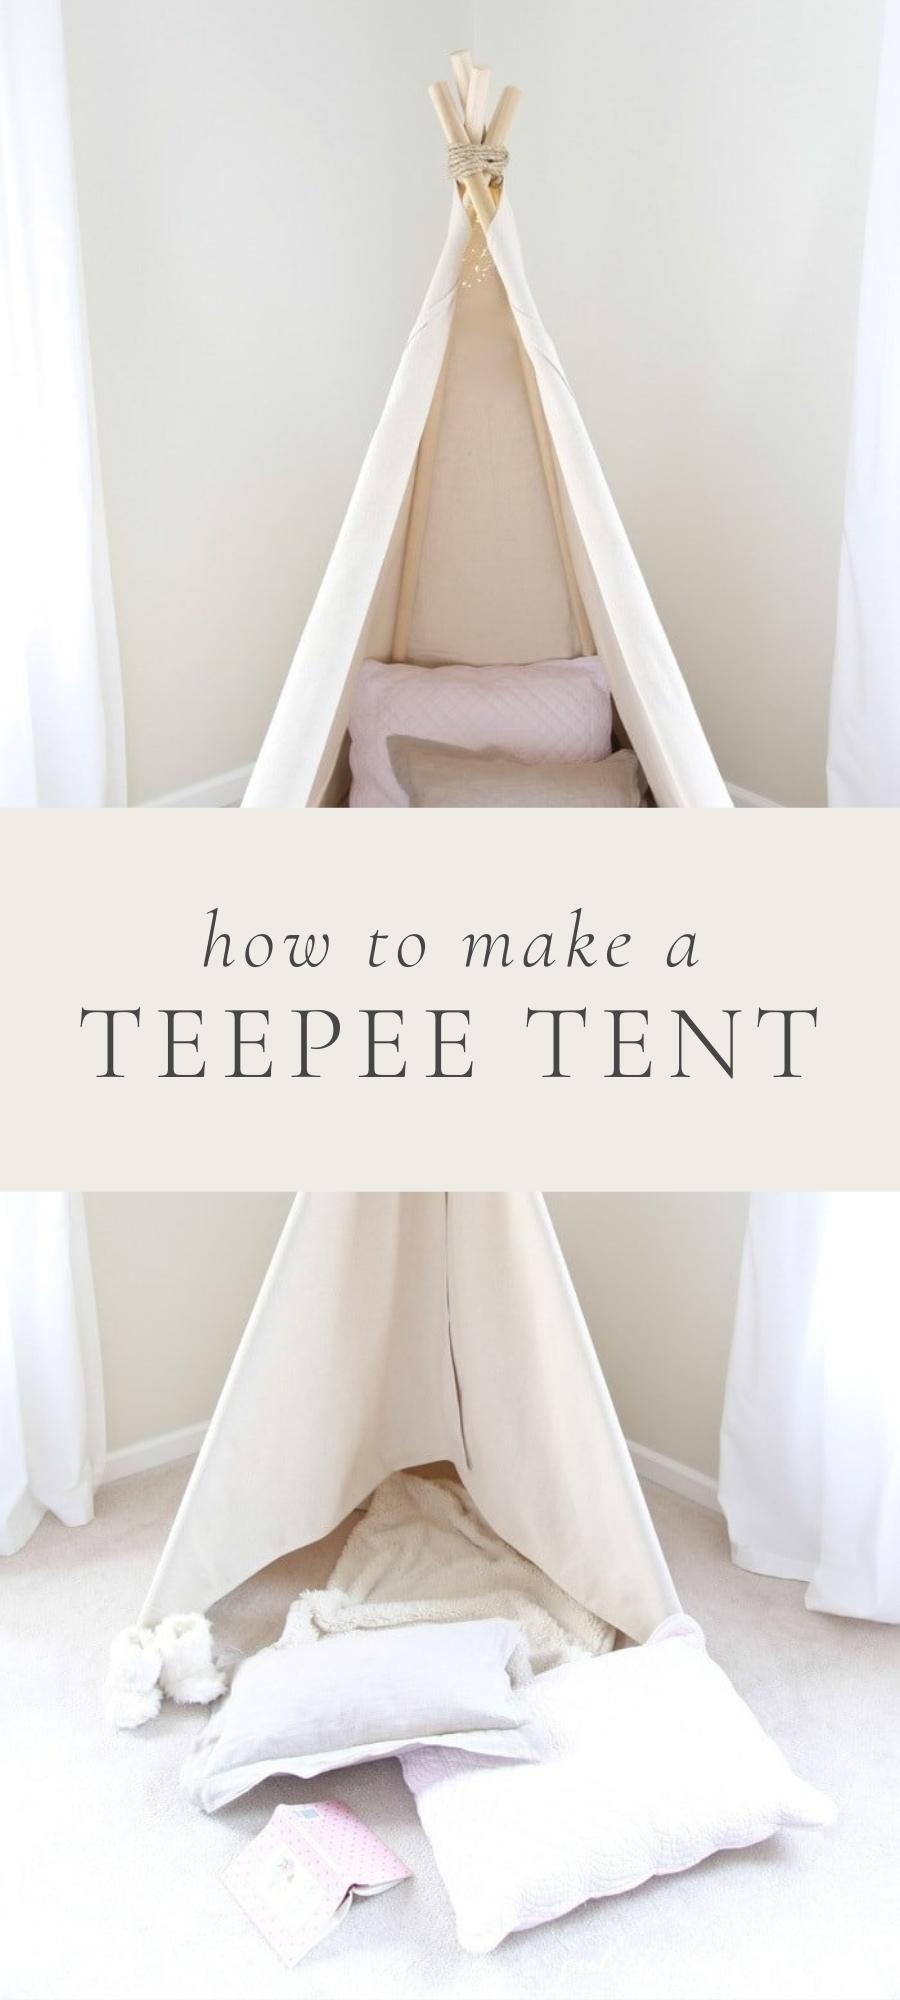
You guessed it, today I’m sharing how to make a teepee! This simple do-it-yourself project is a true no sew teepee you can create in less than an hour for $60.
Don’t let the instructions intimidate you…it’s like washing your hair: lather, rinse, repeat.
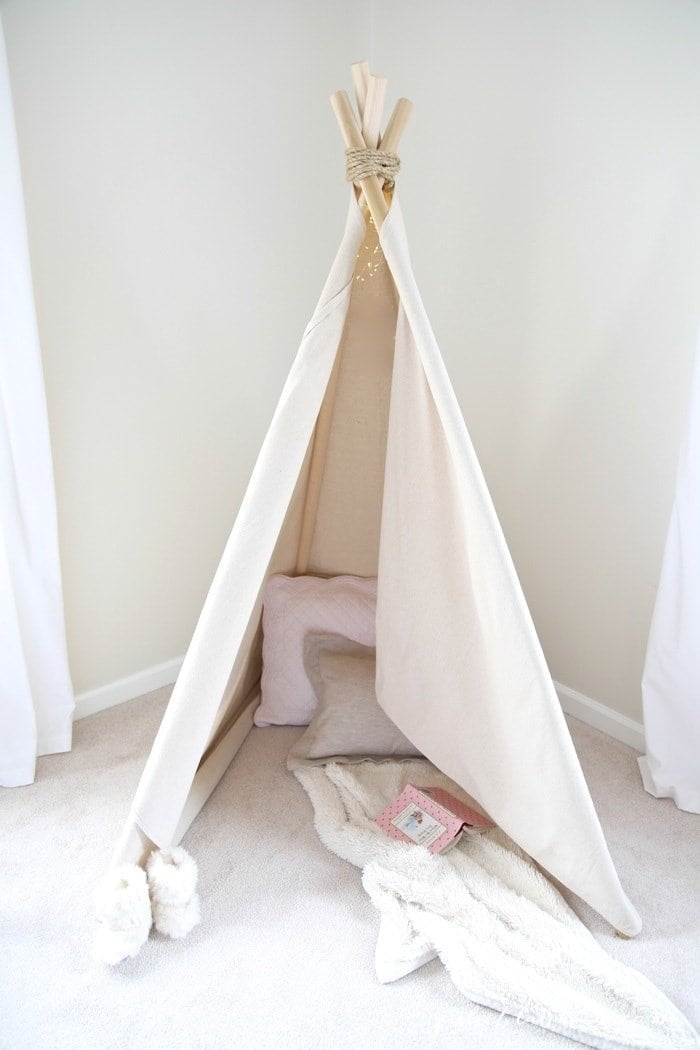
Before starting this project, I was a bit overwhelmed and worried it wouldn’t work. All of the methods I found demonstrated how to create no sew teepees with stitch witchery or by weaving fabric. We wanted to create a teepee that would stand the test of time and show durability for our 3 toddlers.
The teepee tent can easily fold up and be stowed away or be taken outdoors for an evening of fun. It is also the perfect size for a bedroom – 3 girls easily fit in it and have spent hours reading, playing with Ani’s new lantern and playing dolls. I’m so thankful we took the leap and made a teepee for Ani. I hope they share the same fond memories I did as a child.
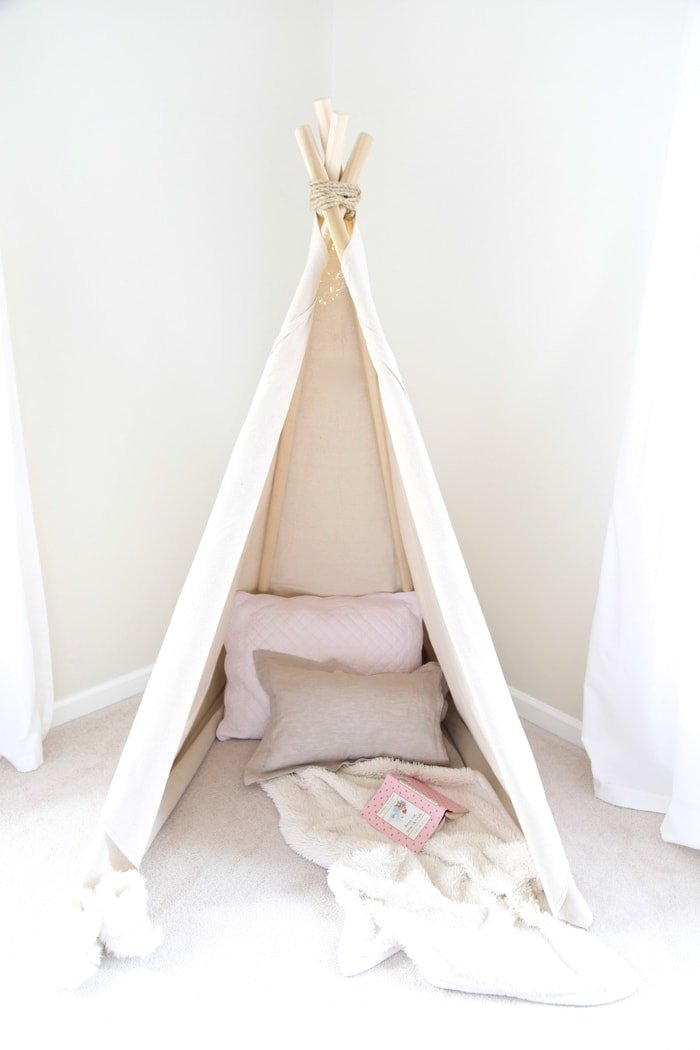
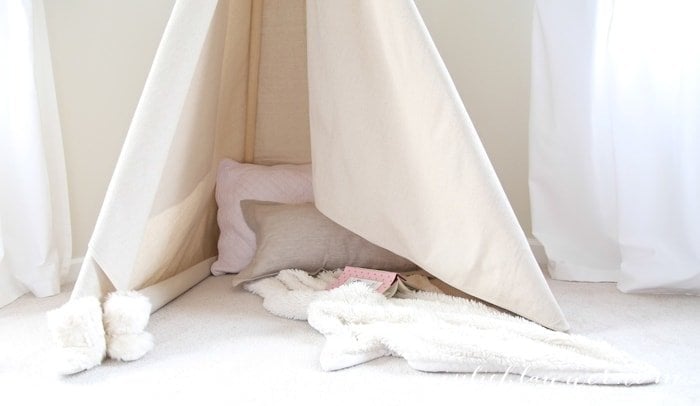
Because our girls are little, I decided not to do ties. The heavy canvas folds back beautifully and stays without effort.
The heavy canvas drop cloth is durable, making it a great long-term teepee that’s stable as well. I added battery operated lights through the top of the teepee to make it even more enchanting!
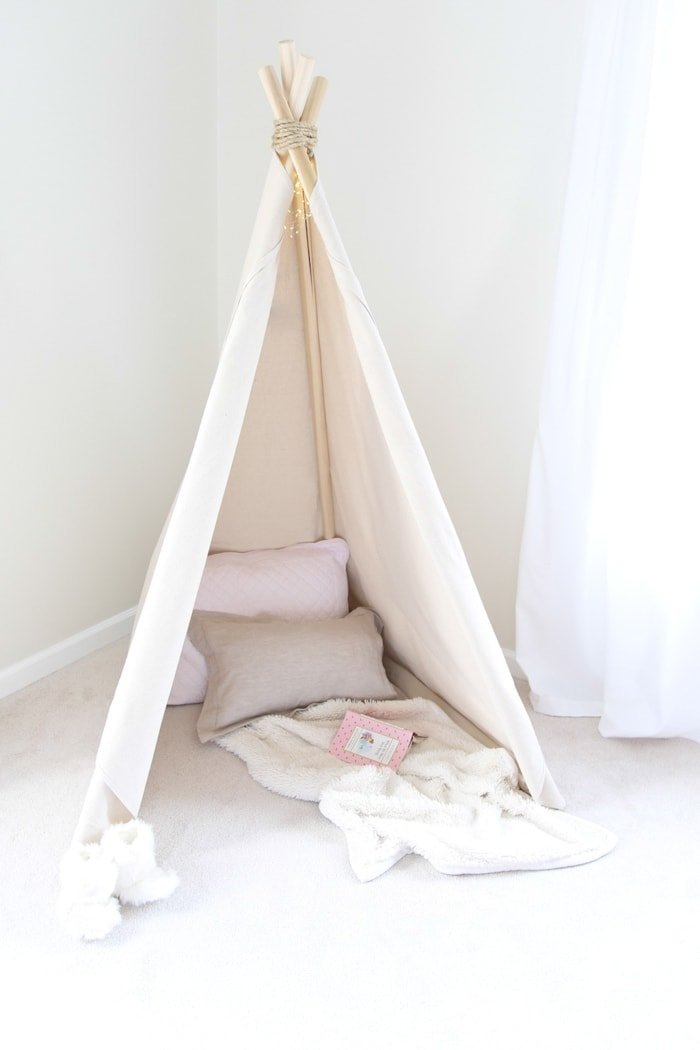
Table of Contents
Teepee Supplies:
- 4 1¾’x6′ poplar dowels {link it to slightly thicker dowels}
- 3/8″ sisal rope
- 6×9′ canvas drop cloth
- 3 screws
- 3 washers
Tools:
- scissors
- lighter
- drill
How to Make a Teepee:
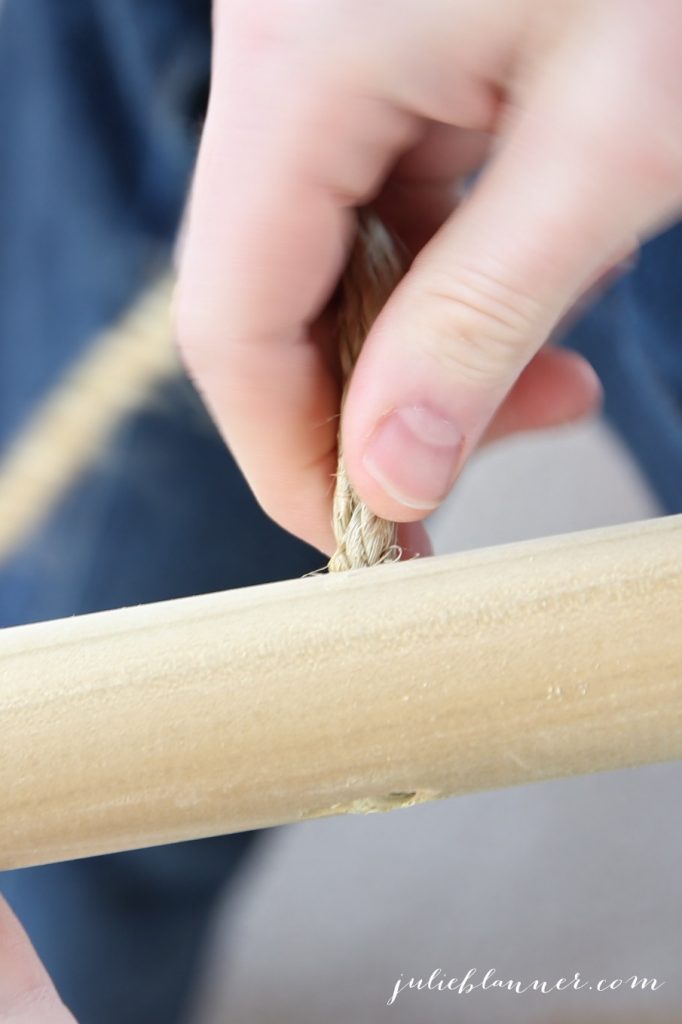
- Cut a large length of rope & burn the end.
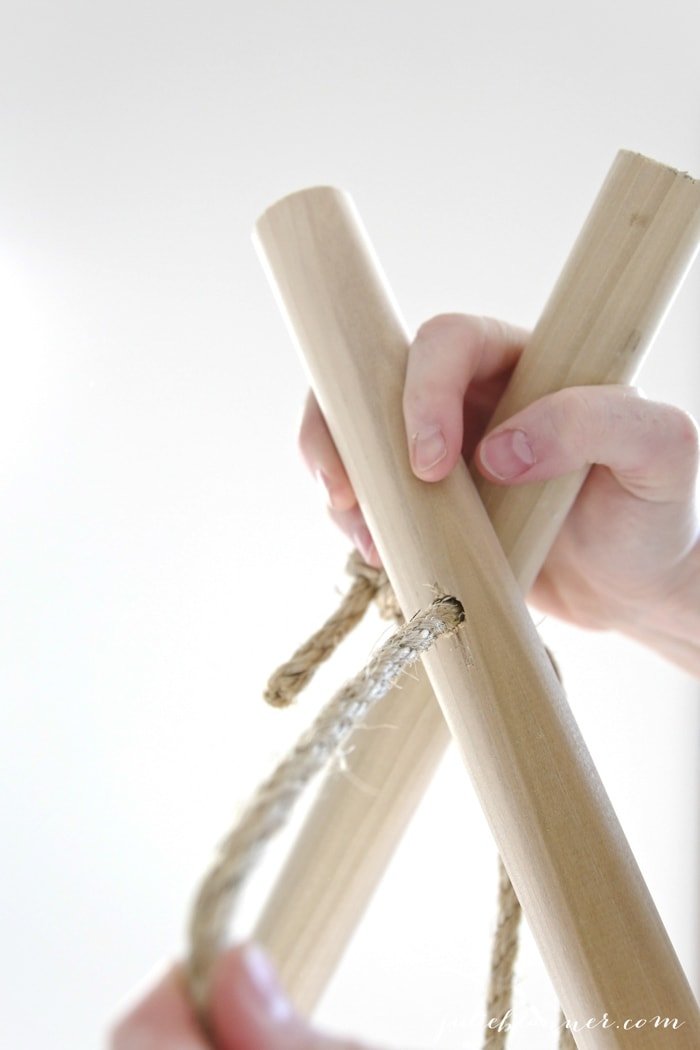
- Drill hole in first pole at 5″.
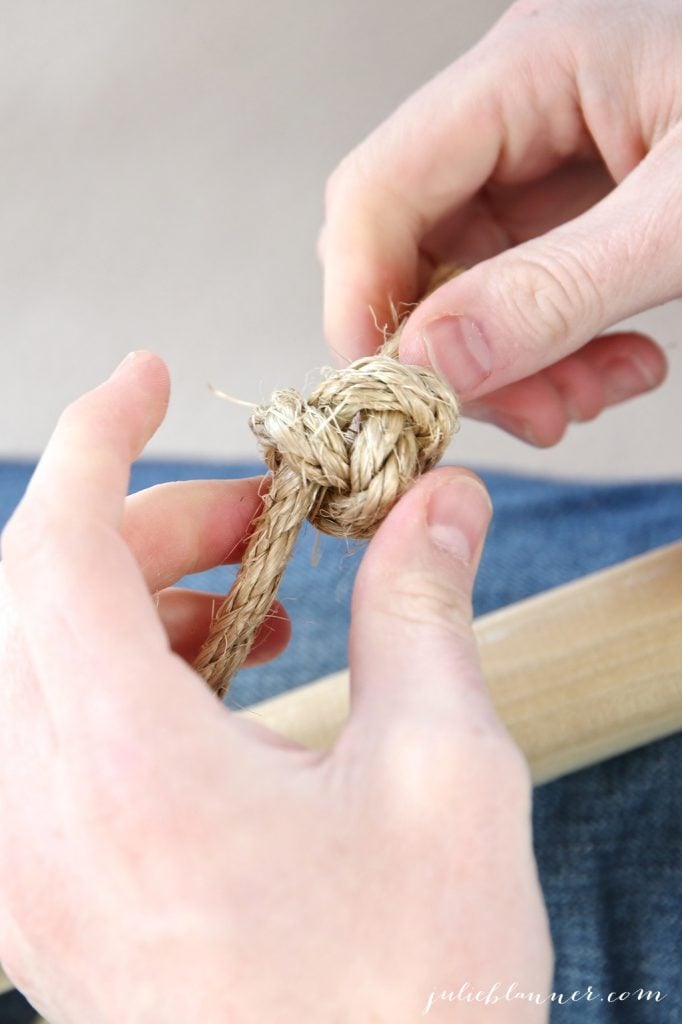
- String rope through the hole & tie a knot where it meets the pole.
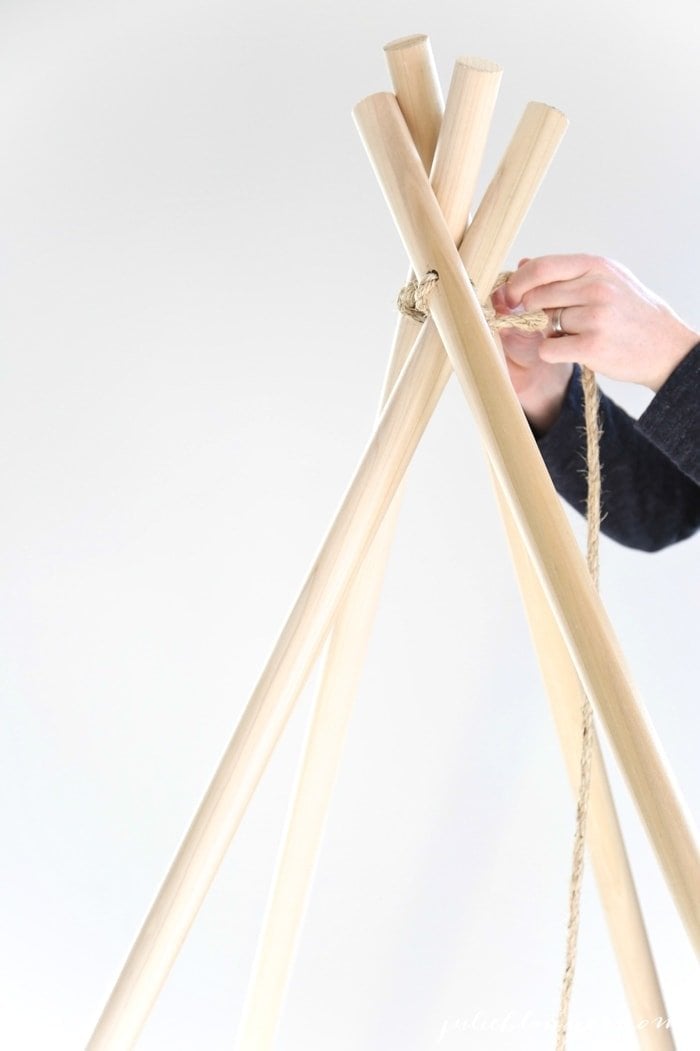
- Create a faux teepee with your poles to see how they need to lay to be stable. Using 4 poles, it’s best to have the front wider & the back of the teepee more narrow. See how pole #2 lies to meet pole #1 & drill a hole at that distance.
- Feed the rope through pole #2, then wrap it around a couple times in various directions to stabilize it.
- Add pole #3, testing where to place it, drill hole, feed rope & wrap.
- Repeat for pole #4. Wrap the rope over & under, then around the teepee several times.
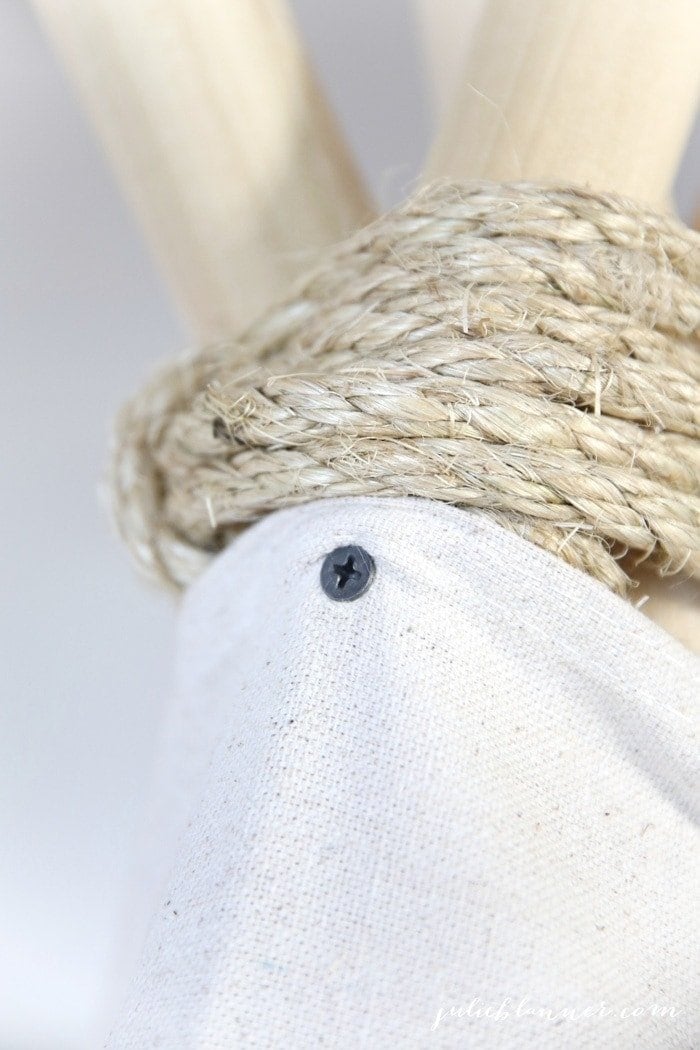
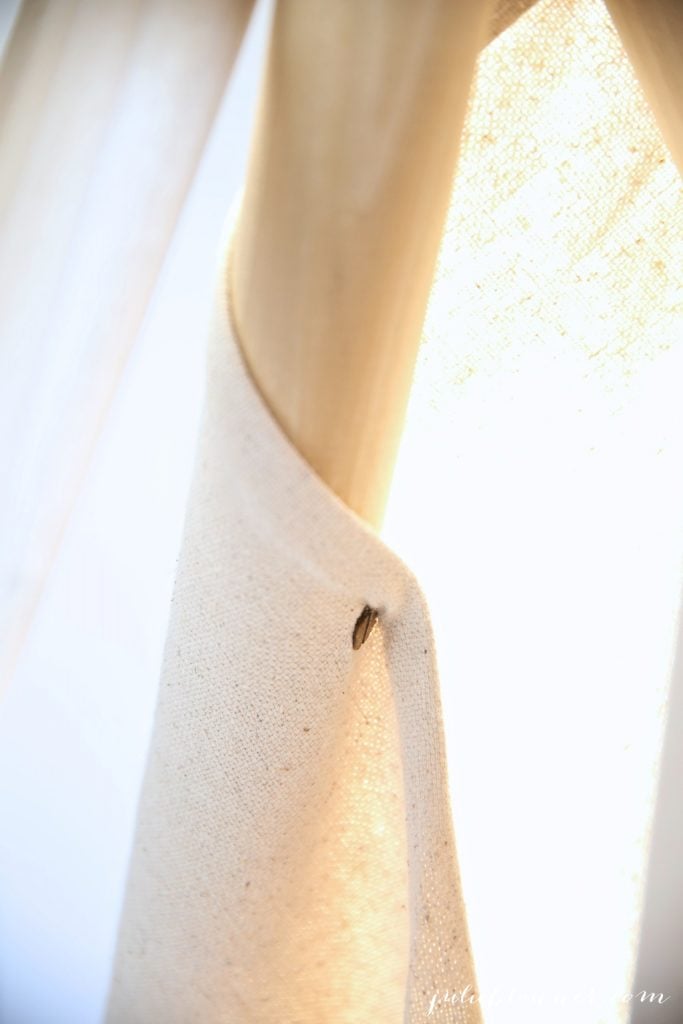
- Open your drop cloth horizontally & find the middle. Start draping it from the back of the teepee & secure at the top of your teepee {where the poles meet} with one screw. Drill a hole through the pole first, add a washer to your screw & insert screw through both fabric & pole.
- Continue draping your fabric around the sides as it falls naturally, tucking excess at the floor under, trying to keep it tight & uniform where your poles meet. Adjust your poles slightly if needed, then use a screw on each side {same method} to secure the fabric.
Optional: roll or cut the excess fabric in the interior. We chose to roll.
Time: 30-45 minutes.
If you prefer, you can learn how to make a teepee with the easy step by step video below!
[adthrive-in-post-video-player video-id=”JnR1jp80″ upload-date=”2018-01-12T00:00:00.000Z” name=”Rose and Eucalyptus Flower Arrangement” description=”rose, roses, eucalyptus, flowers, flower, flower arrangement, how to arrange flowers, centerpiece, floral, pink, valentine’s day, valentines” player-type=”default” override-embed=”default”]
Want to come over for a tour of our home?
How to Make A Teepee
Equipment
- Scissors
- Lighter
- Drill
Ingredients
- 4 1¾’x6′ poplar dowels
- 3/8″ sisal rope
- 6×9′ canvas drop cloth
- 3 screws
- 3 washers
Instructions
- Cut a large length of rope & burn the end.
- Drill hole in first pole at 5″.
- String rope through the hole & tie a knot where it meets the pole.
- Create a faux teepee with your poles to see how they need to lay to be stable. Using 4 poles, it’s best to have the front wider & the back of the teepee more narrow. See how pole #2 lies to meet pole #1 & drill a hole at that distance.
- Feed the rope through pole #2, then wrap it around a couple times in various directions to stabilize it.
- Add pole #3, testing where to place it, drill hole, feed rope & wrap.
- Repeat for pole #4. Wrap the rope over & under, then around the teepee several times. Open your drop cloth horizontally & find the middle. Start draping it from the back of the teepee & secure at the top of your teepee {where the poles meet} with one screw. Drill a hole through the pole first, add a washer to your screw & insert screw through both fabric & pole.
- Continue draping your fabric around the sides as it falls naturally, tucking excess at the floor under, trying to keep it tight & uniform where your poles meet. Adjust your poles slightly if needed, then use a screw on each side {same method} to secure the fabric.
Notes
Let’s keep in touch! You can have more inspiring ideas and tutorials delivered to your inbox 3 times a week!
What is the diameter? Trying to make a small one as we don’t have a ton of space.
need somewhere between 30-40” diameter for base but height can be flexible.
You can make it as big or small as you’d like! Simply use less fabric keeping the legs closer together.
I am so happy! Im a kid and wanna do this
I decided I wanted one of these. I used 5 pvc pipes, 3/4″, 12′; 12′ x 16′ tarp; 2″ screw-in hooks, 6′ of rope and a bungee cord – don’t know size, just had it laying around. Put screw hooks in each pole, threaded rope through all the grommets, gathered everything together. I set the poles together with the hooks facing outward, wrapped the canvas around and hung the canvas on the hooks by the grommets.I wrapped the rope tightly around the top to make sure everything stayed in place. Long ends were tucked under the edges and cut about an inch longer than the rest, and stapled to the bottom edge. The bungee cord keeps it rolled up when not in use. It is about 7′ diameter inside, the tarp drapes so that there is a 6′ high opening for a door. I am thinking about putting a 6′ x 8′ piece over the opening to make a rain fly/porch/door closure/privacy screen. I have figured out how to stabilize it in wind, thinking of using it for camping. right now it is in my back yard, used for getting fresh air, when it’s cooled down in evening.
This is so cute!
What a great tutorial! My daughter would love to have something like this for her reading corner!
Thanks, Beth! Enjoy!
Great idea to make with kids!
This is absolutely adorable! I do alot of DIY projects. I have done a toddler picnic table , a swing from a tree in my yard but i have never seen this so my 3 year old and my 6 year old love to read and play camp, they are going to love this! Thanks for sharing, a great way to keep the kids happy!
Yay! Enjoy, Emily! I’d love to see photos!
What are the dimensions of the bottom part?
You can adjust it to your liking, but ours goes from 4-5′ each side.
Although I like a diy, you went a little steep on the price. I was looking online at Wal-Mart and found similar teepees for less than $60
At the time I wrote this, teepees were $200 & up and difficult to come by. We still love this because of the size.
Been wanting this idea for my grandchildren. Thanks so much
So glad you enjoyed it, Denise!
My nephew would love this! I definitely see us making this in the future!
Teepees are all the rage right now. And you did a marvelous job of showcasing how you made it. Beautiful blog!
Is there a purpose for the washers? Can it be constructed without them? I have my poles tied and ready for the fabric but keep forgetting to get washers small enough for this project. Wondering if I can do it without them. Thanks!
Thank you for your post. Your instructions are so clear and thorough, all the photos are very much appreciated and the conciseness is a welcome change from the average blog post. Thanks for taking the time to document and share your idea.
I really really really want to do this – but I’m scared of not wrapping the poles correctly and then making something unstable/unsafe. Any advice? Or does it come together fairly intuitively when you’re actually doing it?
It does, it really guide you along our girls and dog play in there daily.
Hello, how is the teepee holding up?Thanks!
Great! It’s been in Ani’s room for almost 3 years now – it’s her reading nook. Enjoy!
Thank you. Love it. Inspired by you, I am off to buy a drop cloth, dowels, rope……and everything else on the list.
My grandchildren will love it. 🙂
Very much appreciate your idea.
Michele
Thanks, Michele! Hope they enjoy it!
did you wash the dropcloth before hand or iron it…? I have most everything on hand, getting ready to make it for my 4.5yo ! many thanks!
No, but I’m a no fuss gal! I hope your kiddo enjoys it as much as ours do!
Extremely easy to make. I used 3/4 inch pc instead of wooden dowels. Just because I had them on hand and I wanted to make it before my grand daughter arrived. Took about 30 minutes and I had 20 minutes to spare. She loved it! Thanks for sharing the tutorial.
Oh perfect! So glad you enjoyed it, Ruth!
Hi!
Thank you so much for this DIY turtorial!
I have one question, how tall is the teepee in centimeters, and what is the diameter in centimeters?
I want to say it’s 6′ tall
So adorable! I just have to make one of these. Thanks for sharing, love it.
Any chance you would make one and sell it? We are so not handy…BUT I LOVE YOUR TEEPEE!!!
It truly is easy if you decide to give it a try. Enjoy!
I am wanting to make this for my daughter’s school prodject on Native Americans…. would it transport well to and from school?
Absolutely! Enjoy!
Hi! I’m actually planning on tackling this as a large project and using it as our wedding arch way! I am adorning it with greenery and flowers and not using any canvas. How simply does this fold and store? We will need to transport it to the venue and set it up. Was hoping you’d be able to explain more how to break down and rebuild!
Because I screwed in the fabric at the top we can collapse it quickly reposition the pools and drape the fabric around it again without any effort. Congratulations on your upcoming nuptials!
Hi! I love love love this project. I’m also a self-proclaimed DIY addict. Anyway, I think it would take me a while to put this up since I have to order poplar dowels from Amazon (I’m from the Philippines and asking for a custom project would cost lots of money). I wanted to ask which size I should buy for my teepee.
https://www.amazon.com/MADISON-436571-16×48-Poplar-Dowel/dp/B000CSP6D6/ref=sr_1_1?ie=UTF8&qid=1479018193&sr=8-1&keywords=poplar+dowels
Hope you could help a mommy out. Thank you!
Hello, I am currently looking at making my own TeePee for my current project in University that will be set up for an exhibition over christmas.
Your tutorial is the best I have found on the internet, and easiest too follow.
Although, how big is the outcome of the TeePee ? As I am wanting the TeePee quite big, enough too fit two teenagers inside.
Could you recommend any different sizing’s for me too use? Or how I would go around making it bigger?
Thank you very much,
Abbigail!
If possible, I’d make yours taller.
This is really lovely. You can get it to be wider by making it with 5 poles and I also found that if you put a bead between each pole on your string, it helps it sit really nicely and then you don’t need to tie it with the string around the top if you don’t want to.
Hi Julie,
This sounds adorable and would love to try making it for my little one, but none of the photos are loading for some reason 🙁 Photos are loading on your other blog posts so it’s just this one – can this be fixed?!
Thanks!
Lizzie
YIKES! I’ll put it on my priority list tomorrow, thanks for letting me know!
All working now – your finished piece looks beautiful, thank you so much!! Going to have a go at this next week 🙂 Thank you!
Looks like a fun easy project! I am sharing this on Pinterest.
Thanks for this post! I was searching an easy diy teepee!
Would a sheet like a bed sheet work for this? I wanted to use a organic cloth material for my little ones.
Thank you!
It would, but it won’t be durable and could tear if pulled near the screws.
How in the world did you drill the dowel to thread the rope through it? Its so hard I darn near started one dowel on fire trying to drill it. Im at a loss. How do I get holes in the dowels?
I’m sorry you’re having trouble. I wonder if it’s your drill or drill bit? We were able to drill through in seconds.
Hi! My husband and I actually used 2″x2″ wood boards instead of the dowels. The dowels ended up being $60 so we went with a more cost effective option that ended up being $10 for 4! The long boards are square but work just as well! Just thought we would pass that along in case people were scared away from trying due to the cost! Thank you for this fun project!
This is incredible! It won’t be long till my daughter is at the age where she will want to have her own “escape” and this will be perfect! Definitely saving this for a not-far-distant day! Thanks!
Wow it is very nice tent :]. I dont know if i can do it alone but what a heck i will just try and see how it will go. Nevertheless my daughter will be satisfied especially she is always aksing me when we go for camping (unfortunetaly its winter now :/)
Was wondering about what size footprint this takes up? We have a limited amount of space but would like to build one for our so.
Truly, you can make it whatever size you want by using smaller dowels and how you arrange them when you’re tying the rope. Ours is about 4′ diameter, but smaller.
I am 52 and I am honestly looking at this idea for myself. I am thinking it would look great with a palet bed inside of it.
Good for you, Ruth! I often think it would make a nice retreat for reading books myself! Enjoy!
Where can I find the 1 3/4″ round dowels? I can’t find them on the lowes website??
I sometimes struggle finding things on their site, but they have them in store.
Ok thank u! If I happen to not find thm would I just go a size up?
Yes – any will work, truly, that’s just what we used. I thought they provided great stability. Enjoy!
The lights at the top were brilliant (pun intended!), and I think they give it that special glow that even I, at 29 years old, love. 🙂 I’m considering making one of these for my son, as he keeps telling me he wants a ‘hiding place like a teepee’ for christmas, haha. Thank you for the awesome tutorial!
Thank you, Rachel! He’ll love it! I use the twinkle lights which is on a battery timer. They’re just $10 and make it feel magical. Have a great Christmas!
What a great idea. I plan to do this for my boys and paint some red lines across the bottom.
That will be adorable! I hope to see it when you’re done! Happy Holidays!
Hello!
I just came across this tutorial and am so excited to create for my almost 5 year old. I ordered the drop cloth from your link and am going to grab other stuff from Lowes. My questions are, do you know the length of the wood screws you used and also I’m having a really hard time telling where you put the two screws other than the center screw for the fabric. Hope you see and can answer since the post is older!!
Thanks,
Abby
I don’t recall how long, but Lowe’s can help you if you show them the dowels you’re using. You can screw into any of the dowels – I just draped the fabric and used a screw in the back and one in each of the front dowels.
Also i love your teepee, but was wondering if it is safe and stable for a 1.5 year old? In the last picture where the teepee is sort of open, how do you hold the canvas cloth back? have you pinned it? I was thinking of getting the exact cloth you used and linked to, is one pack of it good for this project? Also any idea if I want the same material but with some sort of color where I can find it ?
I know that is a lot of questions 🙂 Thanks for your time!
It’s heavy enough that it stays in place. I personally think it is, but as with anything with kids, it’s a personal choice. My youngest was 1.5 when we made it and enjoyed it. It has never collapsed if that was your concern.
thank you for your replies, please could you let me if it held up well over the years 🙂 thanks!!
We’ve had it a year and a half and still use it daily.
Hello,
Please could you let me know where you got the poplar dowels? the link does not seem to work anymore. Also please could you link the screws as well and mention the size of the drill you used? I am really not a do-it-yourself person but seeing the simplicity of how you have done this I really want to try. I think if I manage to buy the components- my hubby will help me put it together 🙂
Any drill will do. Thanks for bringing that to my attention, I’ll update it asap. All supplies are from Lowe’s.
About to make a version of this for my toddler. Do the washers go between the fabric and the pole or between the screw head and the fabric? What size washer? Thanks! Also, advice for cheapest place to get the dowels? Thanks for the tutorial!
I always match up the washers to my screws in store. Enjoy!
Hi Julie,
My husband and I love this and are planning to make it for our girls for Christmas. I’m just wondering how tall it is on the inside at its peak. I know you used 6′ dowles, but with everything completed and the canvas on what is the completed height inside? Our daughters are quite tall for their age and I wonder if they’ll be able to stand in it or not. Thanks for sharing your idea and your time!
I’ve never measured, but they sit and lay in it bs stand in it. It’s currently in Ani’s room. You can always use larger dowels if you’d like.
Thanks! I look forward to making this for our girls!
We just come back from buying all the supplies. A bit more expensive here in Canada ~$100CAD and we got everything we needed at home depo.
We’re just waiting for our almost 3 year old to go down for his nap and we’ll be putting it together. His birthday is a few days after Christmas and I want to make sure his birthday is special…he is going to freak out when he wakes up and sees a teepee tent in his room!
I’m knitting a little bear rug to put in the bottom and adding lights too.
Thanks so much for this awesome idea !
So fun! I hope you have a great time celebrating! A couple years later and our daughter still loves and uses hers daily!
Looks great! What are the dimensions of the teepee? Does is stand quite tall and wide?
It does, but you can easily adjust it! To adjust height, purchase shorter poles or cut them.
After looking at this again and again, I think I will finally take the plunge and make this for my son’s birthday in December. Unfortunately the materials over here in Germany are quite a bit more expensive, but I really think it’ll be worth it. Could you by any chance tell me what type of screws you have used? Also, how easy is it to actually collapse and stow away?
It’s really easy to collapse and stow away! Spax screws.
It looks like there are poles on the bottom of the teepee, that you’ve wrapped the canvas around and serve to stabilize the four upper poles of the teepee, but I don’t see any mention of those extra dowels in the instructions. could you please explain?
No, we just used 4 poles – the canvas rests on the front two poles. Let me know if you have any questions, I’m happy to help!
Hi there! I love the simplicity and neutral colours. Where did u get the canvas?
Thanks, Michelle! Lowe’s!
Love the tee pee! Unrelated but I also love the wall color in there. Do you know the kind?
Of course, Erika! https://julieblanner.com/favorite-cream-paint-colors/
did you screw the fabric in at the bottom also? Or just up top?
We just did the top so that it can easily collapse for storage. The weight of the fabric helps keep it in place.
Thanks that’s what I thought!
Do you think this would be okay for a 2 year old? I saw this come up and immediately thought I bet my son would love to read his books in here. He’s only 1.5 but he loves to pull out books and bring them to me or pull them out and flip through them himself. I was thinking this would replace the rocking chair in his room when we need to move it when we decide to have another baby.
Absolutely! Our just-turned-two year old LOVES it! She’s in there all the time, even solo. Your sweet little boy would love it.
Love it. Where did you find the battery operated lights?
Restoration Hardware, but sometimes Lowe’s and Target carry them as well.
Such a cute idea! My daughter is 11 but I can see her wanting one of these to curl up with a book inside!
I`m literally 14 and i`m still making one of these for my room i don`t care.
It’s a great place to relax for all ages!
I’m literally 40, and I’m making one for my apartment–with no kids! (Only much simpler–there’s no need for drilling and screws.)
So fun!!
I love this TeePee!…My kids love to play under the covers and act like they are camping. Wait until they see this:) I am printing the checklist right now so I can start my weekly diy project….Thanks for posting Lauren!
I am DYING to put one of these in my son’s room. He’s only 1 though so I will have to stow this project away for a few years 😉 In the mean time, I have featured this on my site:
http://www.diylookbook.com/teepee-kids/
Thanks, Lauren!
I am in the process of redecorating the kids room. This is a perfect idea for the room. One question – where did you get the poplar dowels?
Thanks
Jess
All from Lowe’s – enjoy, Jess!
This is absolutely adorable! My daughter would love this so thank you Julie 🙂
Thanks you, Karla!