How to Build a Window Box
Learn how to make your own planters with this easy step-by-step tutorial to make window boxes that will add color and charm to your home. These DIY boxes are simple to make and even simpler to fill with beautiful blooms!
Servings 1
Cost $20.00
Equipment
- Nail/Staple Gun
- Clamps
- Drill
Ingredients
- Wood
- Screws
- Trim 3/4×1-3/4″ accent colonial shown
- Waterproof wood glue
- Sand paper
- Primer
- Paint
- Weed barrier
Instructions
- Using a nail/staple gun adhere 5 boards together. Use clamps to hold them in place if needed.
- Use screws to ensure they are secure.
- Add trim to accent at the top, bottom or both.
- Clamp it to the window box and use a nail gun to adhere it.
- Use waterproof wood glue to give it a perfect finish along the seams before sanding {for an even edge}.
- Prime your wood boxes inside and out to reduce wood rot before painting.
- Drill drainage holes throughout the box.
- Staple weed barrier over holes to keep soil from draining through.
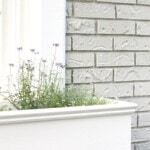
- Hang!
Notes
Tips to fill planter boxes:
- Use empty aluminum soda cans or pine cones to fill the bottom of planter boxes without adding a lot of weight.
- Use potting soil, which is much lighter and includes fertilizer for plants, versus top soil.